ICE install, complete work

ProjectPuma

Help Support ProjectPuma:

This site may earn a commission from merchant affiliate links, including eBay, Amazon, and others.

Wild E. Coyote

Well-known member
Puma Supporter
Joined
Apr 13, 2011
Messages
2,677
Location
Croatia
Hi, guys!

As I promised yesterday, I am posting the fruits of my hard work for a week or two (getting work done in small timegaps between all the other commitments.
I have to say that El dude's guide on other site was very informative and extremly helpful in planning stage. Also, I asked him some questions, he replied and I thank him for that! His advices were very helpful and appreciated!

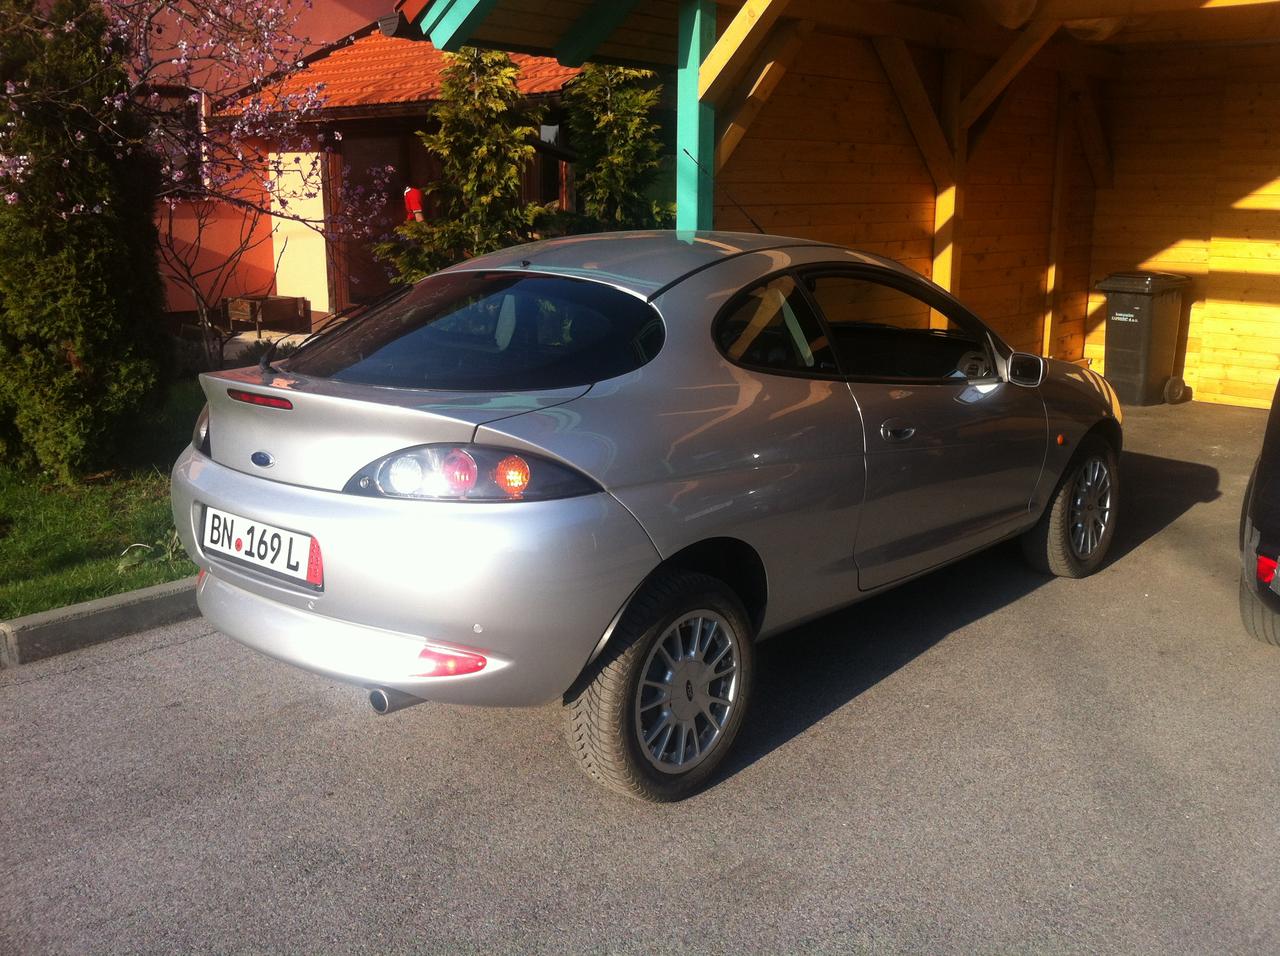
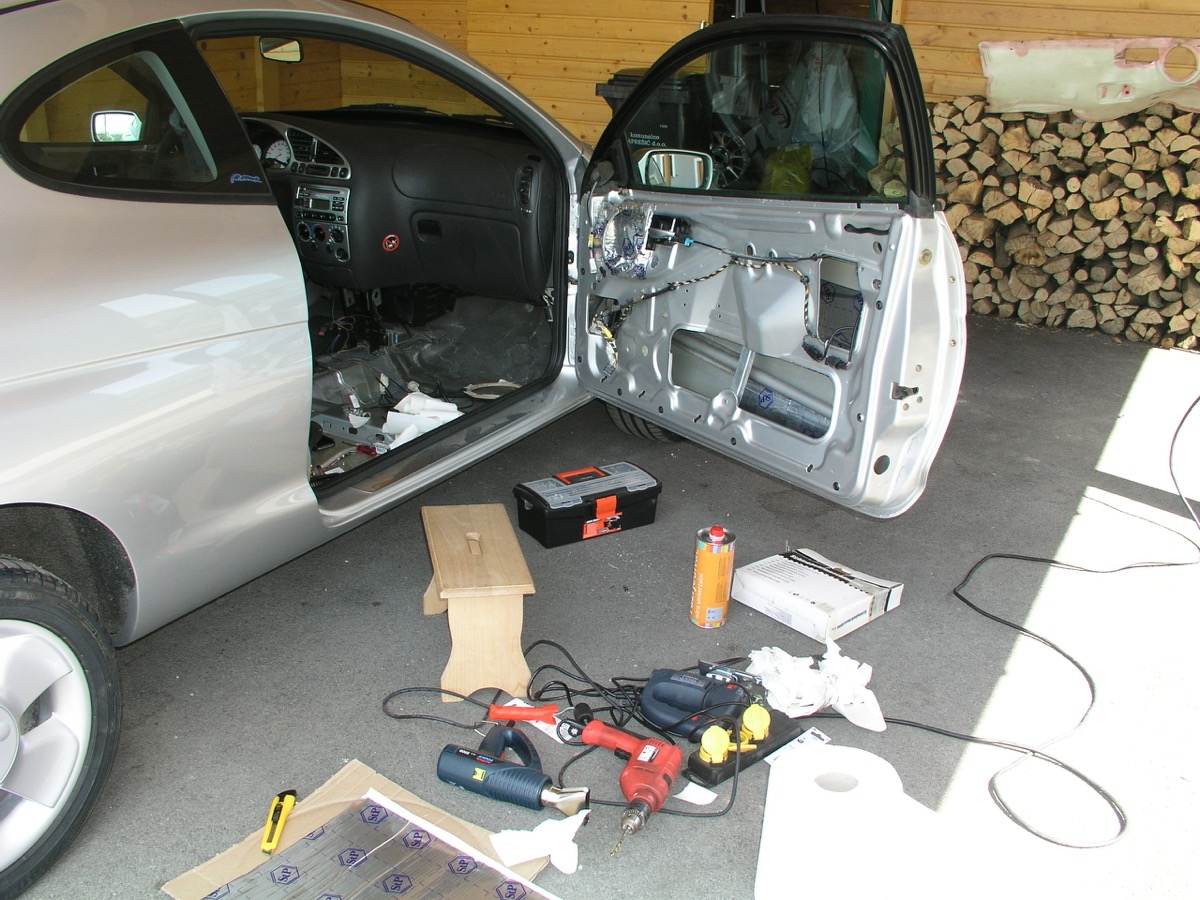
Anyway, after I had bought my silver puma, it was off to a body shop, had it's wheel arches replaced (the guy is using zinc-coated steel thick 1,5 mm; I guess the arches will now outlast the rest of a car :). Then a complete respray and the car looks brand new; I just can't get my eyes of her (too good to be true.... :grin:

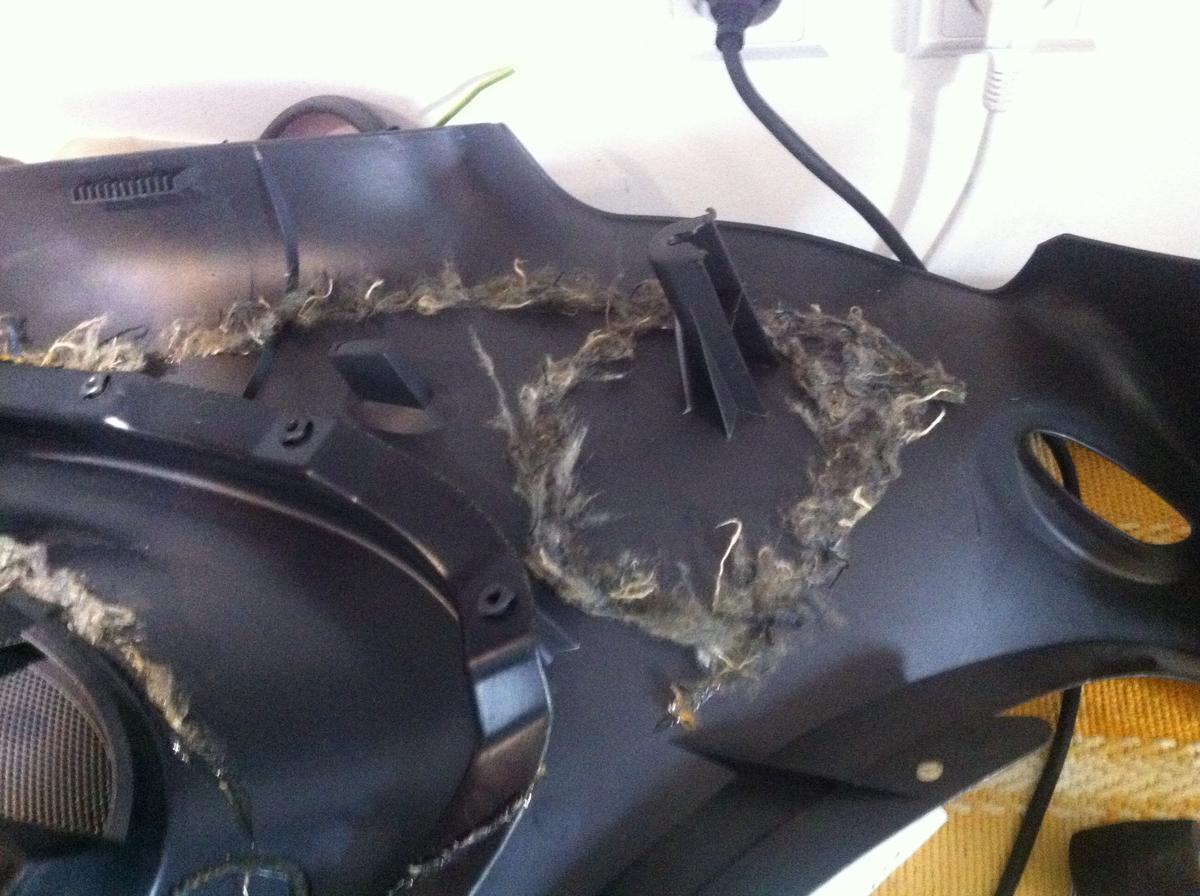
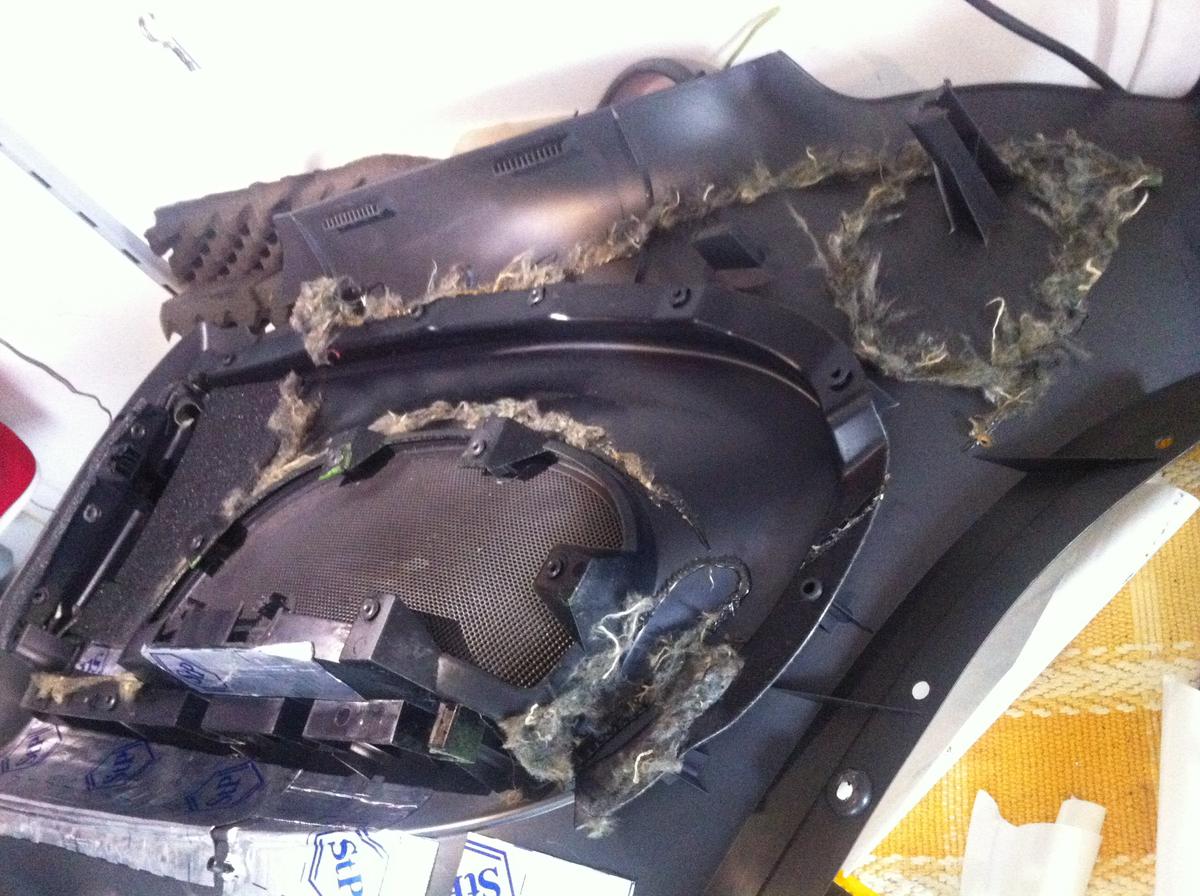
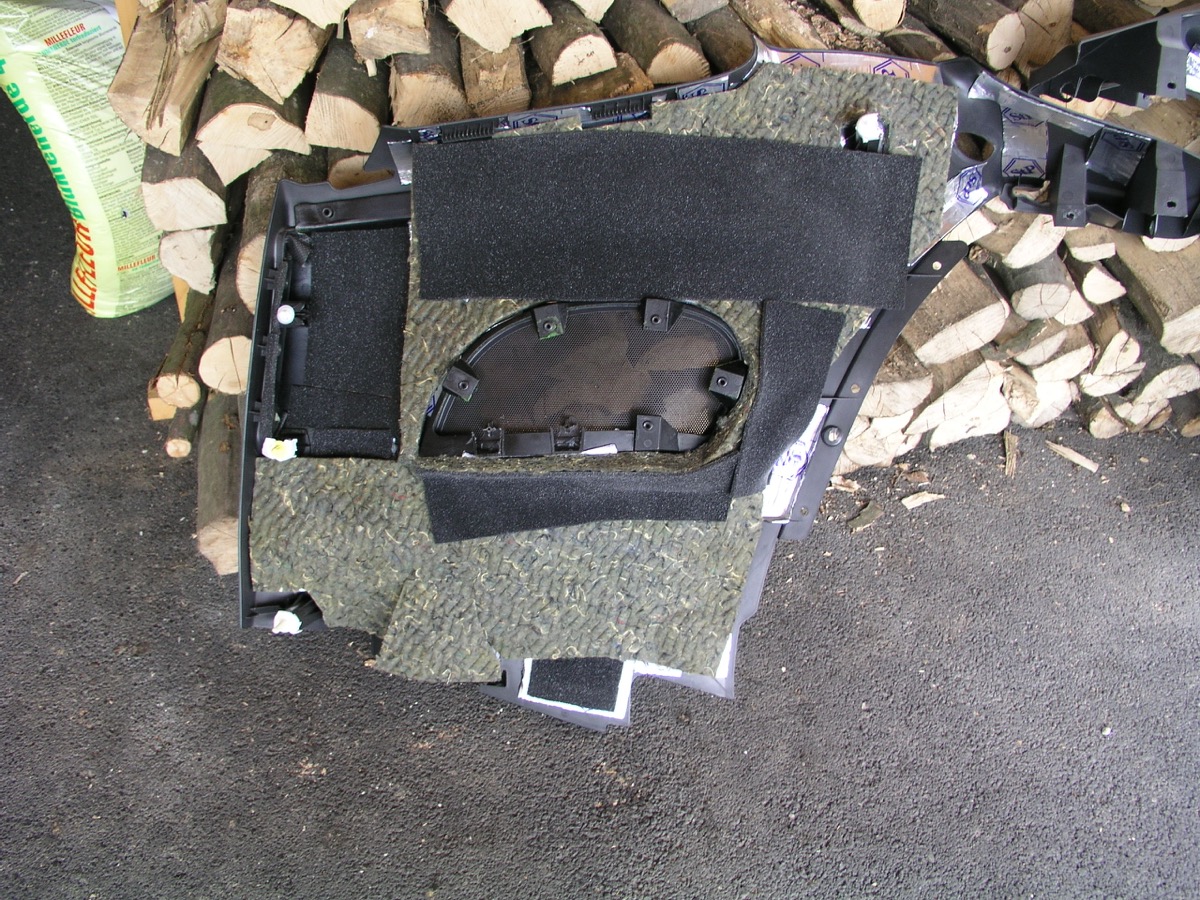
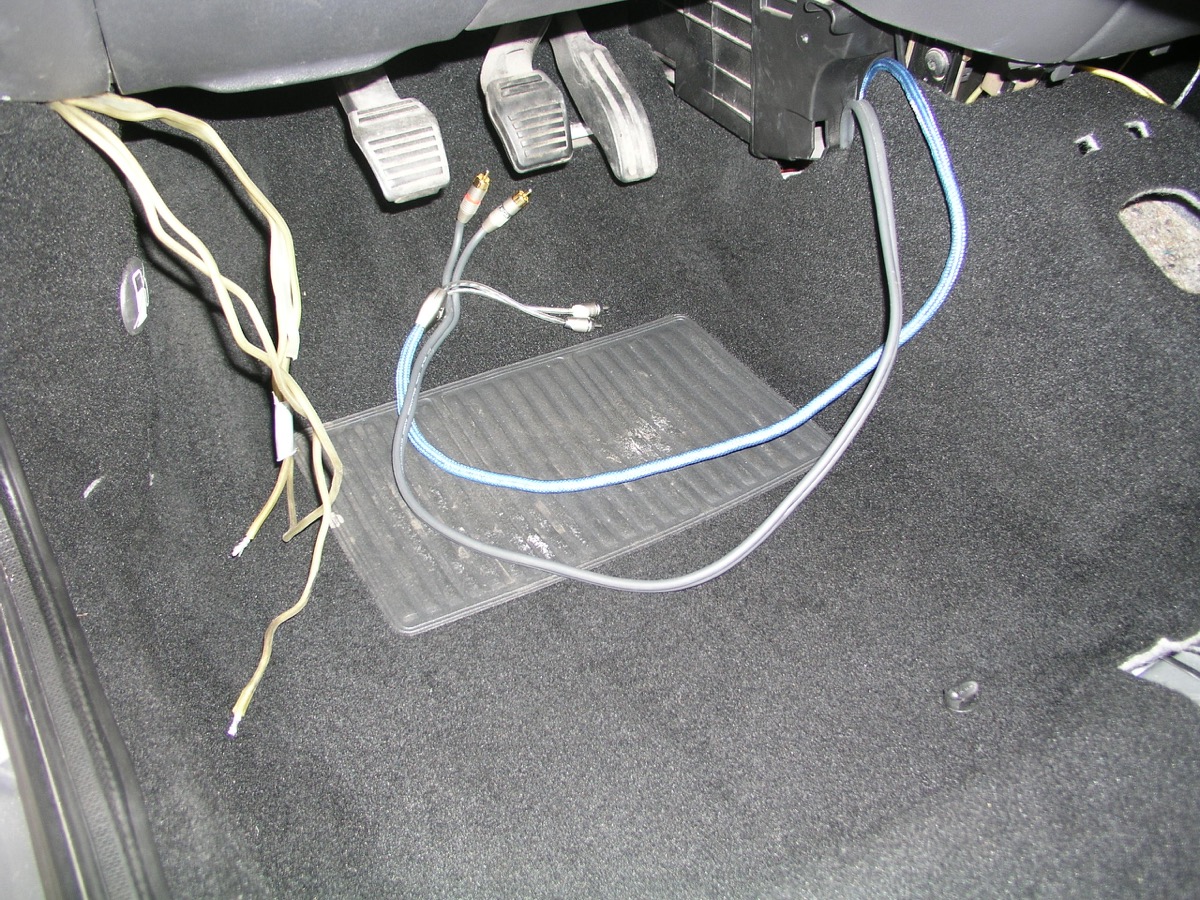
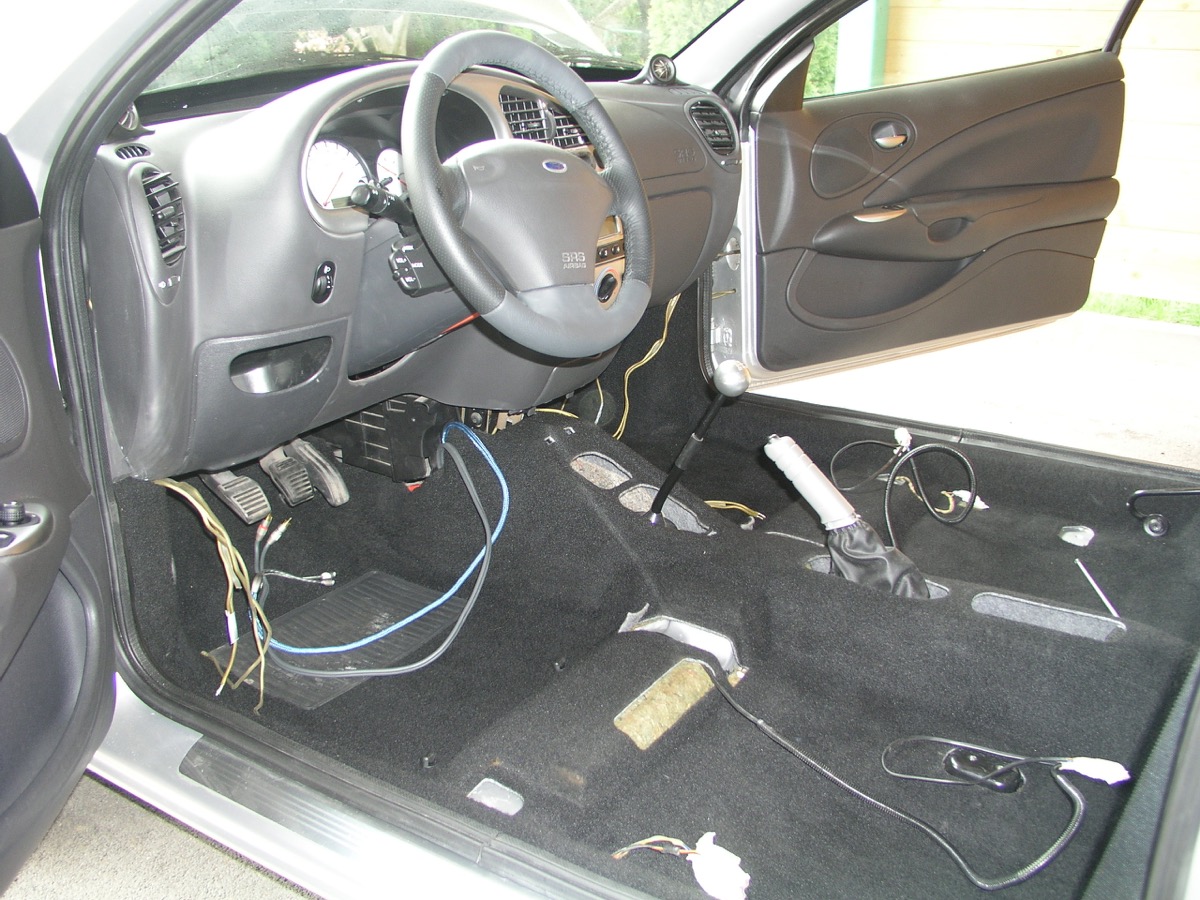
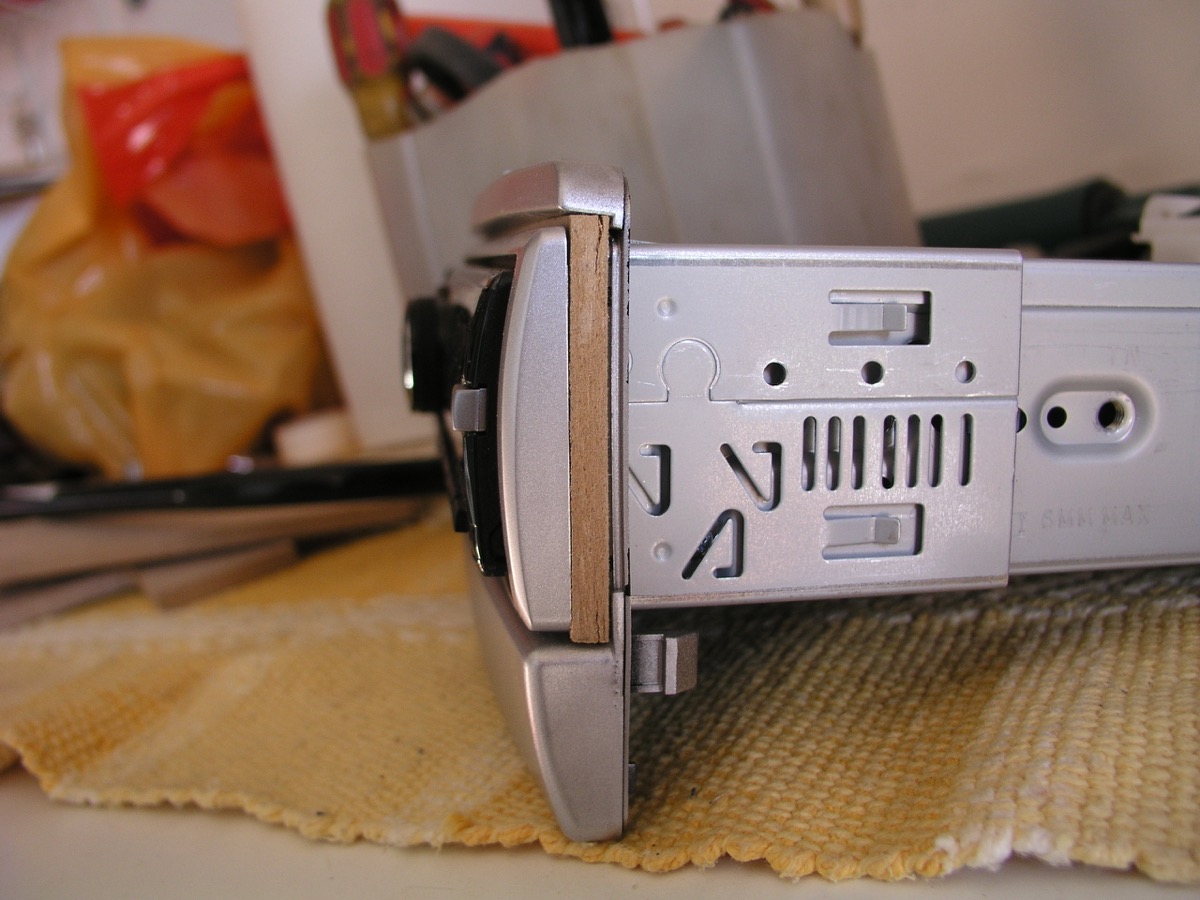
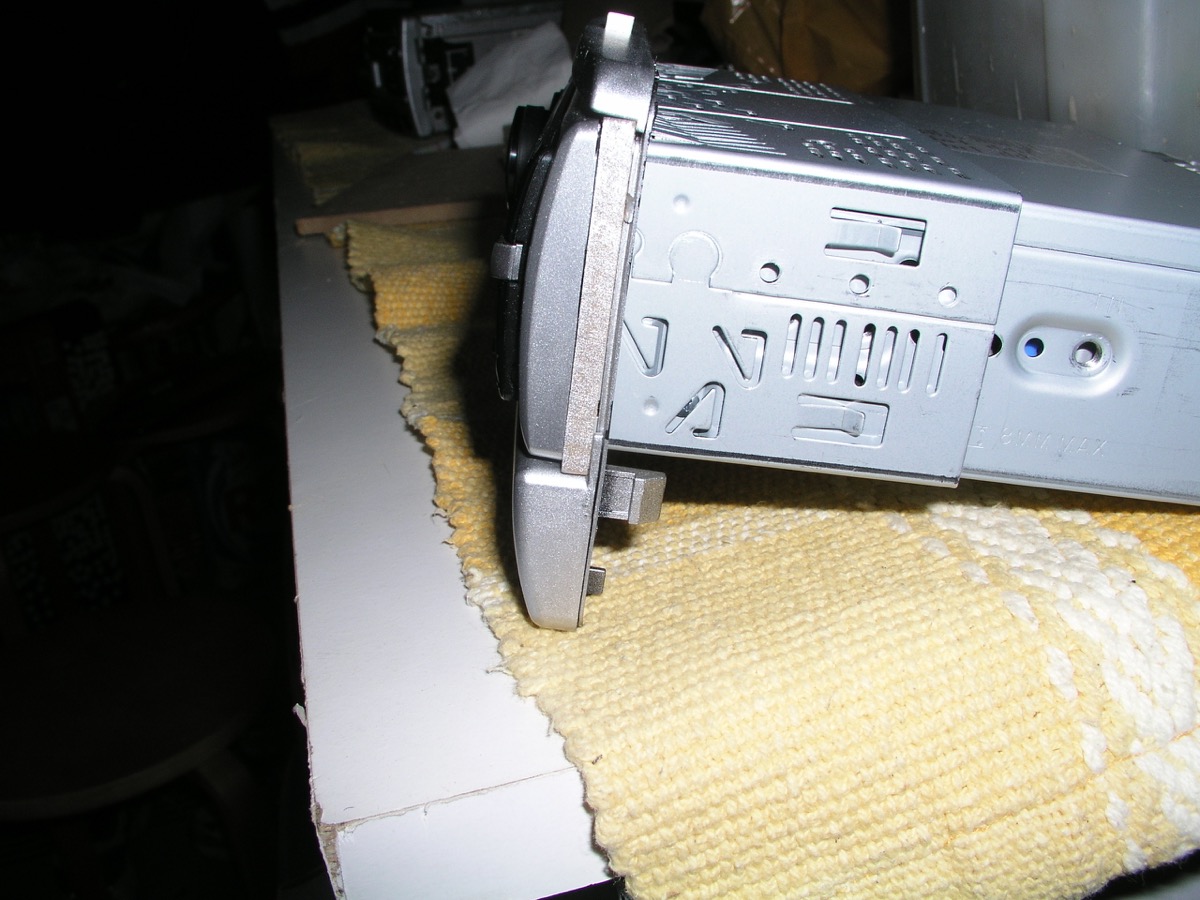
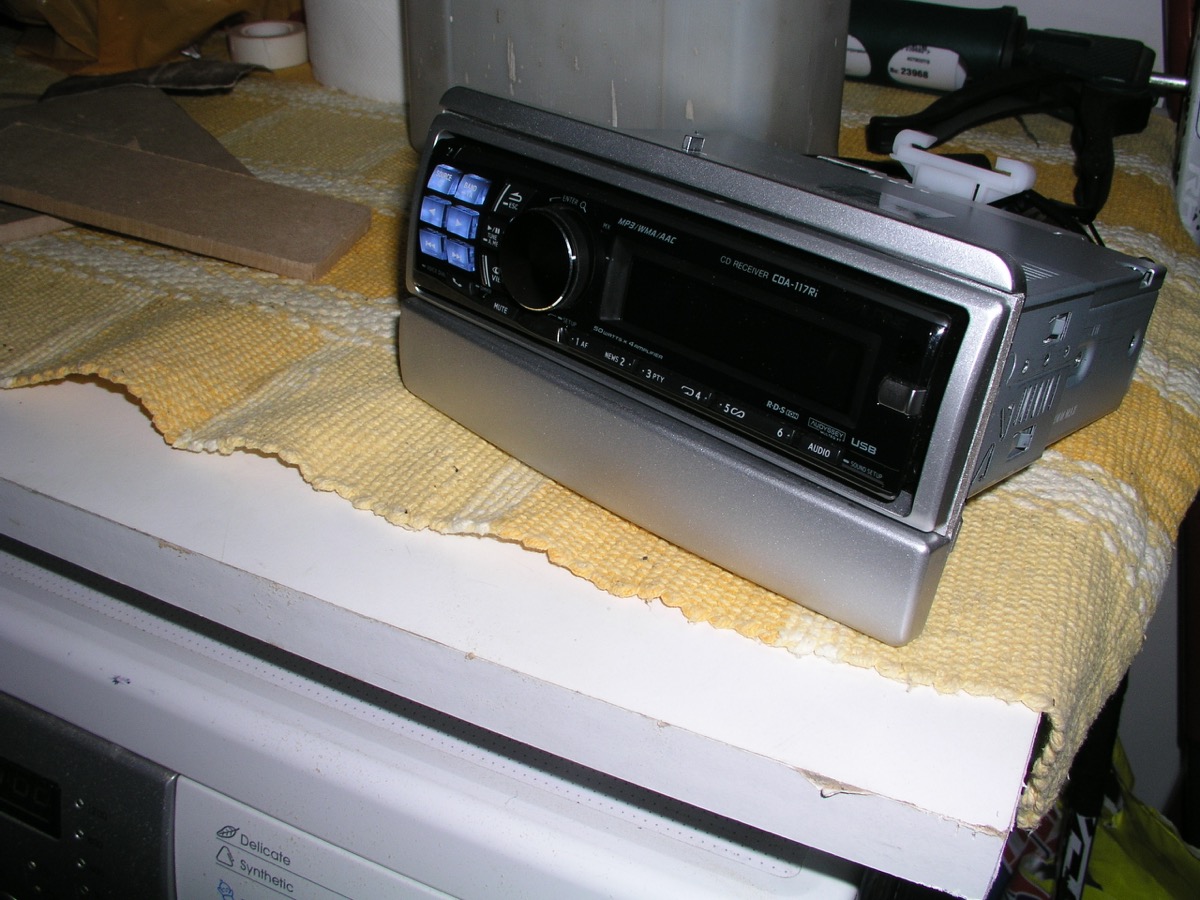
So, while the interior was apart, I took the opportunity to install my ICE. Having seen the original loudspeakers; they are an insult to listeners inteligence. The HU is not so bad itself, but I replaced it as well. Why? Firstly, it is getting old; mine was struggling to read some of burned CDs I have around. Never had that problem with even older Alpine CDA 7893 that was used in my Mk1 focus (sold now). Secondly, to connect an iPod (have a 250 Gb version, putting on it music in lossless format, it should hold around 400 CDs) I would need a Parrot adapter which is not cheap here. And finally, CD6000 doesn't have preamp outputs, and every decent ICE system has to have a good amp!
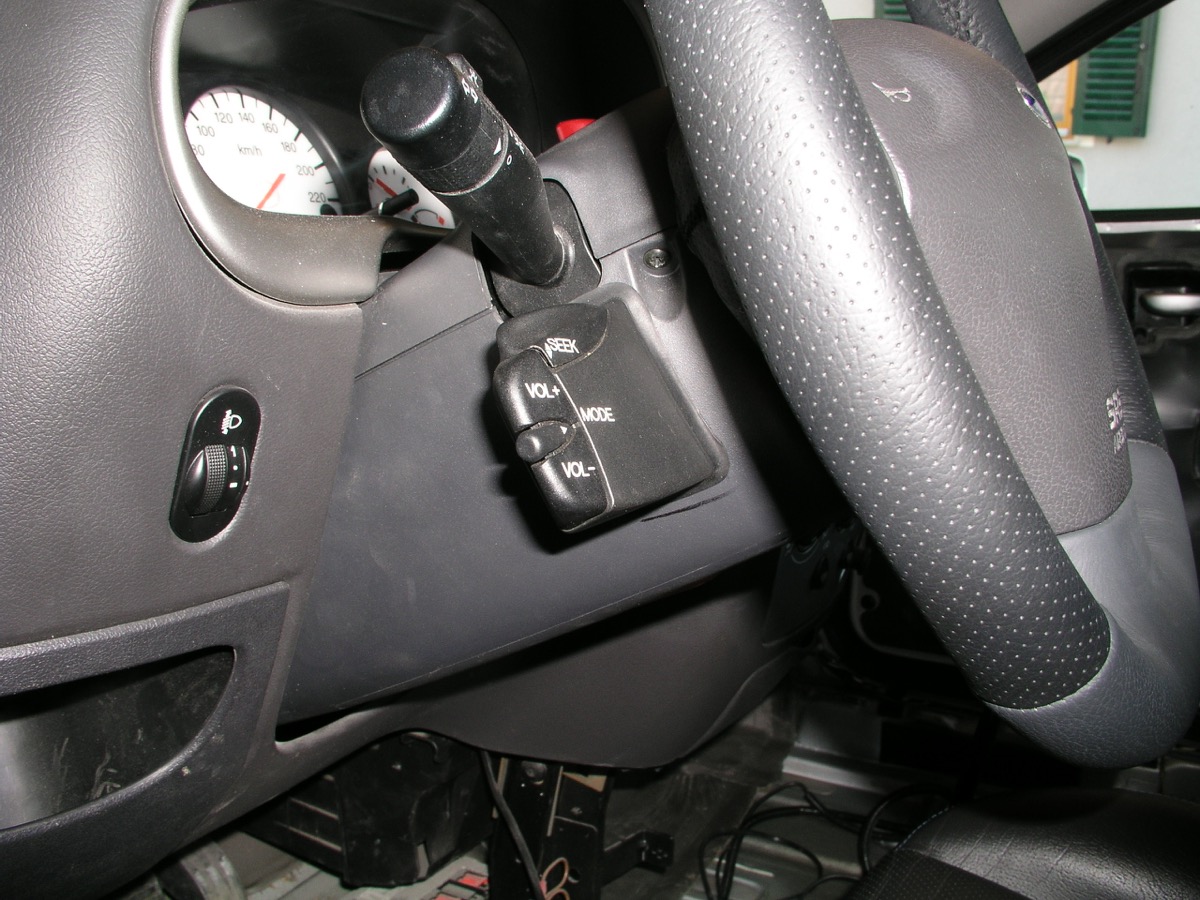
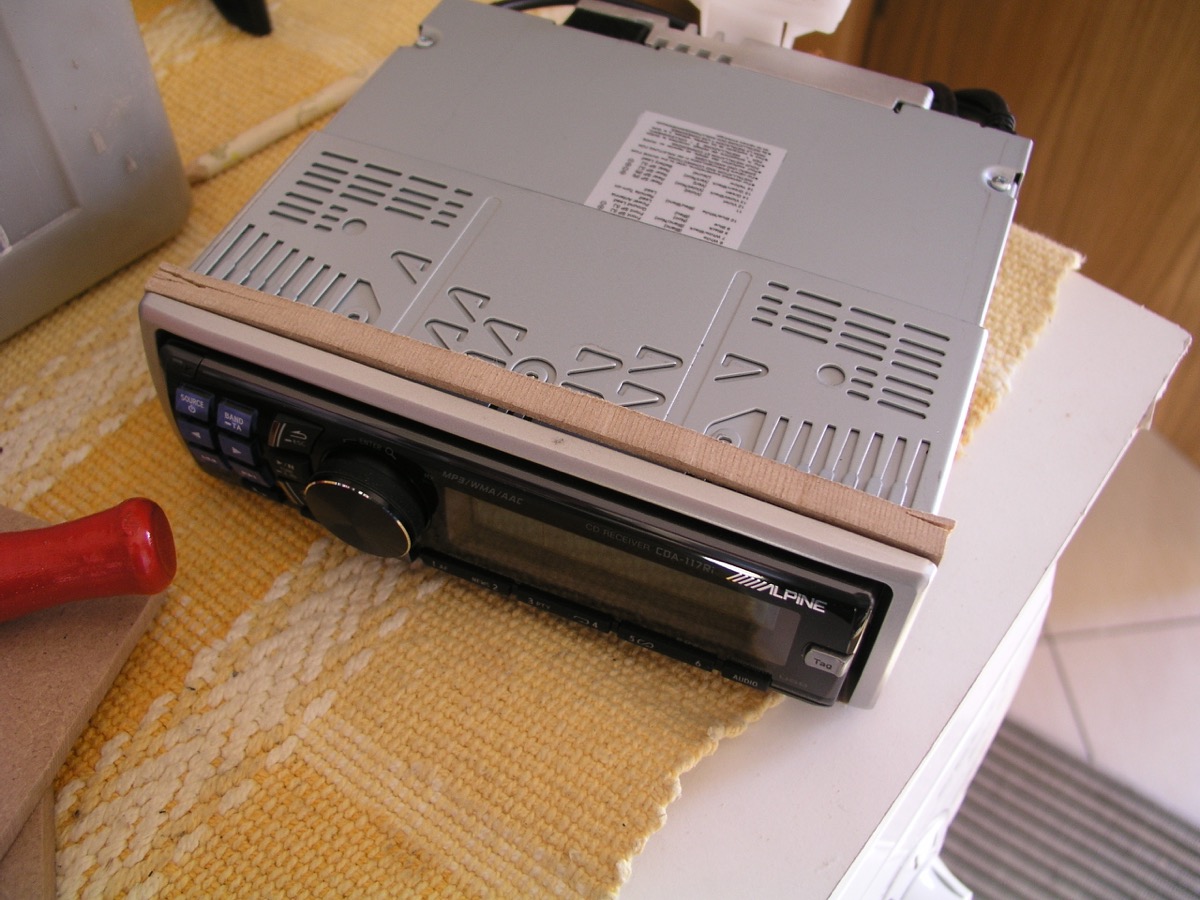
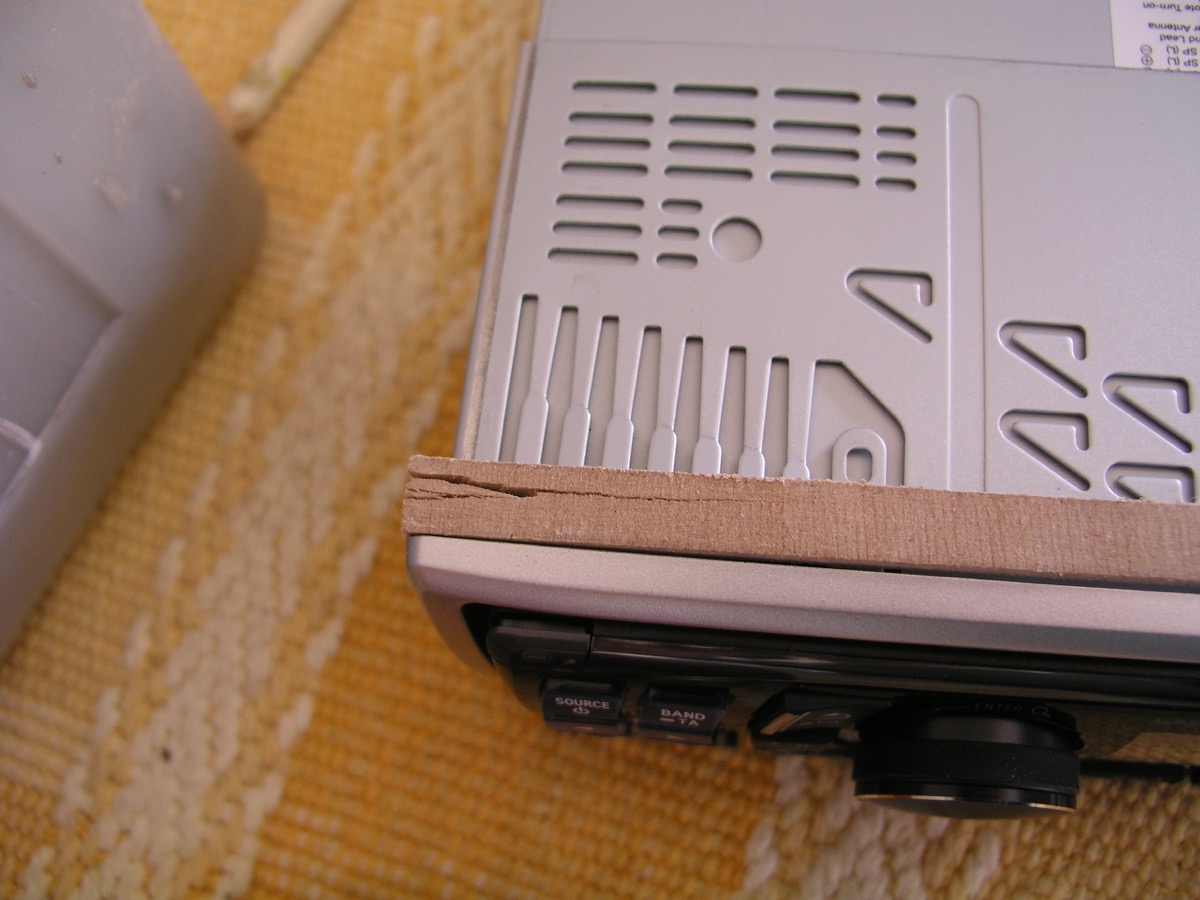
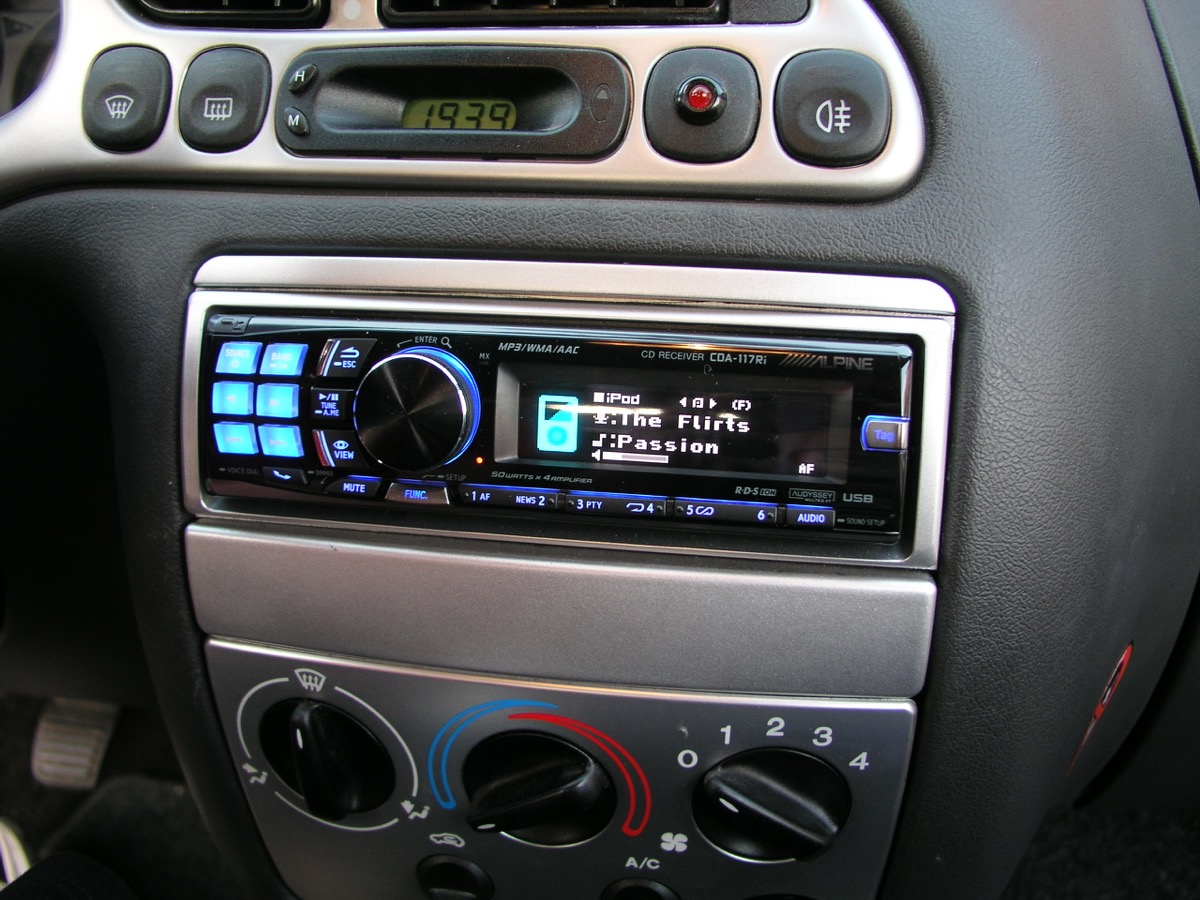
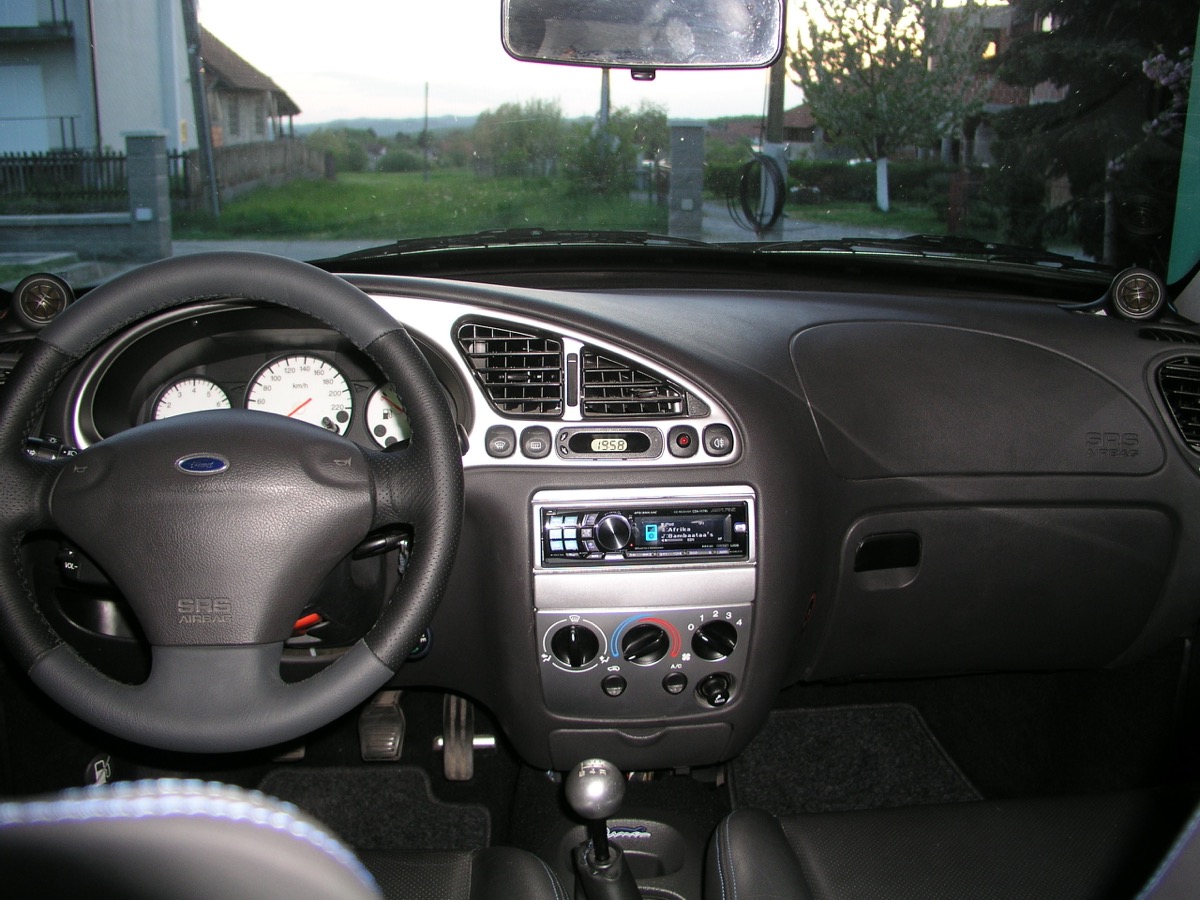
So, 6000 out, alpine 117Ri in! I got a very good quote (in a store, a brand new unit) so went for it! Also, fancied the stalk radio controls and got over e-Bay the stalk and wiring and did the modification as explained in how to section here. Not a single problem, tested it on 6000 and worked like a charm. For the alpine unit had to order adapter, it arrived, and despite the scepticism of the very same salesman who sold me the HU when trial fitted worked straight away. So, I am using the stalk controls with an Alpine HU and it is working like a charm!
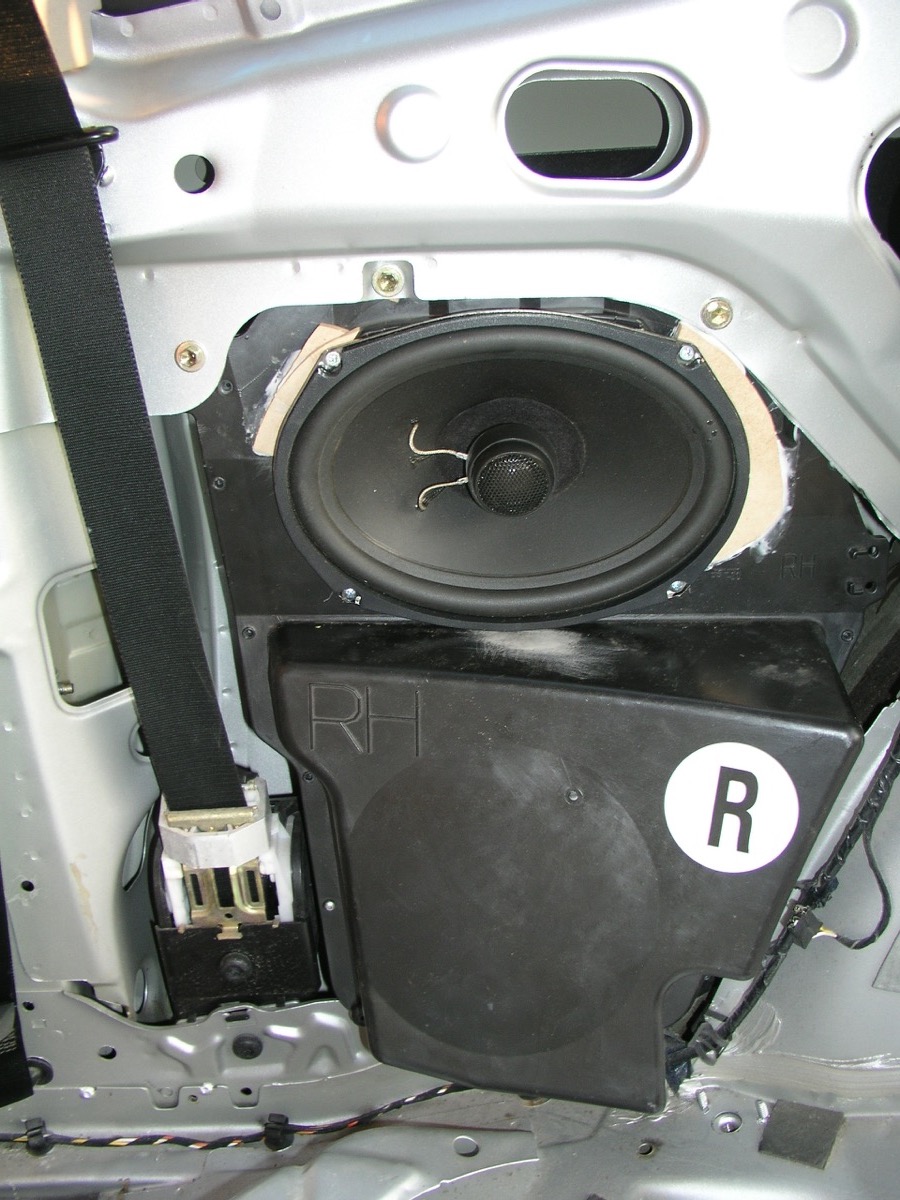
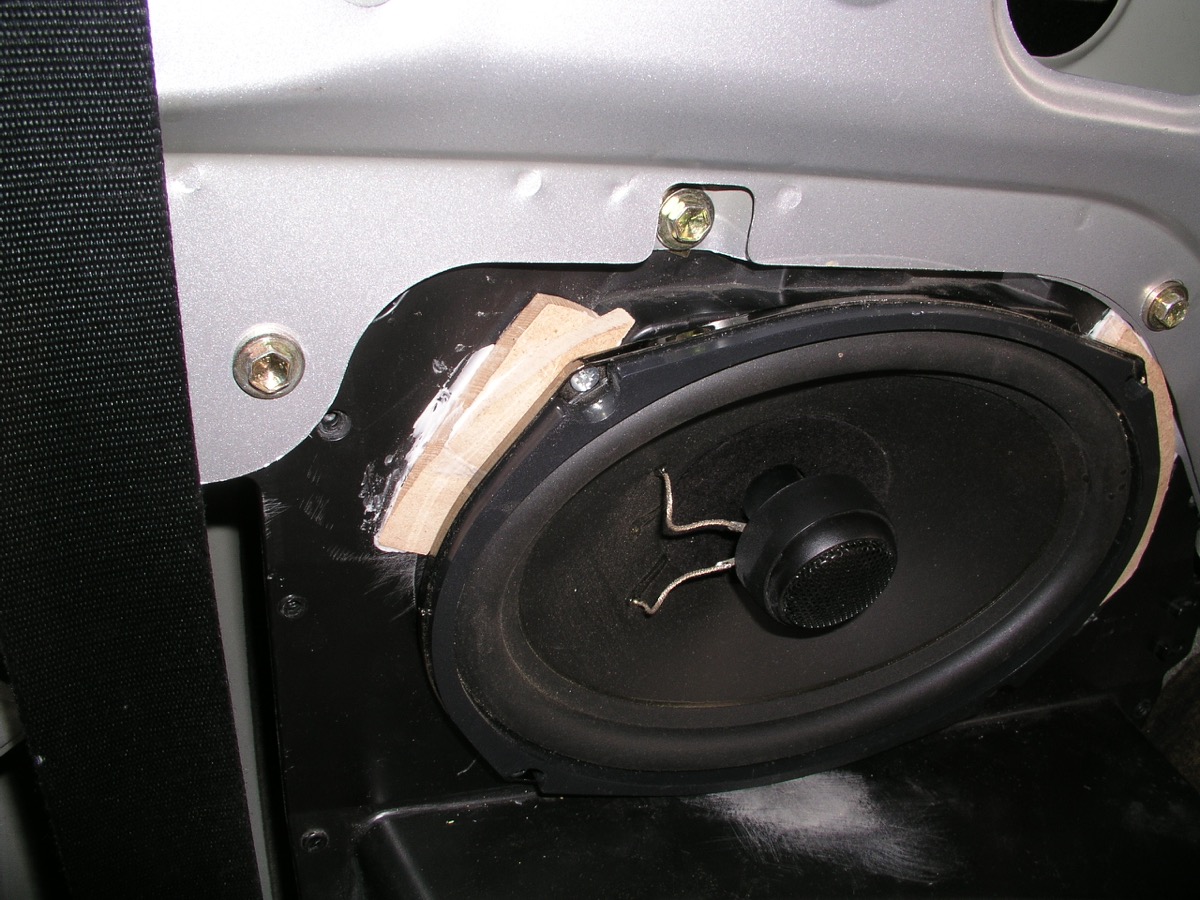
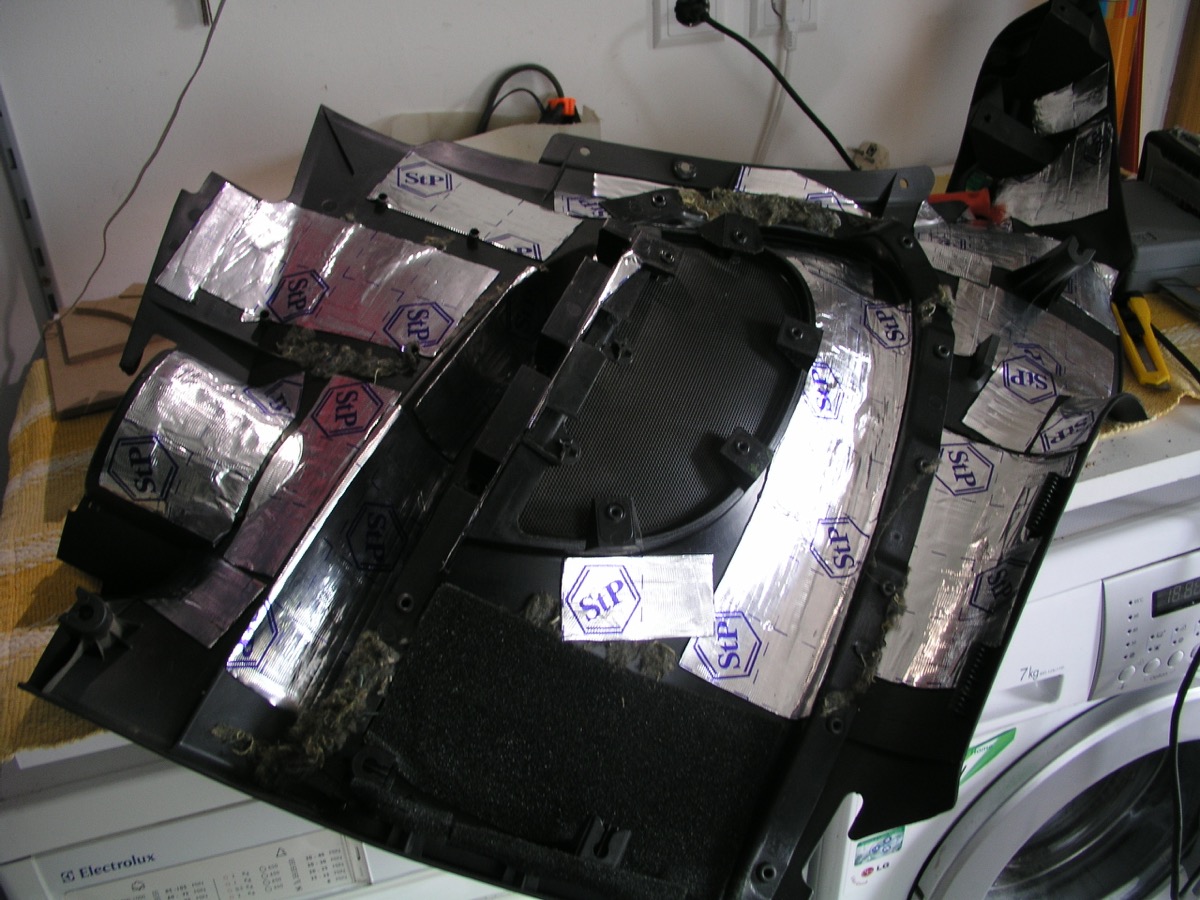
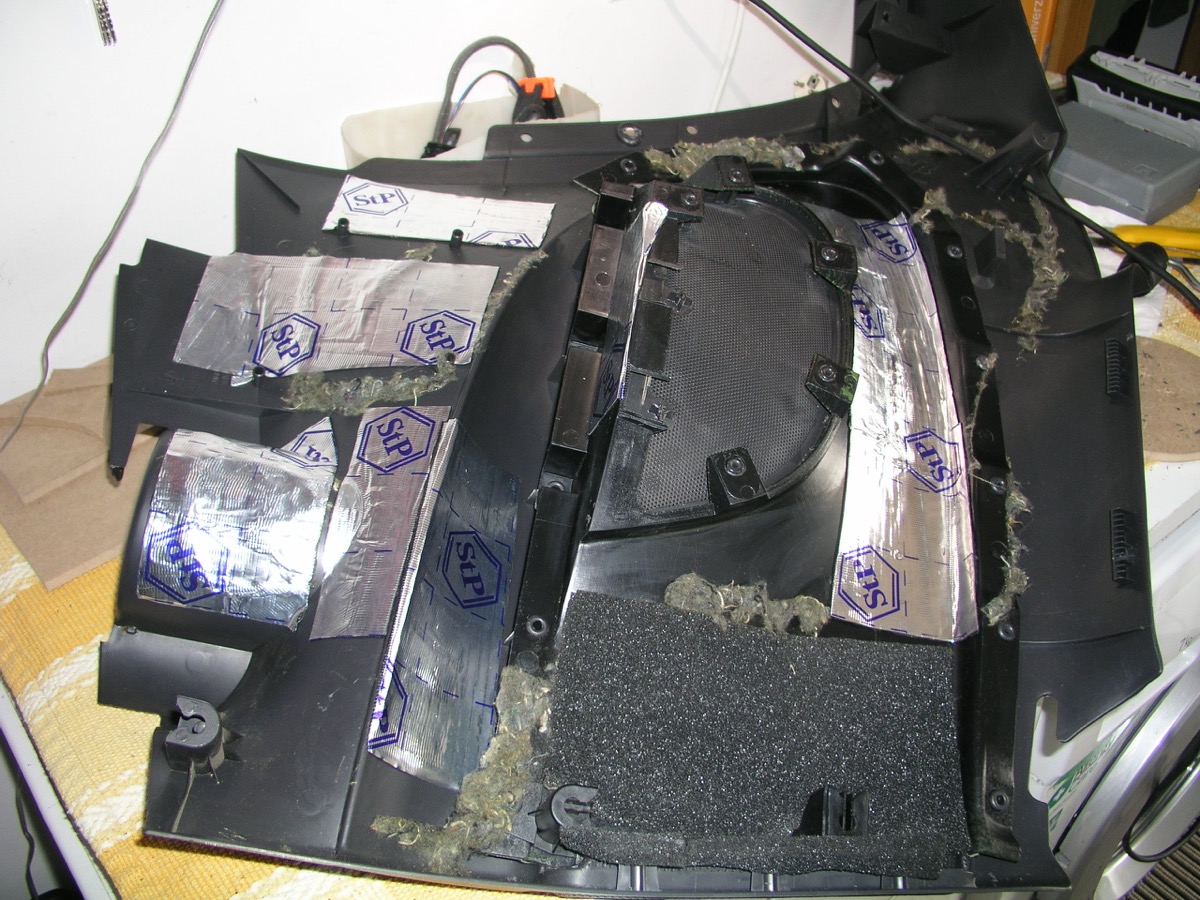
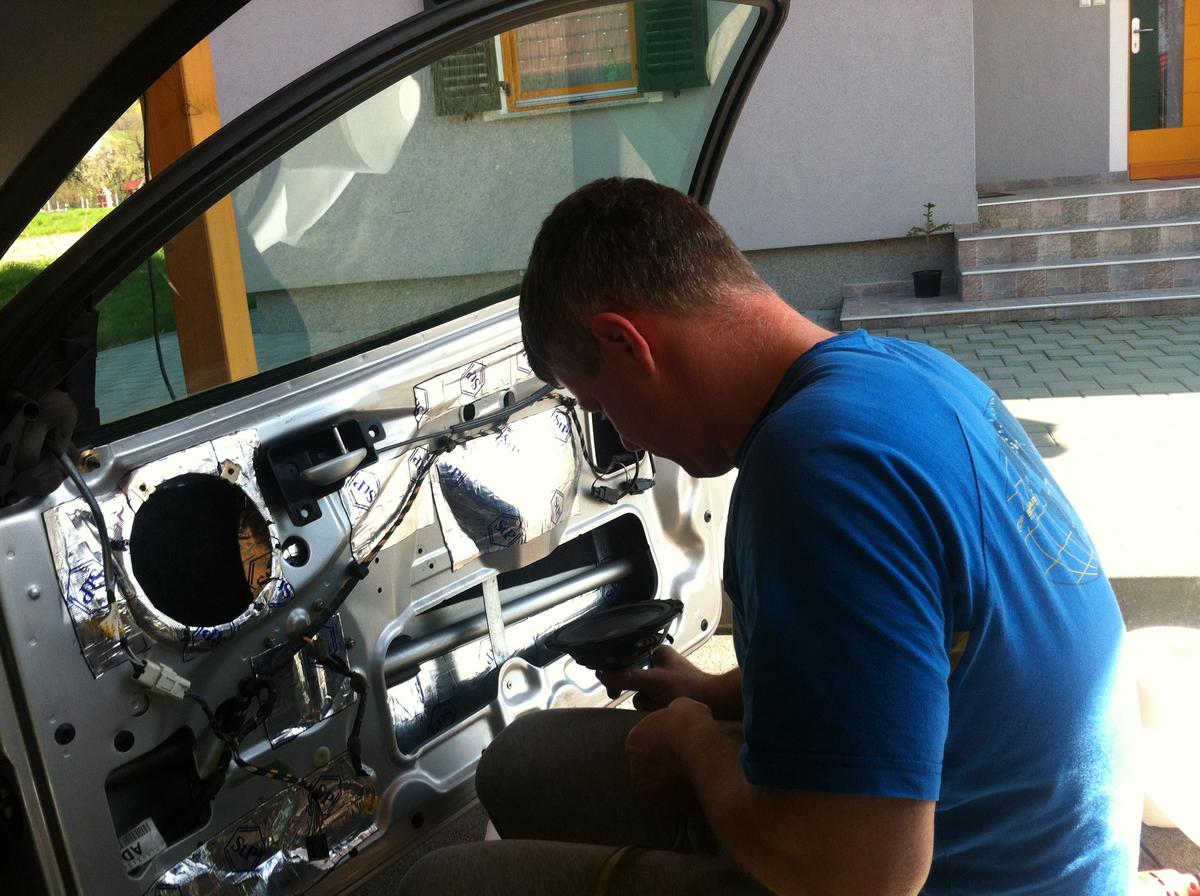
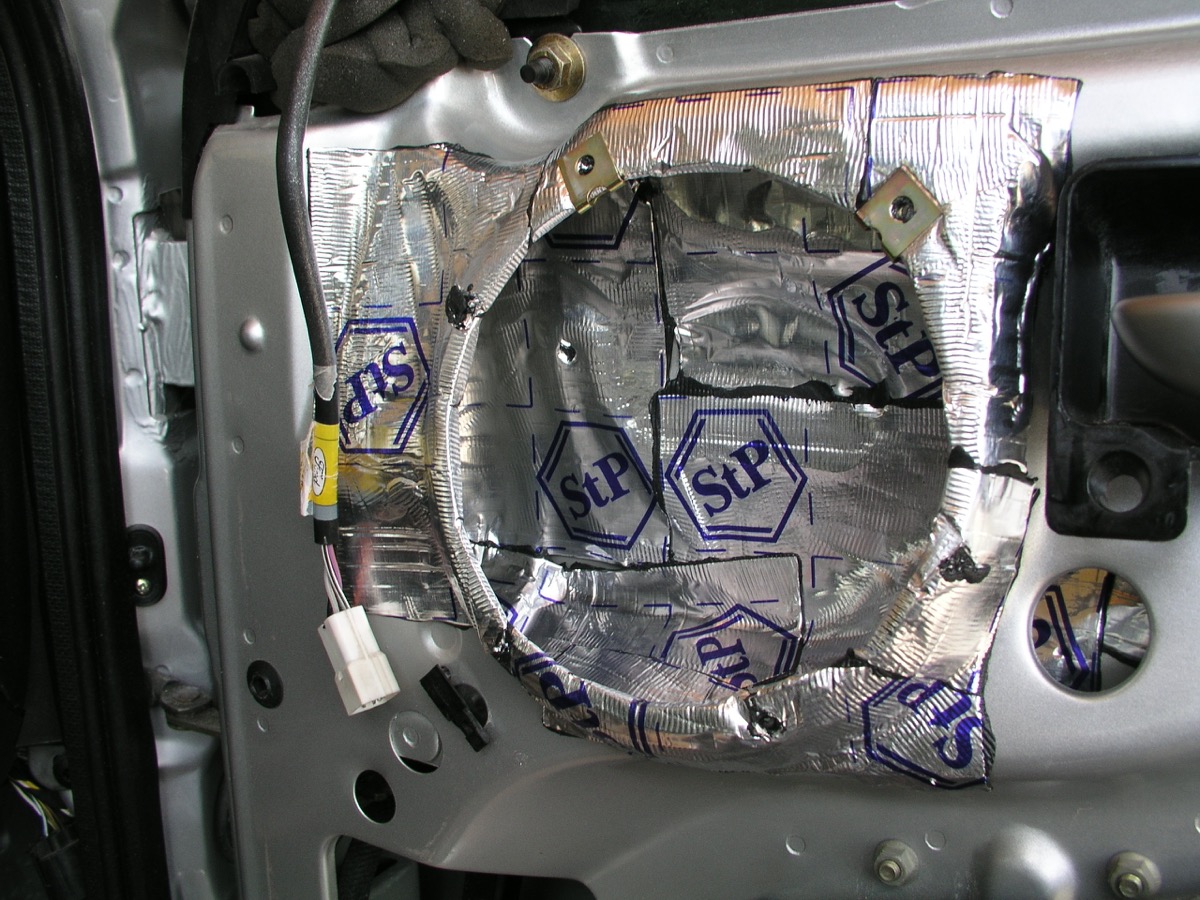
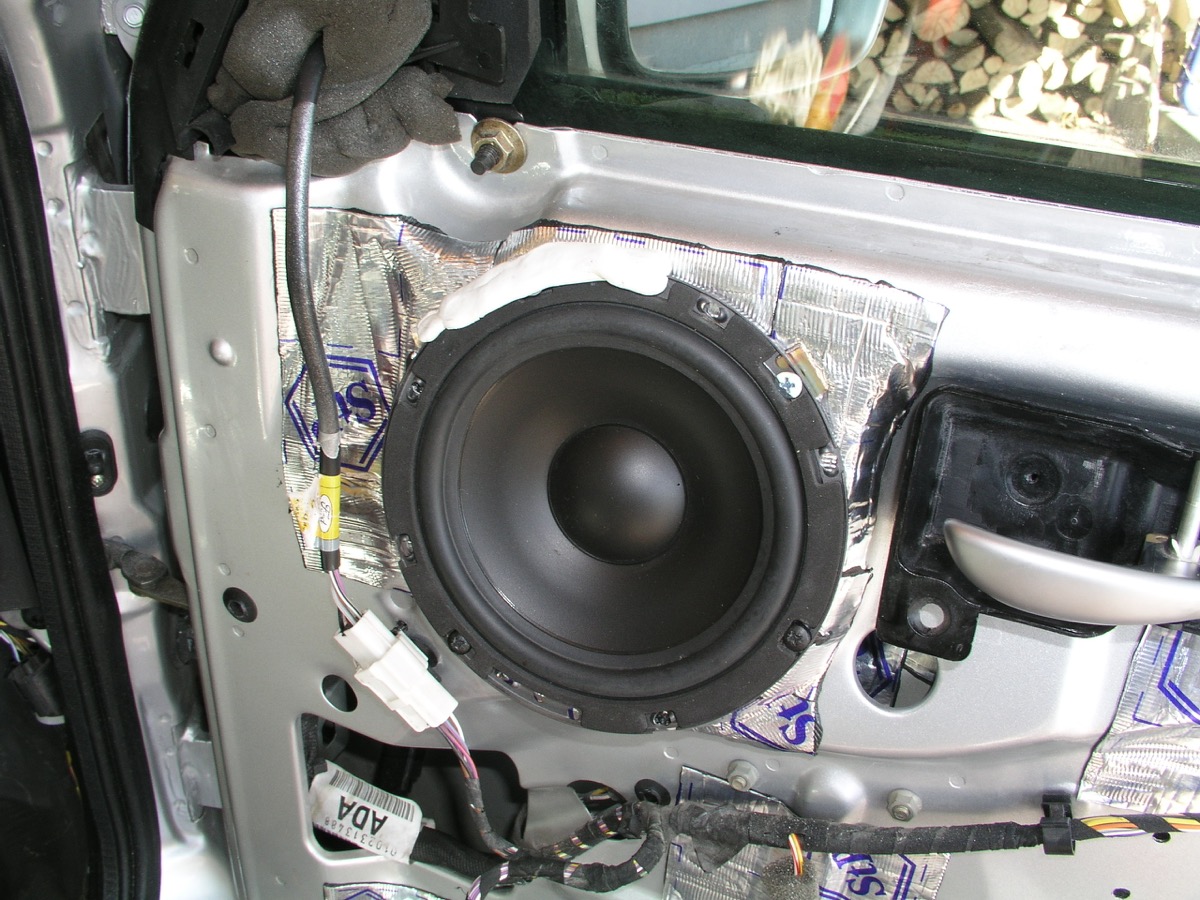
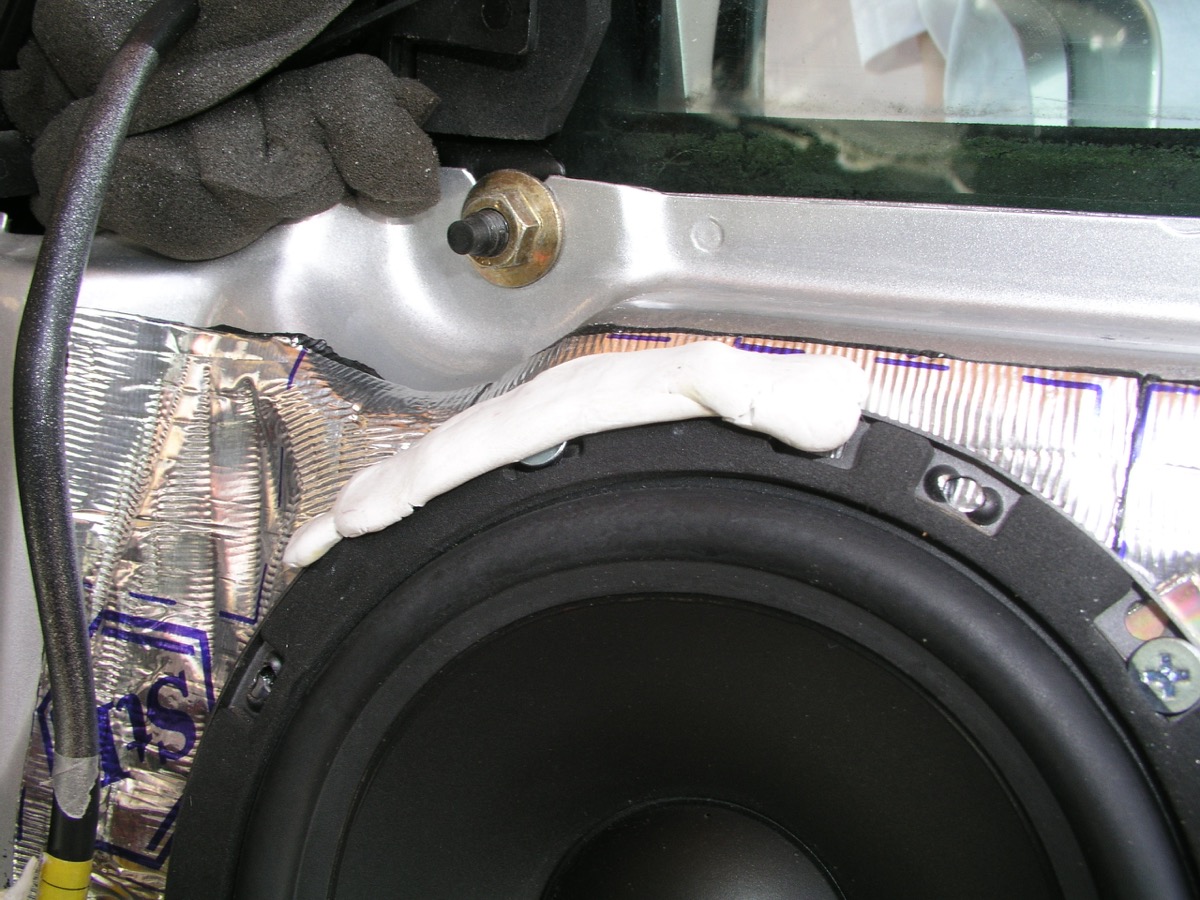
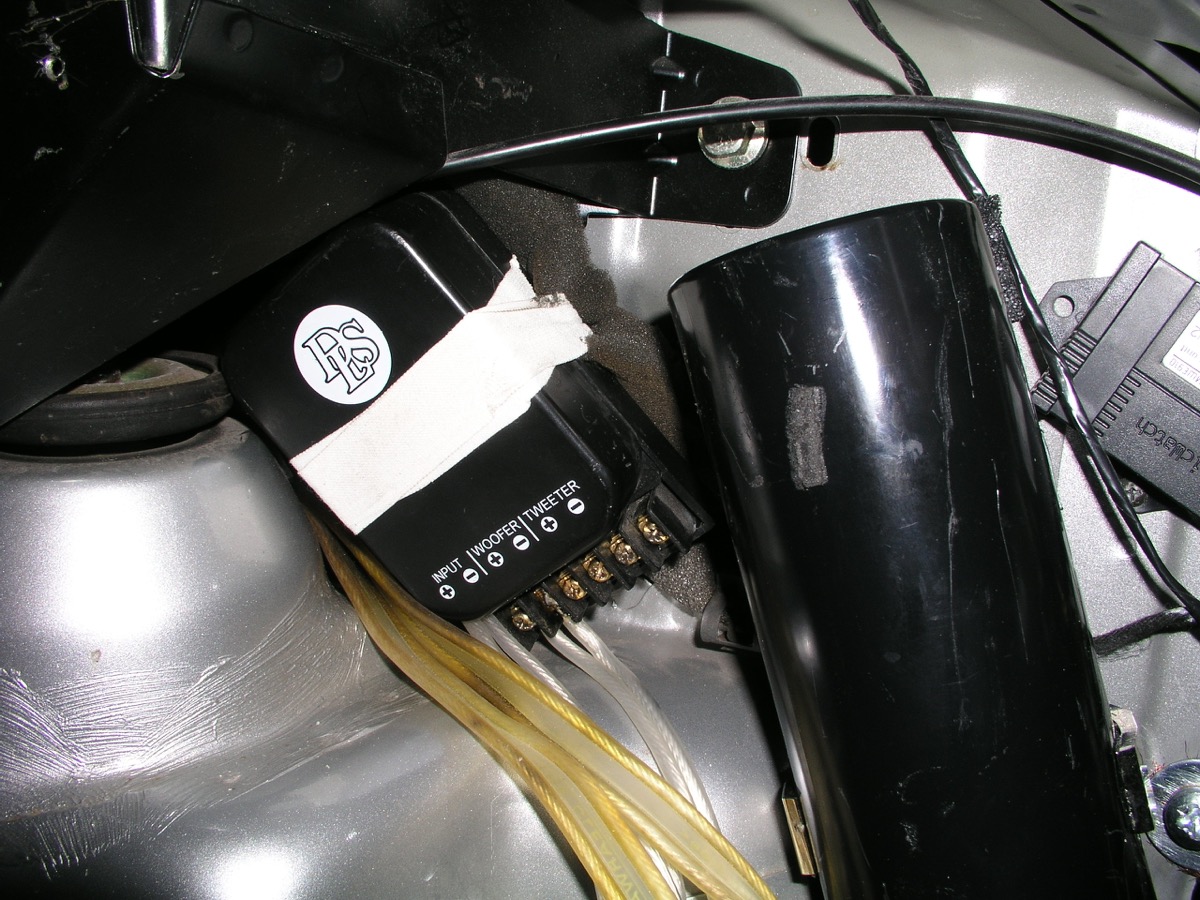
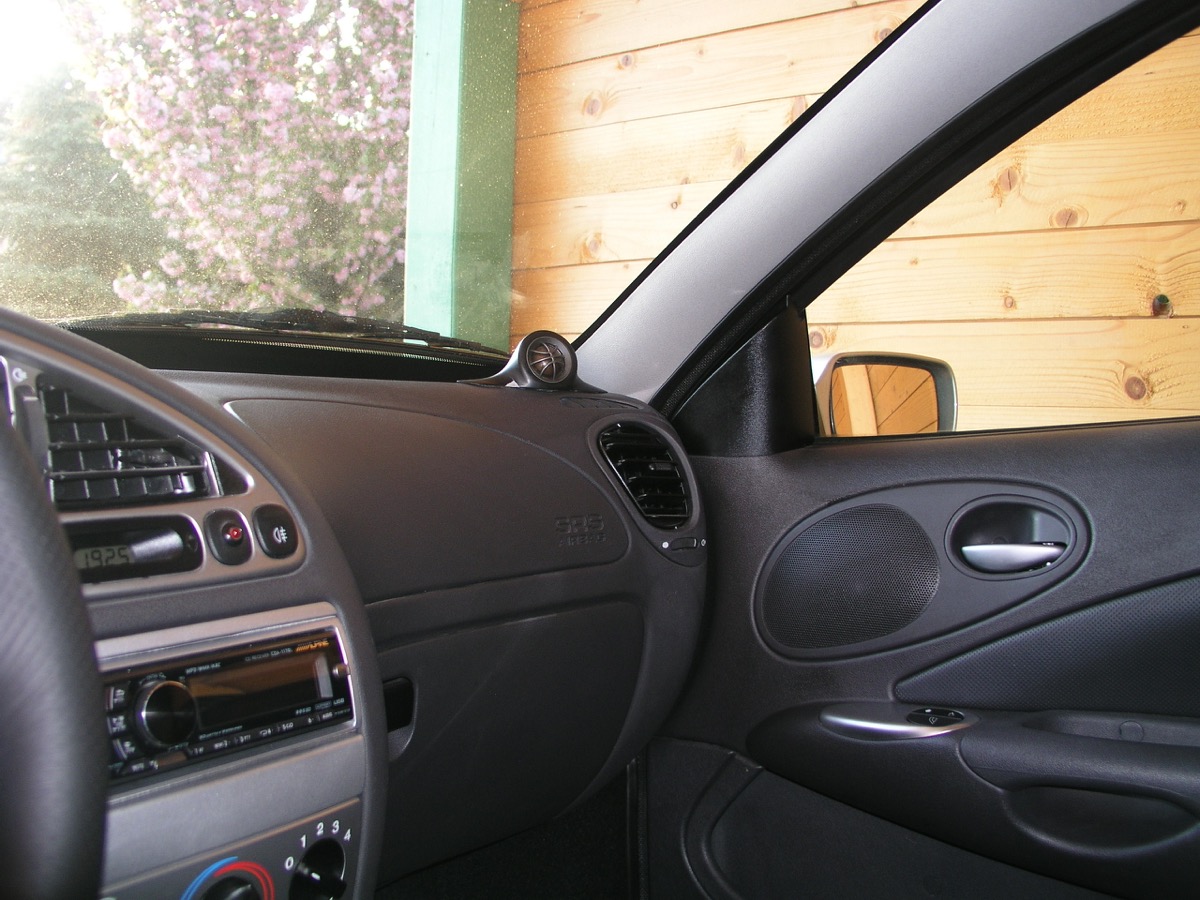
The rest of a system? I am simply hooked up to the Swedish loudspeaker manufacturer DLS. (http://www.dls.se" onclick="window.open(this.href);return false;). In focus I was using their 6,5 inch front system UP6a; 11 years later their designation and iteration went to UP6i, but the systen is still being produced. It has silk dome twitter and sounds amazing. A took them out of focus and stored away to be put in puma. They are extremly powerful speakers, but use a hybrid neodime magnet so the mounting depth of 64 mm was not a problem.
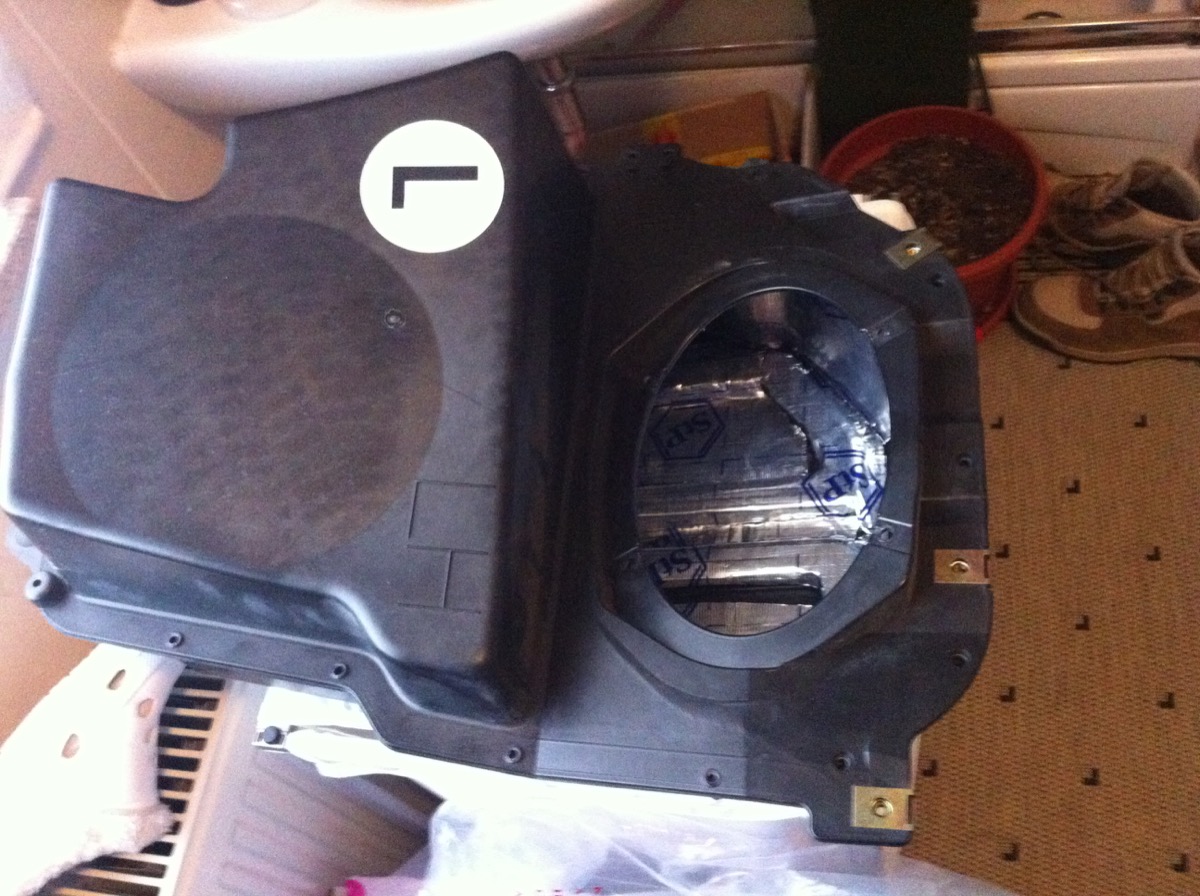
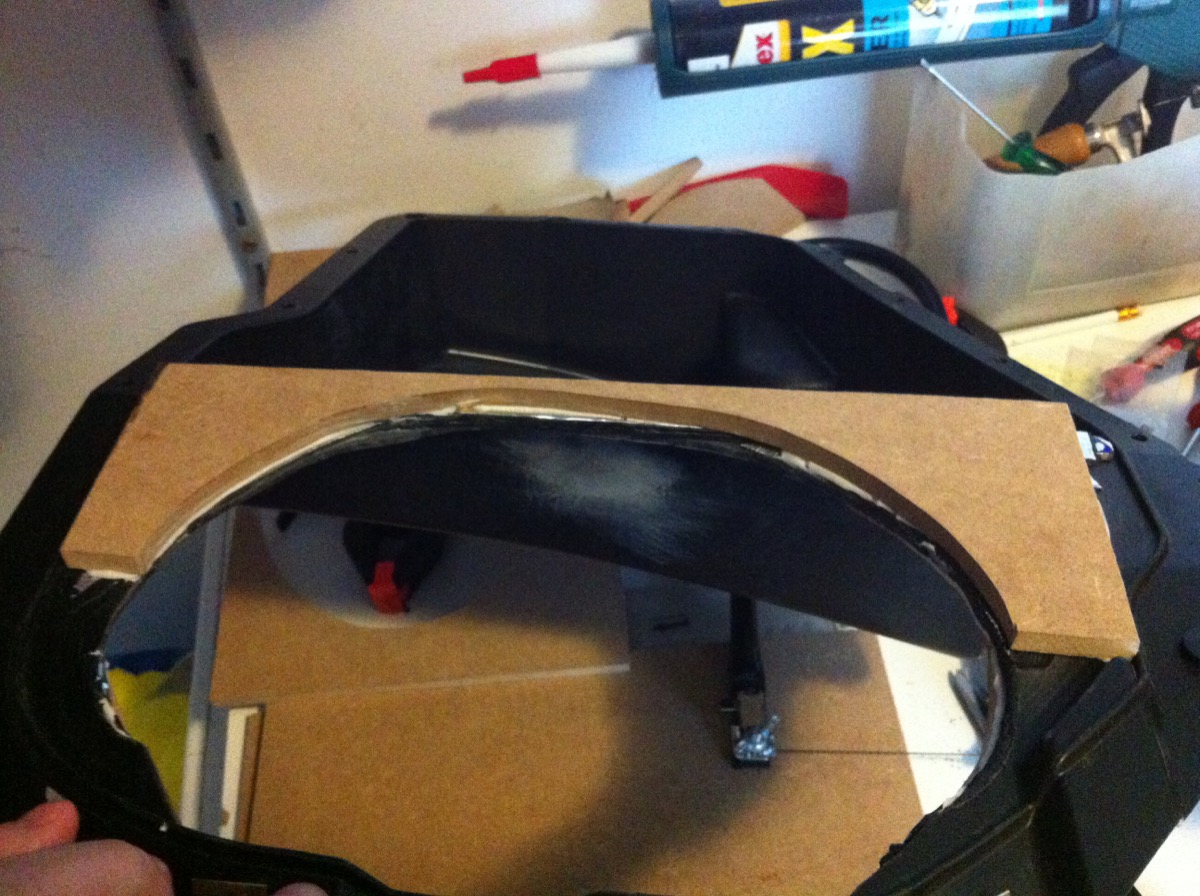
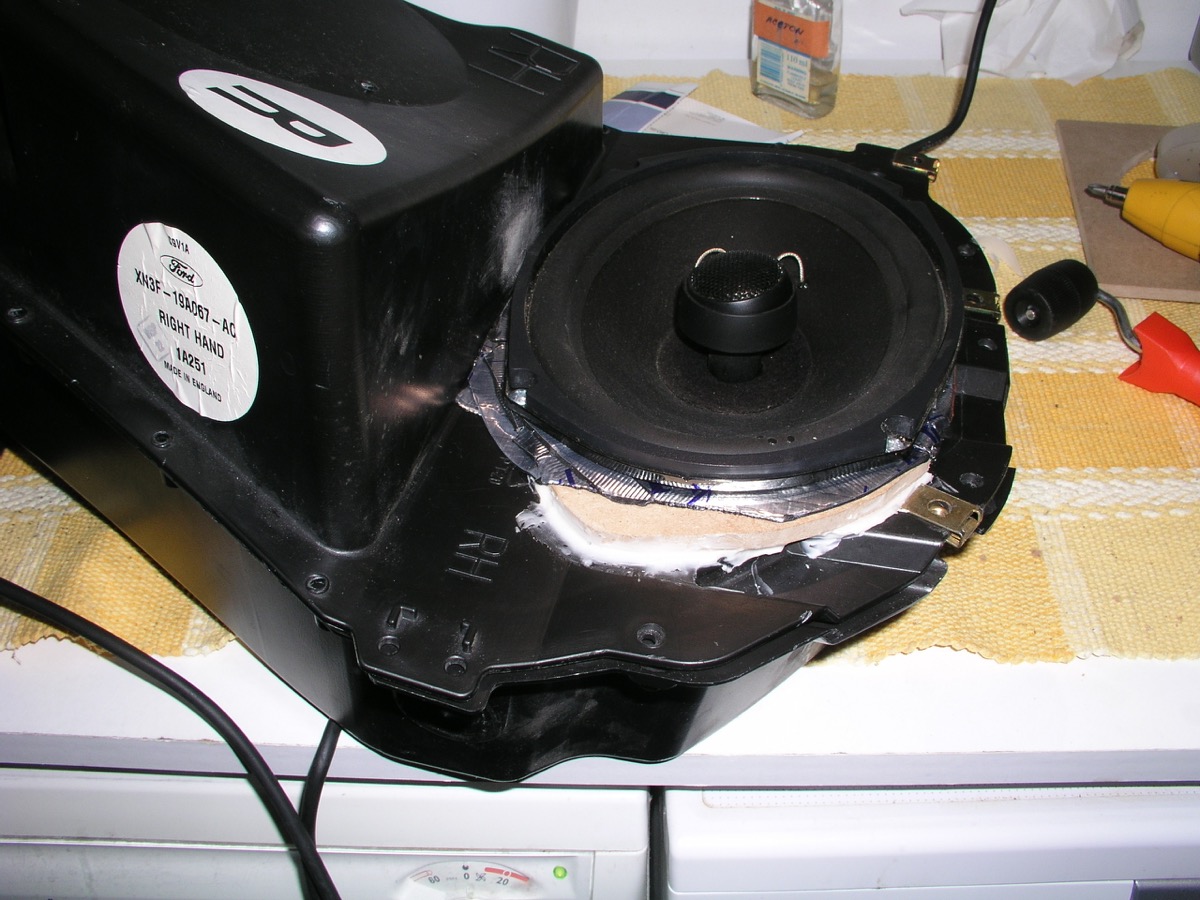
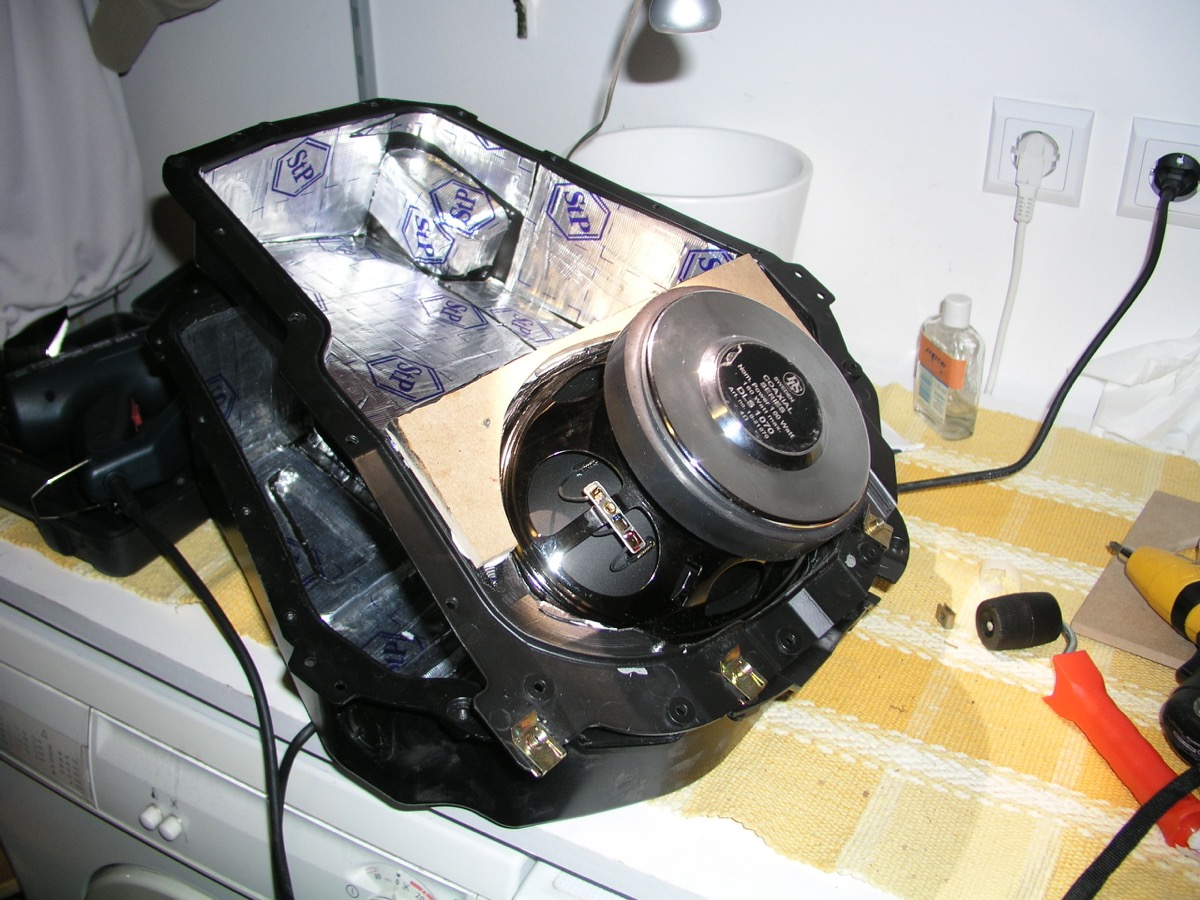
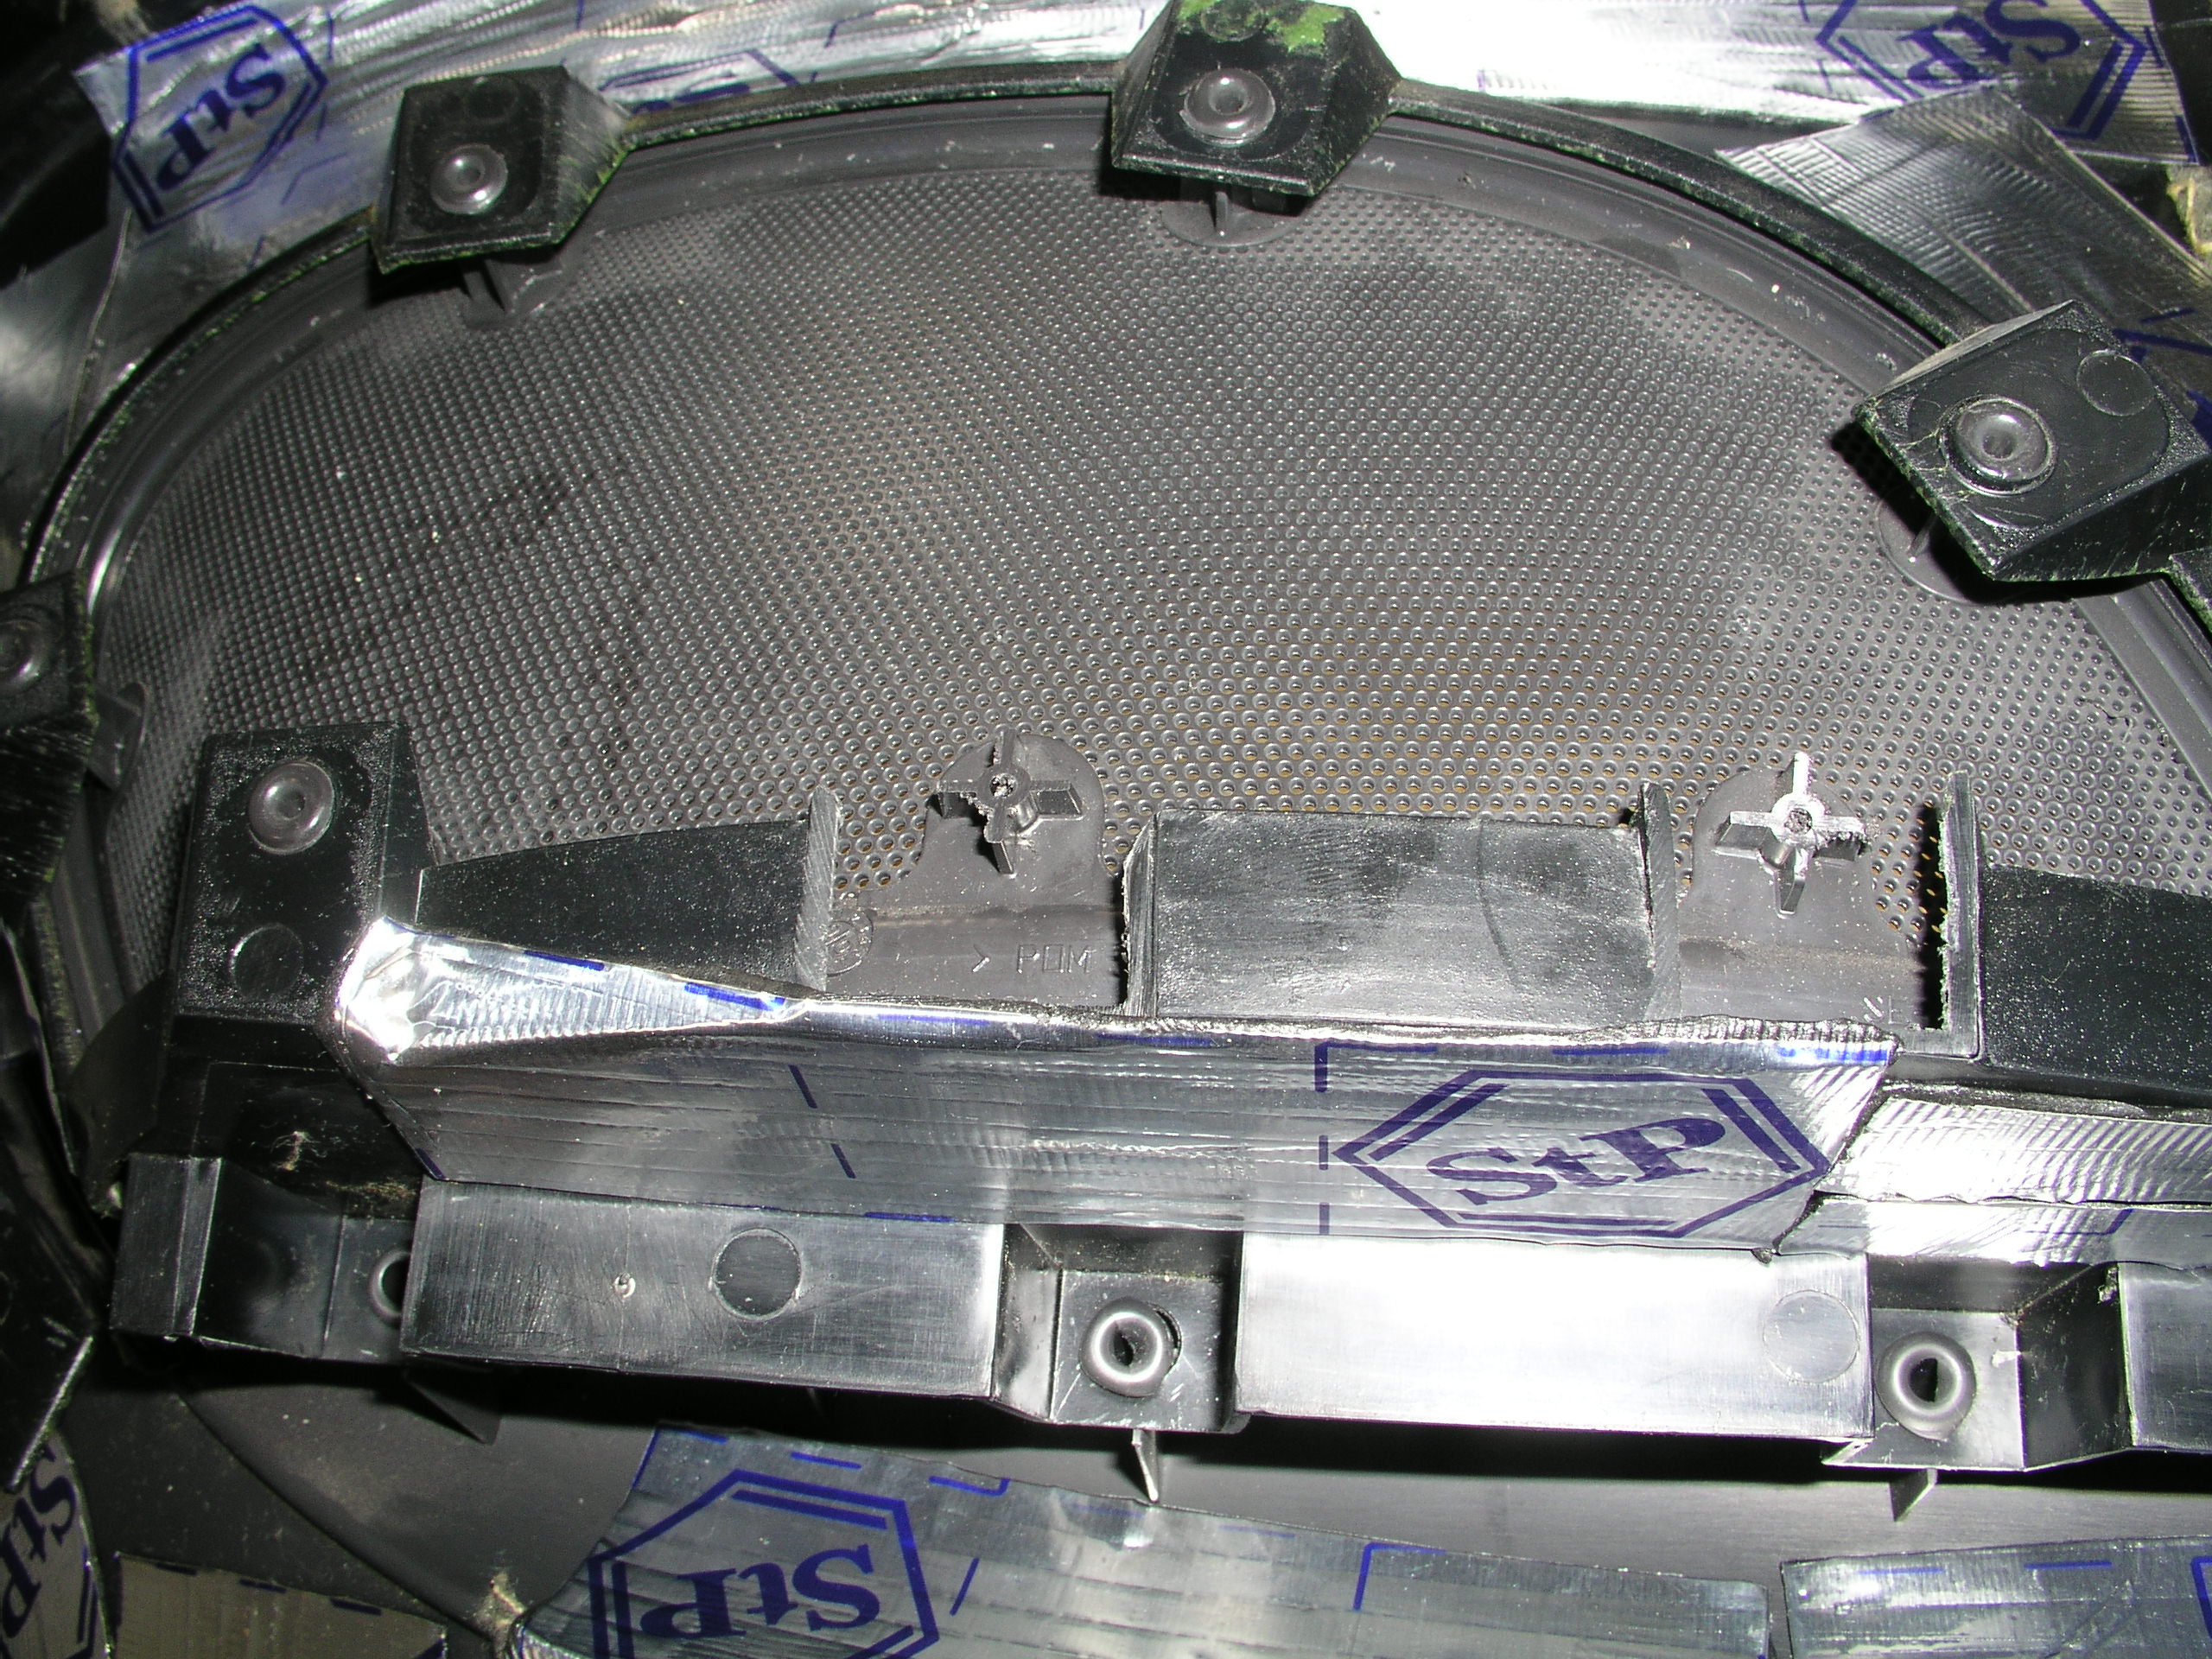
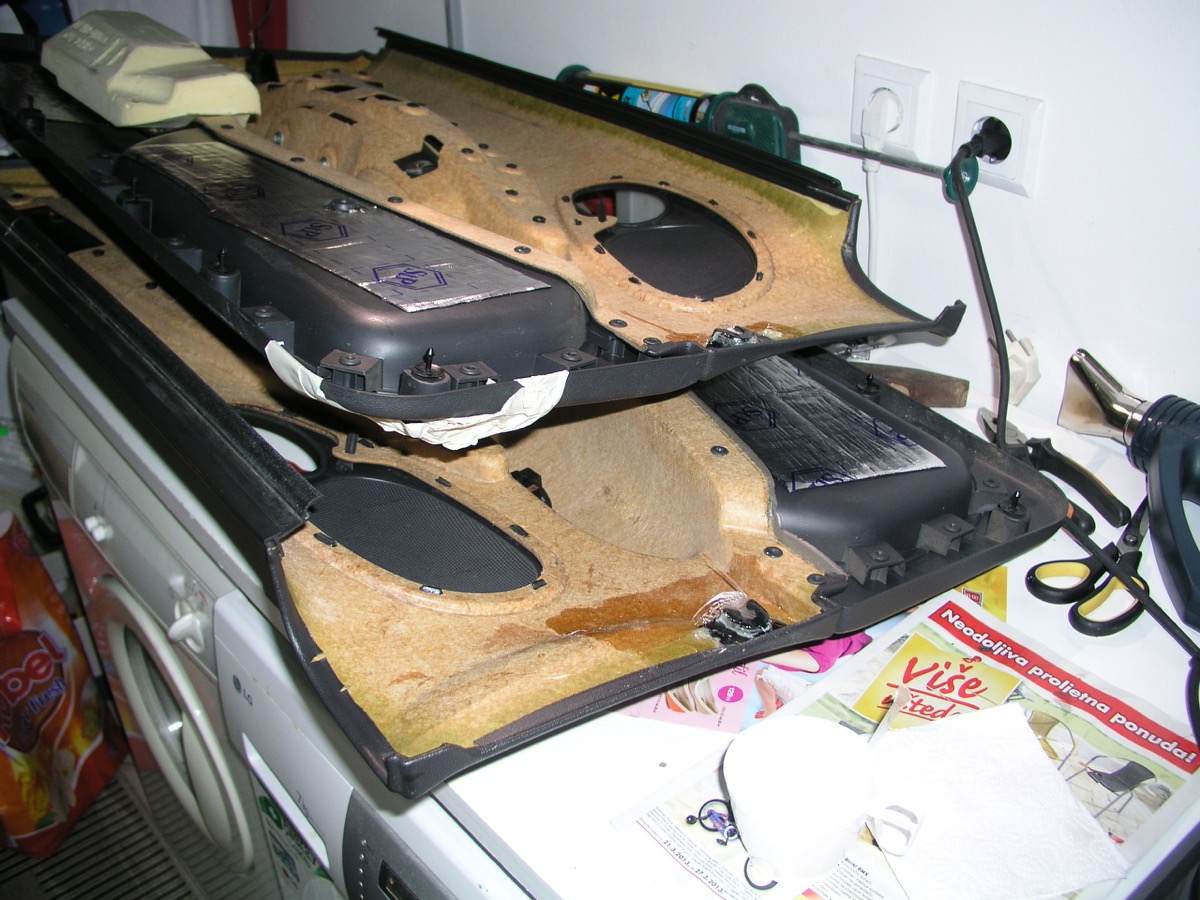
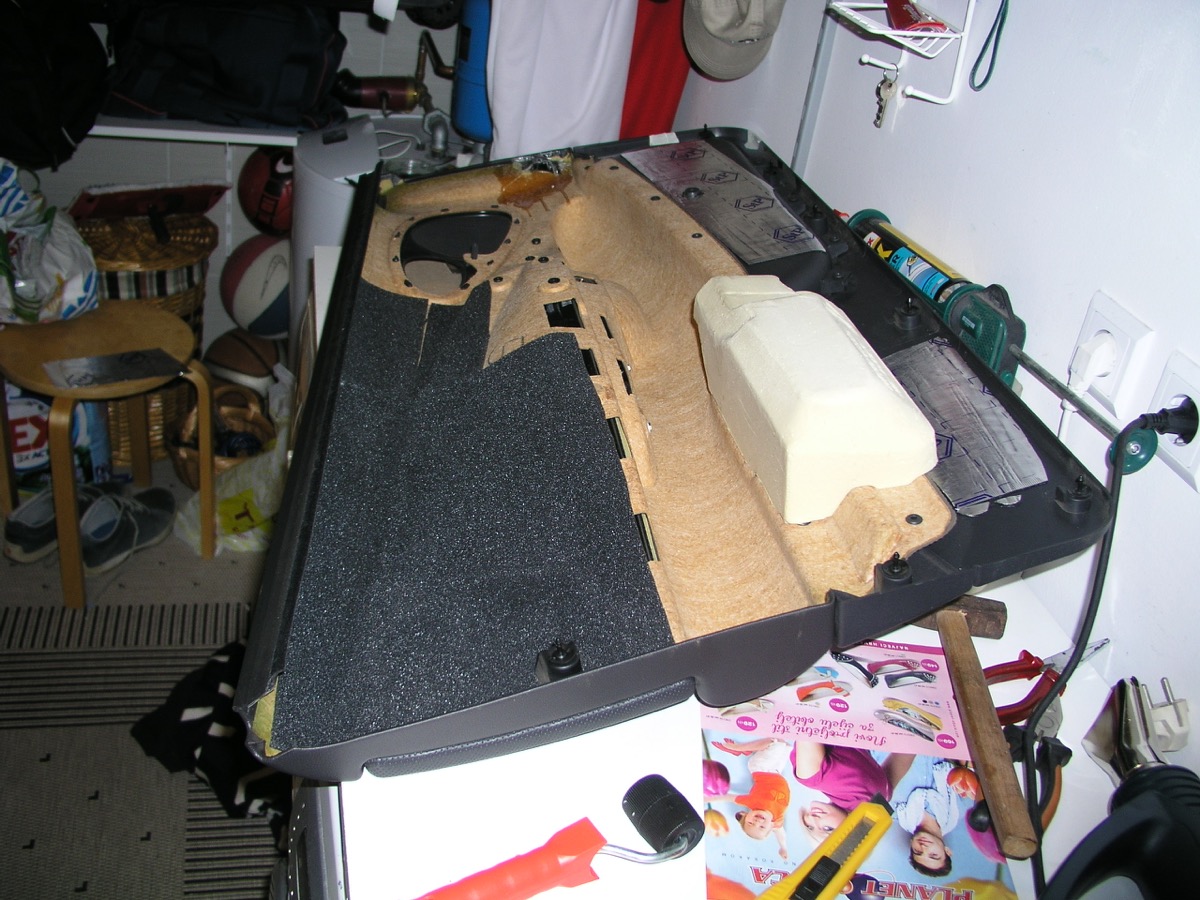
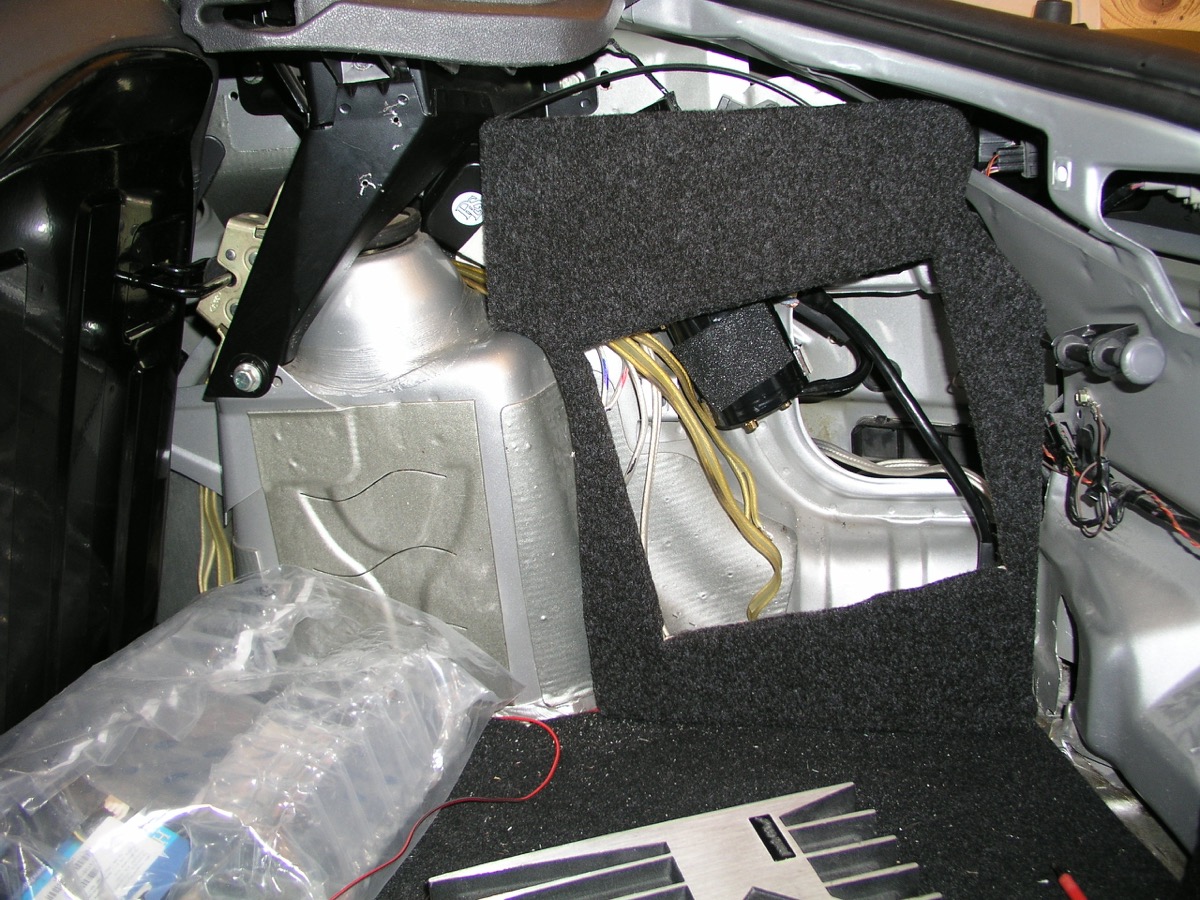
In focus I had s 3 channel system with a 10" subwoofer (DLS MW10) in boot in a box made to fit out of GFRP. Since puma has smaller boot, didn't want to lose any of it so ditched that idea and turned my attention to the rear boxes. For them I used dls 1070 ovals. These are, to my knowledge the biggest and most powerful ovals you can buy; 10x7", but the DO fit in 9x6" opening and they did fit to the boxes in the rear, although just!
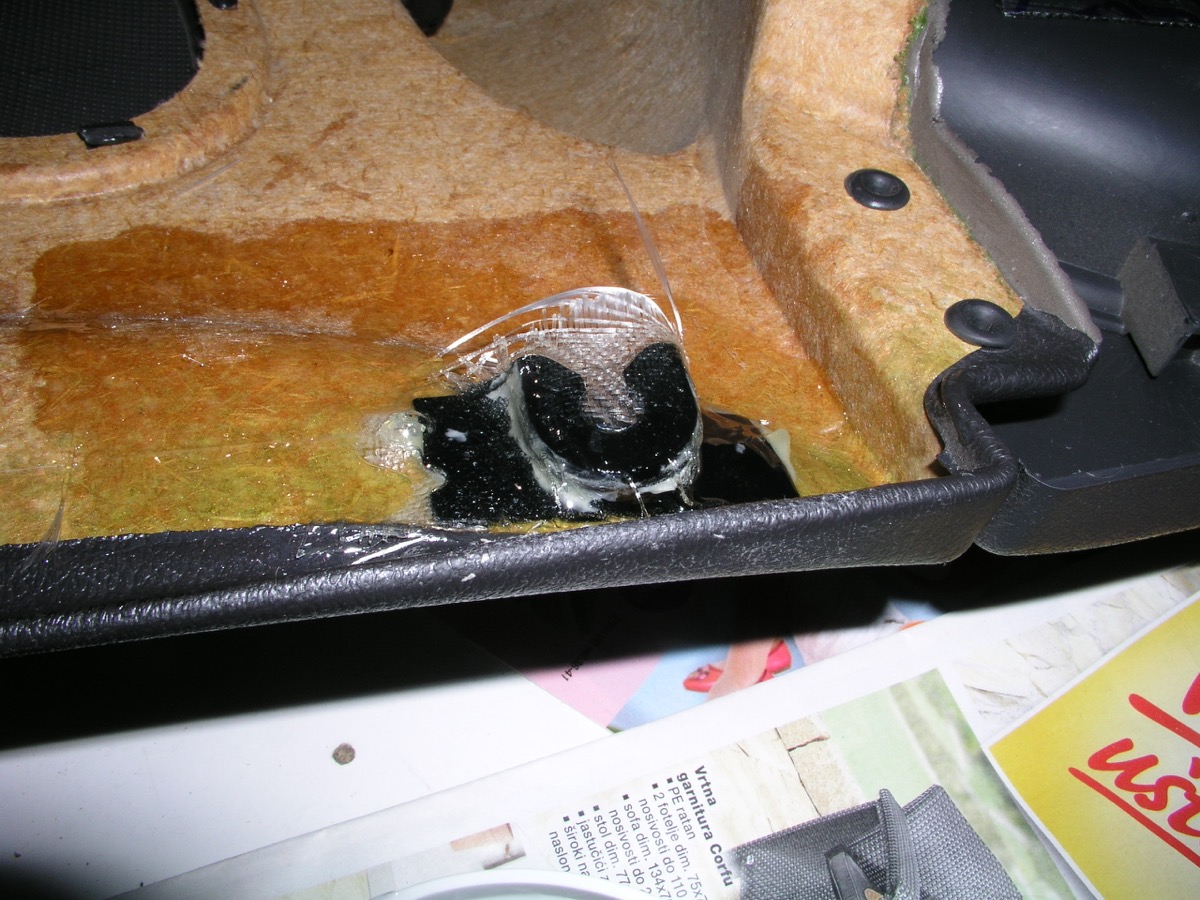
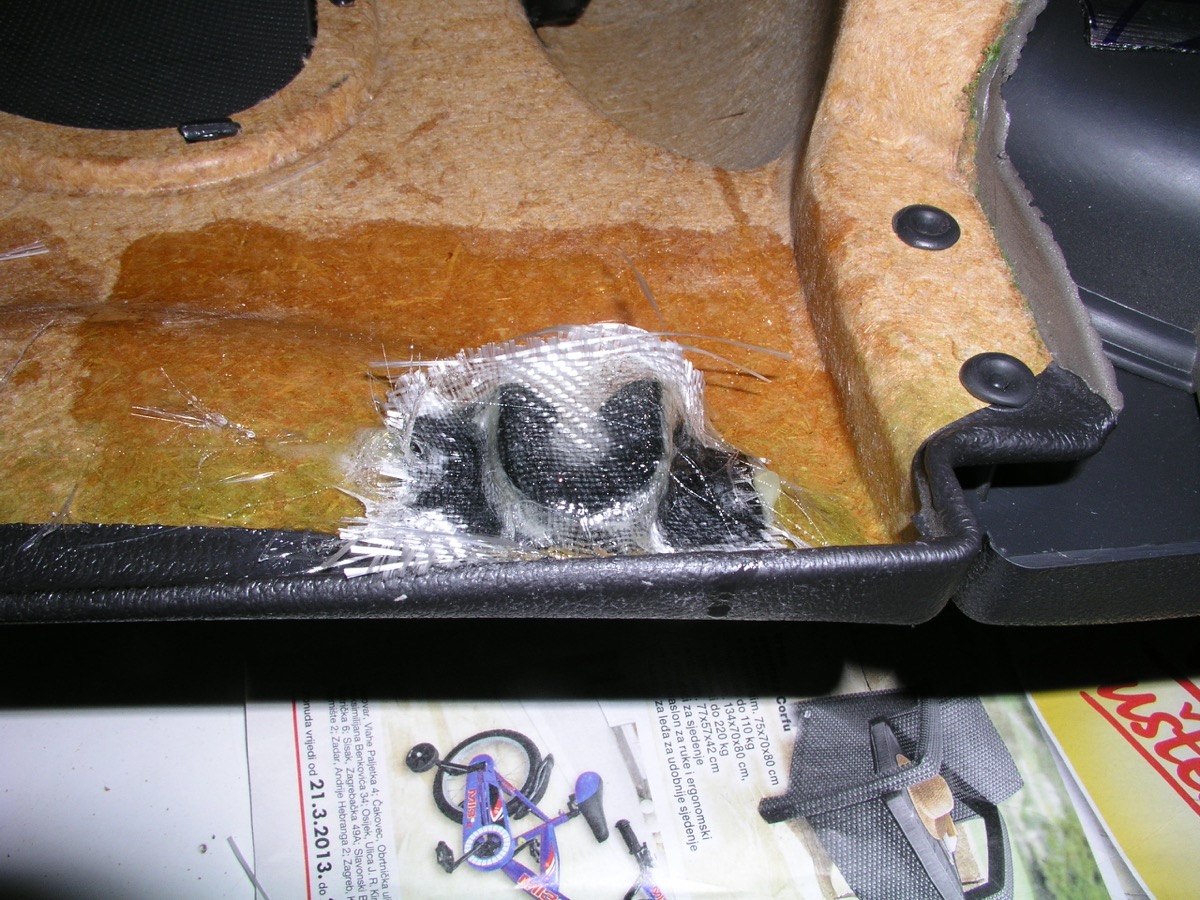
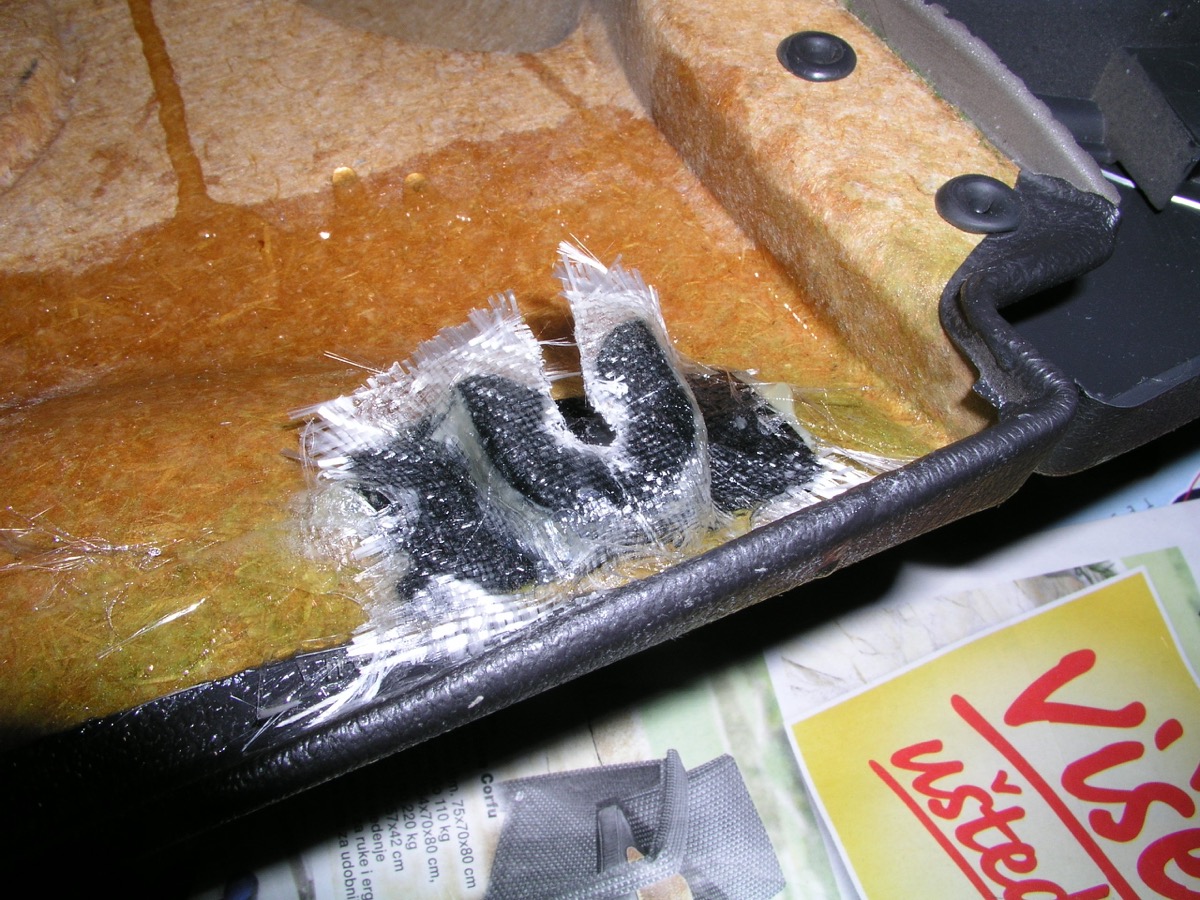
They are a viable replacement for a 8" subwoofer, have extremly powerful magnet and are quite heavy. That posed a problem of its own as you will see later.
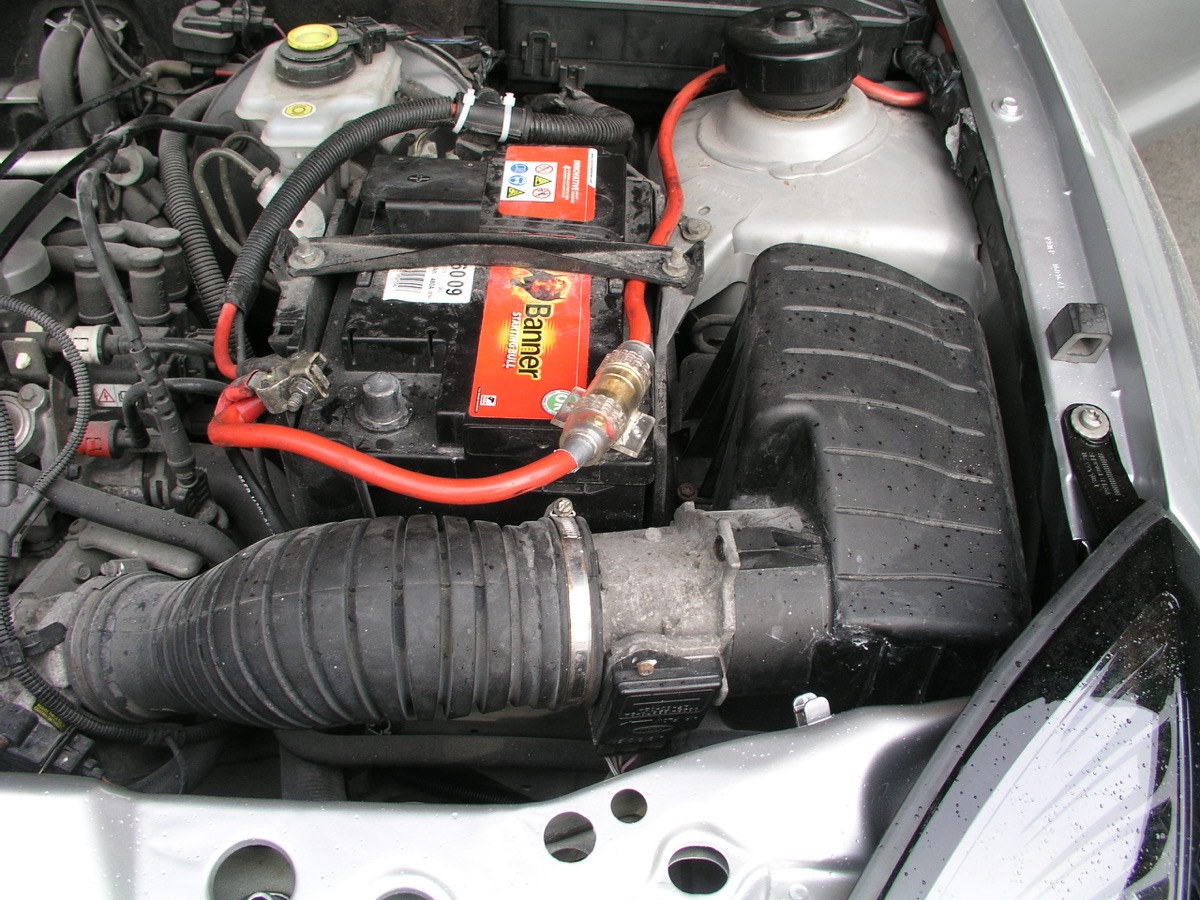
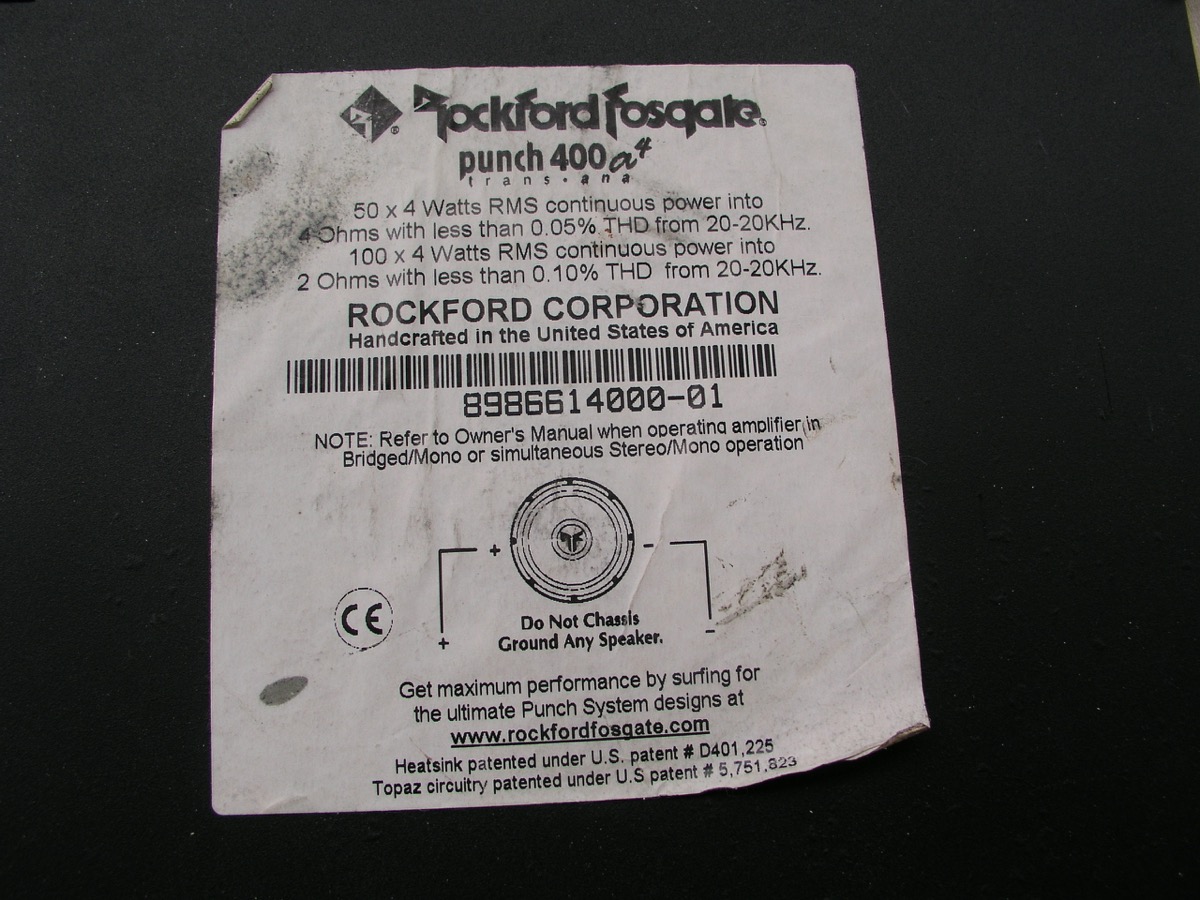
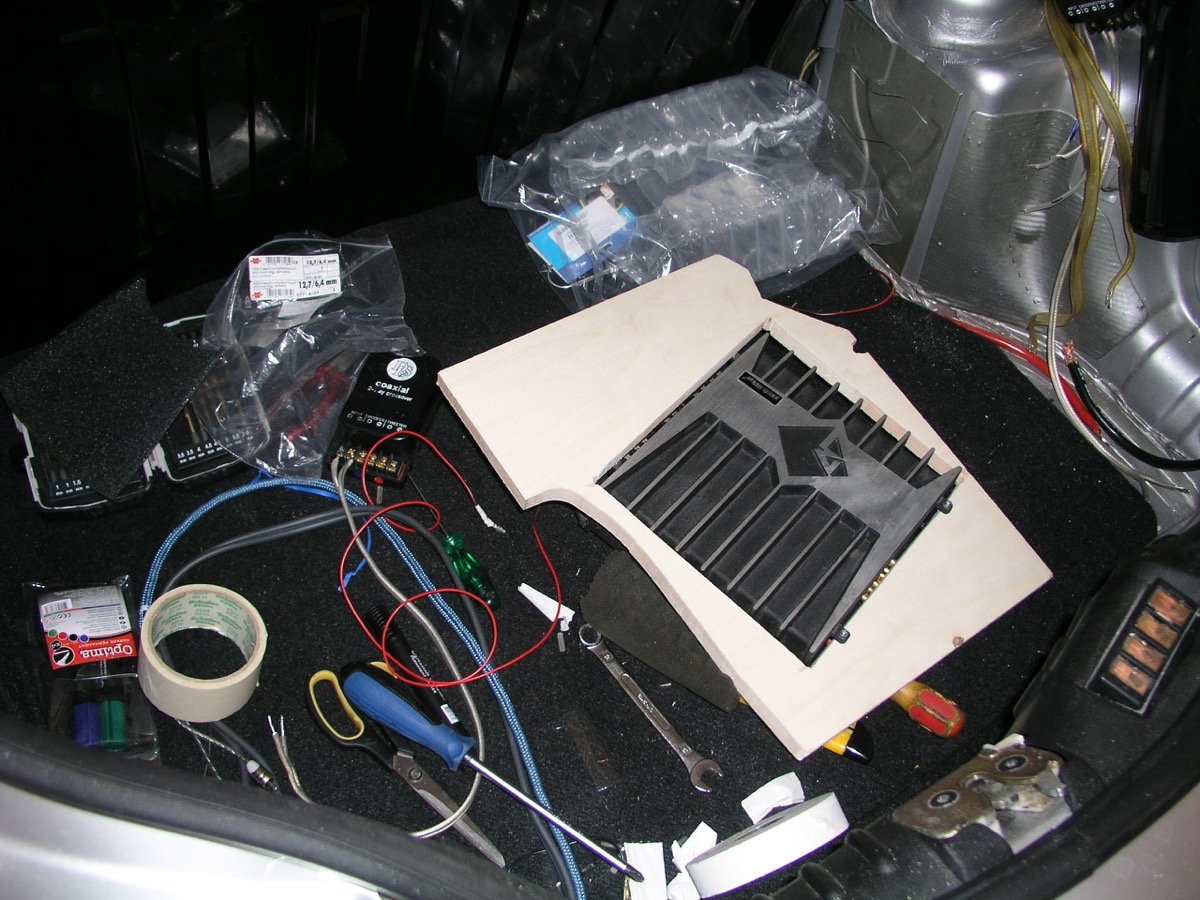
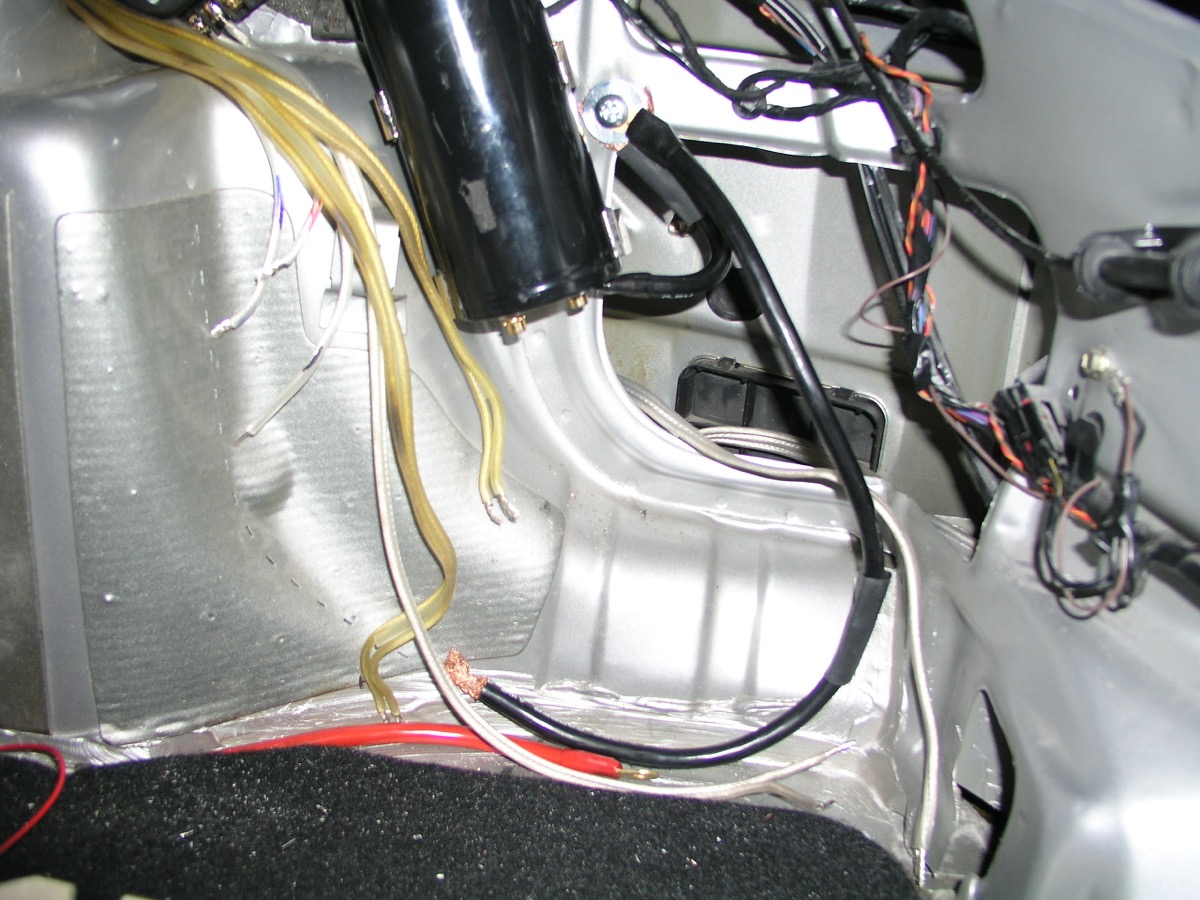
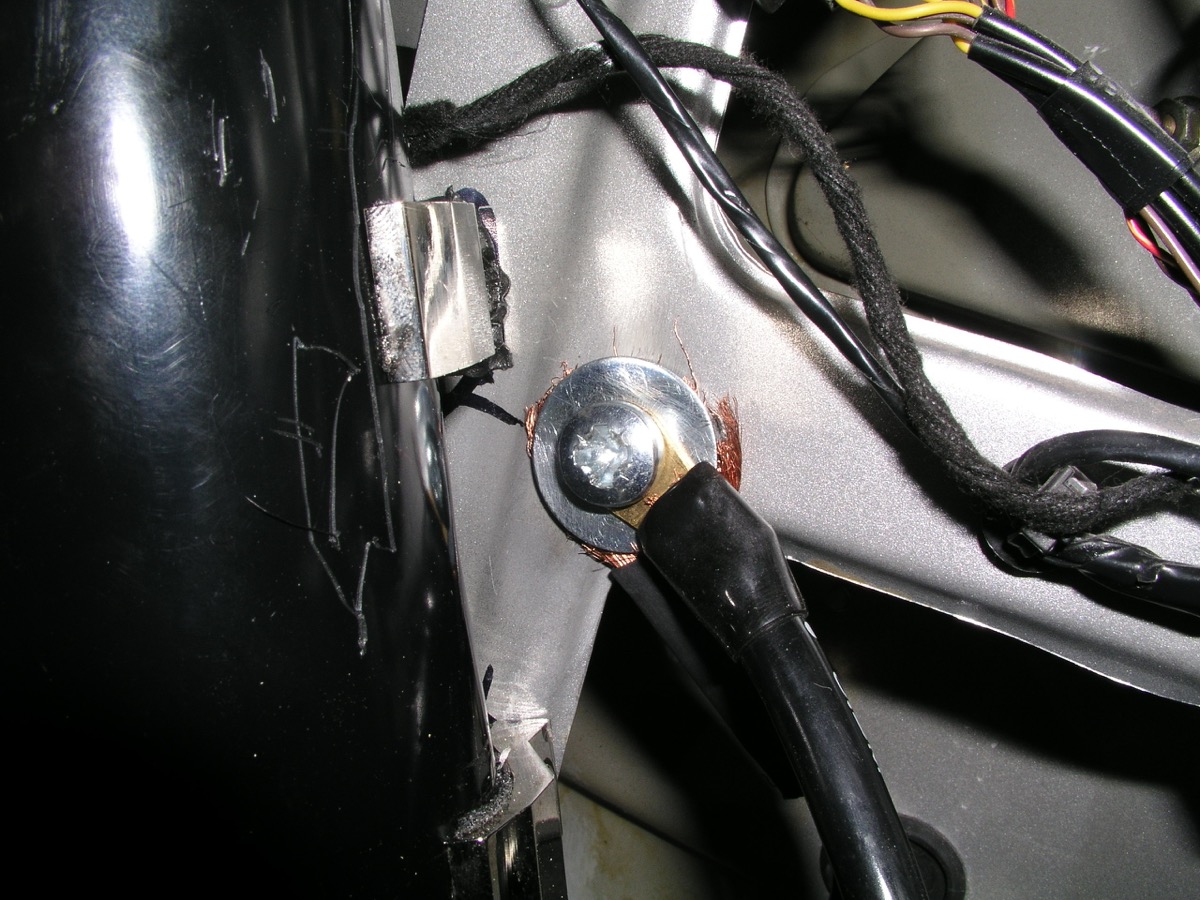
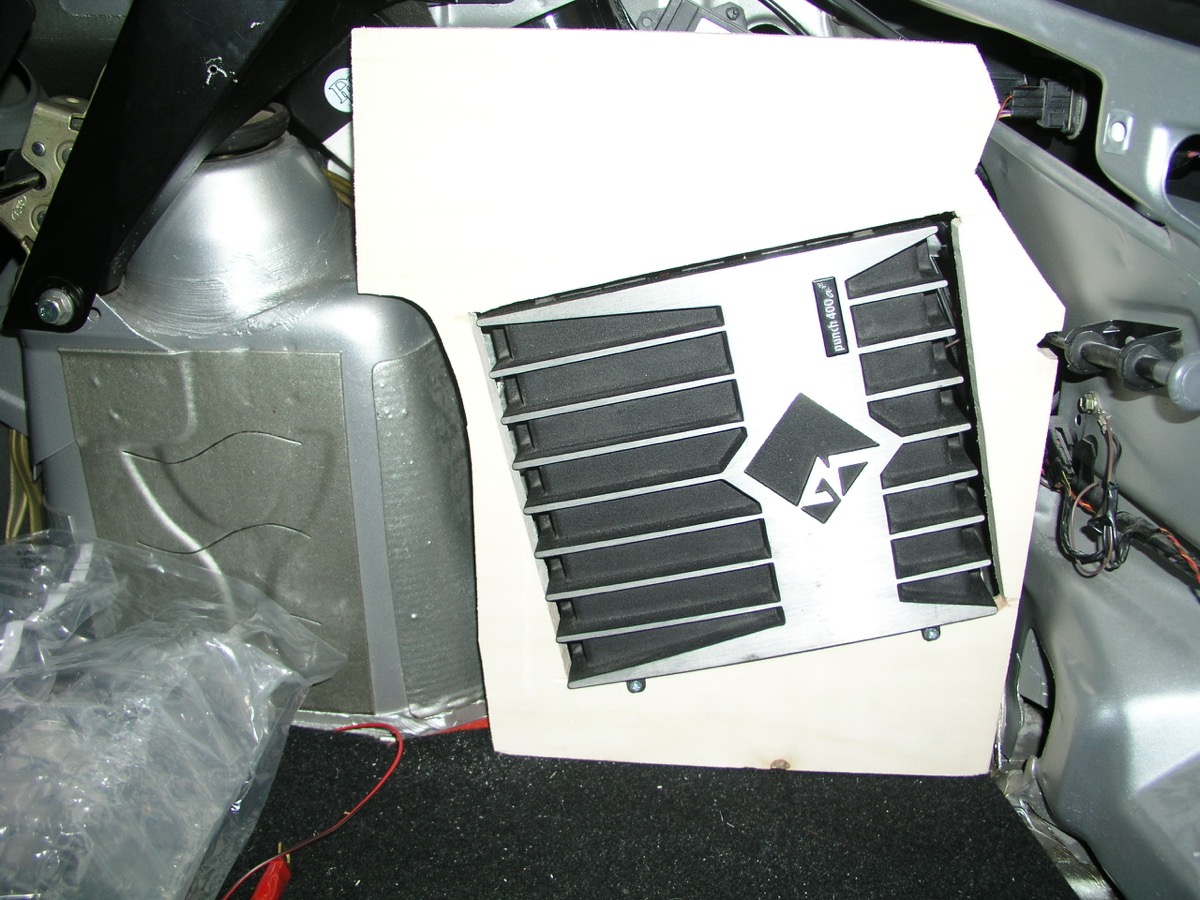
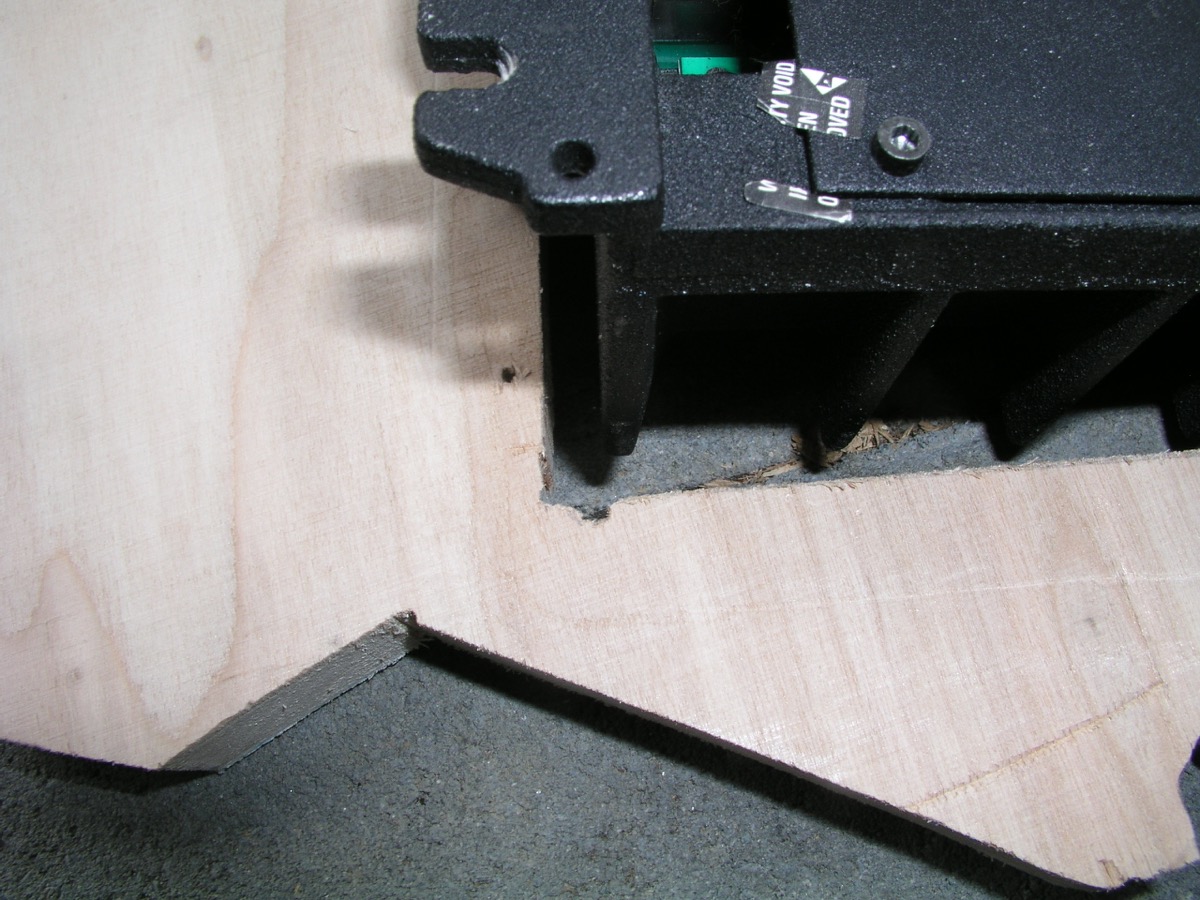
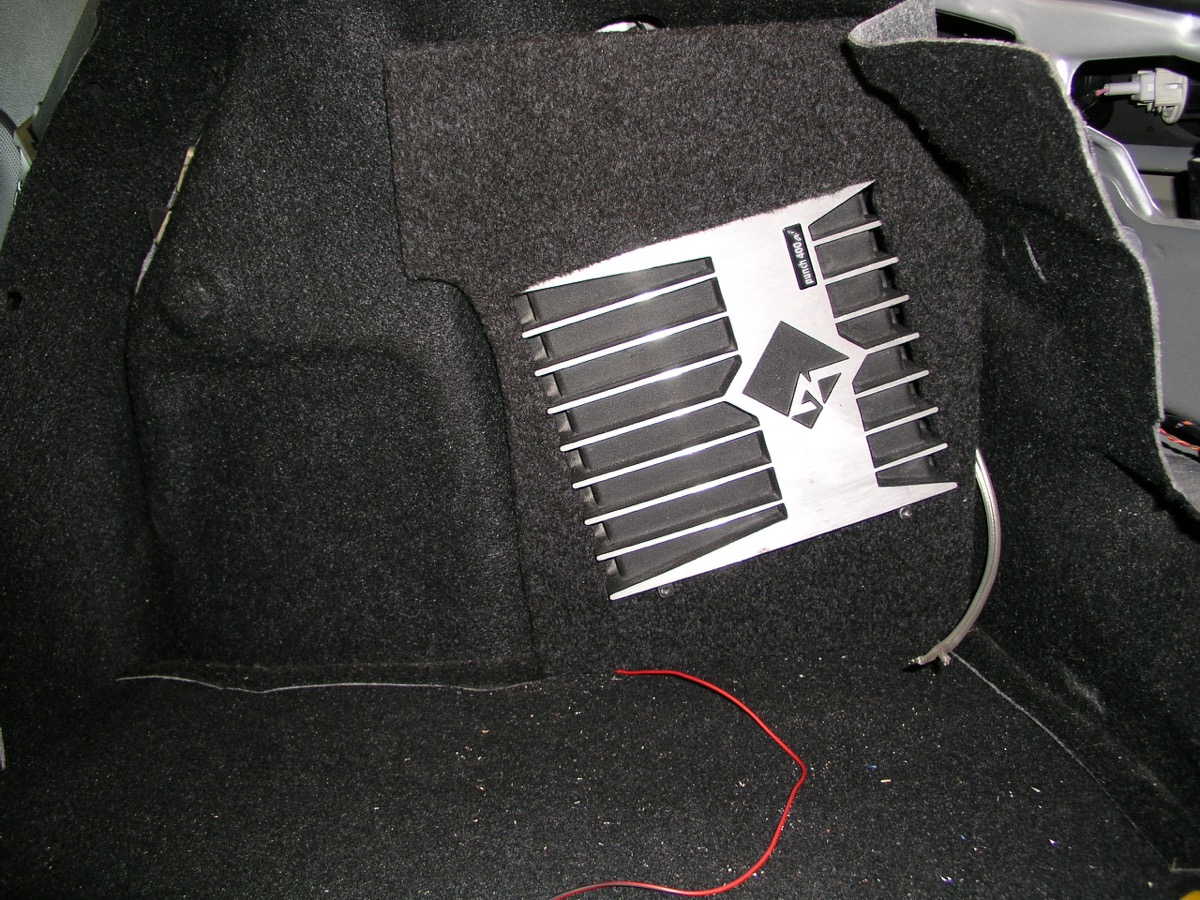
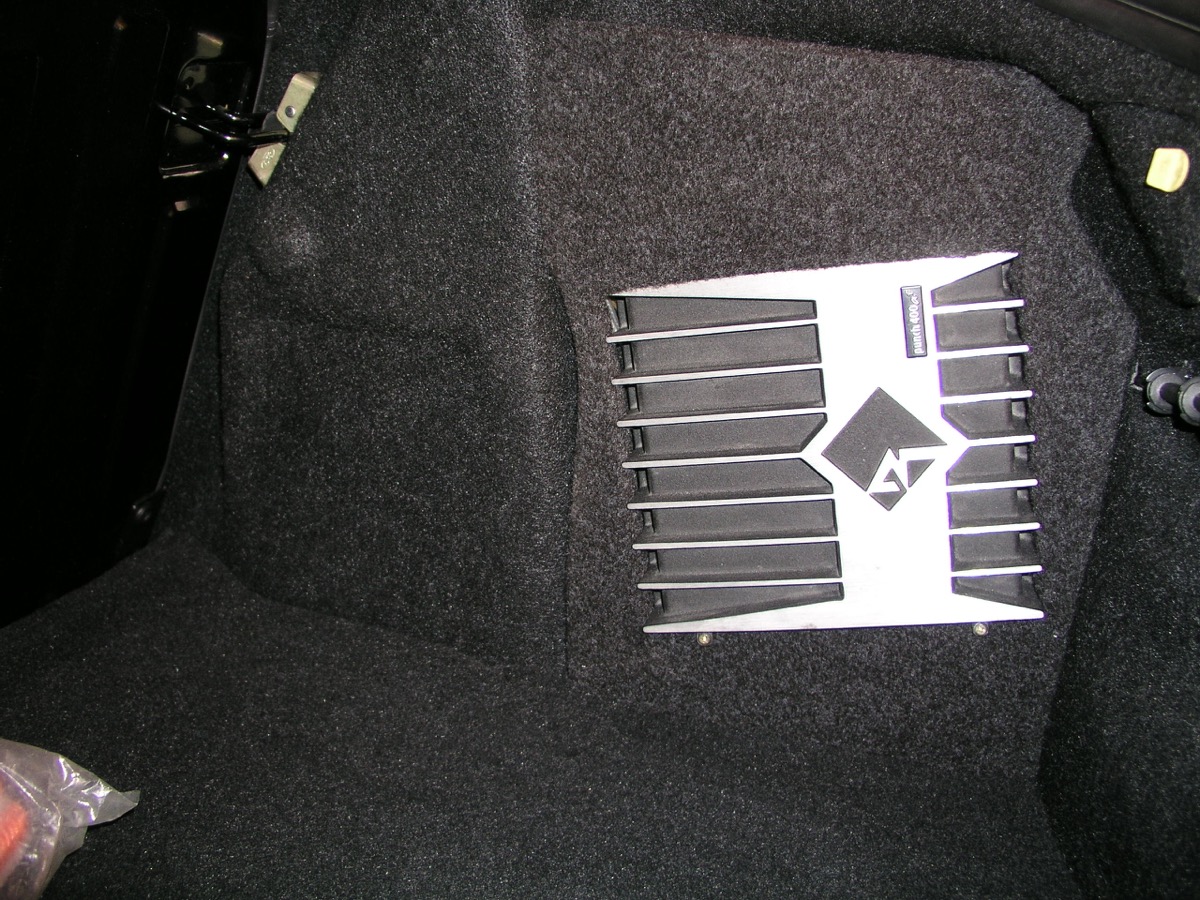
Finally, the power. I went for an old school rockford fosgate punch 400a4 amp. It is nominated as 4x50 Watts, but in reality it pumps out probably double, is extremly durable and failsafe. It is at least 12 years old and in that period of time I have never heard of a single one that had any kind of problem, and trust me, some people were abusing them really hard. Bonus for this amp is that is rather small unit that will fit nicely in the right corner of puma's boot. To go with it is capacitor of 1 farad: steady power supply is must have if you want to avoid any problems with amplifiers.
As you can see, I went for used components rather then new ones. I knew what to look for, found it and now will have fantastic system for a price that would cover just one mass produced average amp!
 
After long intro here is the actual build. Wasn't sure when would server time me out so split the post. Sorry for that.

So, here is the car, for starters, after respray job. BTW, the german export plates are gone now....

17KLbrT.jpg


The sterring stalk radio control in place....

S9H3evk.jpg


The sound deadening material I am using. The sticky 5mm foam

VTCKTXe.jpg


And the butyl stuff

HMAiFpU.jpg


These are russian products. They are basically the same stuff as dynamate only cost a fraction in price. If I were cynical, I'd say KGB probably just stole the blueprints of Dynamate to start with as STP products are labelled as production of Russian army :grin: But, note the price: 58 euro for bulk package of 4 sqm for 2 mm sounddeadening stuff! It is probably inferior to dynamate in last 5 percent of ability, but you can use it freely as it is cheap!
You can check it here: http://www.stp-distribution.com/en/" onclick="window.open(this.href);return false;
 
So, the boxes. As I said, I am puttig in them 10x7 ovals which is causing problems of their own. You need to cut out the bigger hole, but the problem is the base. I know for a fact that puma was the first ford ever to be constructed entirely on computers. The speakerbox looks like someone had a cracking good time in CAD and rendering mashine; not a single surface isn't twisted, recessed or deformed in a way! Bloody nightmare to put anything on it!

So, this is the box as it was originally, with some dynamating inside already...

TKAss5S.jpg


The hole enlarged and some MDF already in place to create a level surface for the speaker to sit on

32rEHG4.jpg


The MDF parts were glued in place. Also, I was worried about the strength of the box as a whole, since the speakers are big and heavy, so I glued a 8 mm MDF plate below

WMJFLON.jpg


Naturally, the complete box was treated with STP (aka Dynamate)

9TfLgXt.jpg


The speaker in place. With some STP below to even out the irregularaties in surface. I glued the speaker on top of using selftapering screws

0TD9c3H.jpg


The back side showing the magnet size and the top of the box also tretaed with STP

77wsyGF.jpg


To finish the box I put in some filling (don't know the name in english, sorry, I used to polyester stuff used for stuffing the pillows; very cheap, and as effective as the expensive stuff for the speakers).

The box in place in the car!

ZoyELnX.jpg


9eObqFx.jpg


Now, the problem with the bottom part of speaker is that it was touching the back of rear trim. I dealt with it by sawing away two fixation points for the rear grill and glueing it in place!

odFWRDy.jpg


Now, since we have already moved to rear trim, they were also treated; othervise they would rattle along with the music!

So, of with that cloth/insulation....

JutZbJ8.jpg


(sorry for the bad photo, taken using mobilephone)

Starting to apply the STP stuff all around...

BrJYTa0.jpg


And some more...

zzab0vp.jpg


o60ibQd.jpg


Back with that cloth on and on top of it the STP gold, the foam, as you can is in pictures. That should secure everything. By this point I should say that you can feel it already in your hand that the trimcard is much stronger, a bit heavier and not so wobbly (if that is tha right word; i.e it is much more resistant to twisting and bending)

NvUTjms.jpg


Also, note the clip fixation points; they were taped over so the attachment clips are very tight and secure
 
Nice topic. Hope you go on... i would love to get some stuff like this on mine :D
 
Switching to the doors

0zep1lV.jpg

(me working)

The tools: a hotair gun, a drill and a saw (don't know the exact name in english; the translate would be the stiching saw, I guess you understand what kind of saw is it)

KjUeDFg.jpg


Treating the speaker encolosure with STP. As advised closed it and sealed

bN77gYk.jpg


Also, treated the innerside of outerskin of doors and rear panels

xRNa8kU.jpg


jpXAvEg.jpg


It is not needed to do 100% coverage! You just try knocking and you hear the difference after treatment. Also, the door shut in a much nicer, 'more expensive' way. Instead of a thin! you hear a mighty thud!

The hole for the speaker is a non standard one. To accomodate 6,5" speaker it had to be enlarged. For that I was using that saw. I found the best way of doing it was to do a cutting pattern in MDF instead of just making a mark on door.

WfDZVIT.jpg


You can see the MDF ring on floor; I glued it temporarely with double sticking tape, hacked the hole as needed and detached it. Worked like a charm!

Speaker in place. No problems at all. The white stuff in top of it was to make sure it is not touching the trim. As you can see, no imprints left, so everything is clear!

r7MZqHX.jpg


I used the same technique for the rear speakers and found out that needed to saw that two points away!

h6rWyuM.jpg
 
Excelent thread, following it with interest :)

by the way
Wild E. Coyote said:
...and a saw (don't know the exact name in english; the translate would be the stiching saw, I guess you understand what kind of saw is it)

It would be called a 'Jig saw' in English but I think stiching saw makes much more sense, I might start using that instead! :)
 
The doorcards. They also needed to be treated, or they would rattle.

d4JbpLH.jpg


But, when I was dismantling the car, the two clips broke of the card fixation points. So I had te repair them. First I glued them in place, but wasn't very comfortable with that so reinforced them with some GF. I used expoy resin and put two layers of GF over it just to make sure it would hold together in the long run.

LskIC9m.jpg


The second layer....

HMcWwew.jpg


And finaly a cutout for the clip!

04jJ1p6.jpg


It became very thick so had to sand some away and then I could push in the clip. It should be OK, I hope....

Final version of doorcards. Treated with STP and the spounge

Aum1q0h.jpg


Switching to HU.

First had to spray the facia mask. It was an original Ford one, but in black. So used a can of moondust silver a gave it two coats. Looks very nice. At the same time took the rim of the Alpine and resprayed it in silver as well to match the color of facia in puma.

HjJTbQG.jpg


I could add that the ford mask is very well built; it sits tight and in a set you get the back clip as well. Strongly recommended!

Routing the power cable. Nothing spectacular here, just note the fuse

FHG9CoK.jpg


Routing the cables inside. Also, at this point I have put back in the carpet

TRyMFTE.jpg


Without seats puma is actually a spaceous car! :grin:

RHFzEzu.jpg


HU!
when trial fitted the Alpine to the facia adaptor, I noticed that HU would sit in rather deep. That would have looked ugly (IMHO) so decided to bring it forward for a 4-5 mm. Took a MDF plate, hacked an opening to match and tried it

r9pM4ij.jpg


This is still full thickness of 8 mm

zuENdRl.jpg


Thinned to a mesure

xjMBJLb.jpg


And gave it respray in silver to match it to the rest of a combo

EMudJBp.jpg


Final result

aFaG0S7.jpg


And in place! Sits just about right, in line with the rest of the facia, don't you think?

fGx8ckE.jpg


At this point I should add that the rear panel of Alpine head unit is not as strong as in original HU. when you push in the slider it goes, but when trying to pull out, it rotates a bit and creates a strong resistance. Once put in, the HU i virtually IMPOSSIBLE te get out so mind the wiring etc before you push it in!

All the wires were secured using that spoungy thing (STP gold) so they wouldn't rattle.

The only thing left to do is boot and amp and capacitor instalation....
 
It's great what you are doing here, and sharing it with us. :eek:k:

Wild E. Coyote said:
Also, the door shut in a much nicer, 'more expensive' way. Instead of a thin! you hear a mighty thud!
....you mean it sounds like a Golf...!
 
Not too much done to be shown. I was working on boot. This is the amp I am using

29ExOII.jpg


MFFmN0s.jpg


The idea was to put everything in the right corner of the boot.

K4ralrv.jpg


Already in place is the capacitor (1F) that should keep the amp with enough current even during fastest attacks

yLAajCH.jpg


Also there is some space for crossovers

HZN2qaW.jpg


For negative (earth) connection I drilled a hole here, scraped the color using rotating brush and secured it with an M13. The nut on the other side is secured with blue loctite; should be ok in the long run

bcjdeYU.jpg


Trial fit of amp

k2SyCrJ.jpg


That should be ok, but the cutout in wooden plank is too big. Have to make another one, to sit better on the amp

gW5etK7.jpg


Too much space there

Will do tomorrow another one. This was the first attemp. Still undecided on the fitment i.e. how will I attach and secure that wooden plank to the car. It has to be dismanteable to prevent access to the rear light in event of a need of a bulb change. Will think about it during night; the plan is to finish it of tomorrow...
 
SENATEpumA said:
It's great what you are doing here, and sharing it with us. :eek:k:

Wild E. Coyote said:
Also, the door shut in a much nicer, 'more expensive' way. Instead of a thin! you hear a mighty thud!
....you mean it sounds like a Golf...!

:lol: :lol:

It's nice when you get the doors 'golf sounding' ..

greasing up the strikers and door catch mech. makes a difference too.. :)
 
So, here it is! Ta-taaaa!
It's done!

I had cut a new plank, made it to measure and trimmed it in fabric to match the rest of boot

K4ralrv.jpg


This was just checking if it will fit OK. In the rear you can see the capacitor already in place with some protective foam on it; I was worried amp might be touching the capacitor.

Amp in place, another trial fit

2T7uSKn.jpg


After that succesful test I plugged in everything. The speakers, signal from HU and powercables, but DIDN'T power the system yet! You have to charge the capacitor first! The easiest way of doing it is to use a bulb; you connect by hand both parts of fuse box via a bulb. It will light up. When capacitor is charged, it will turn itself down; when there is no light anymore, the capacitor is charged and the system can be powered!

Final fitment

35KP9xE.jpg


I cut a bit of original trim and inserted that notch in; fits perfectly, looks OEM!

I haven' mentioned twitters. I had made small panels (GF) in 2002. when they were installed in focus. As they were perfectly OK, just put them in puma. They are glued. Maybe at later stage will move them to A-pillar trim, but for the time being they are ok as they are now.

VY9rEZa.jpg


Looks of the system now

8RNn28L.jpg


And how does it sound? It sounds fantastic! Loads of power, can be very loud, but all the hard work put in acoustic treatment paid off. Nothing rattles (no, el dude, the rear cards don't rattle!), just music. I have to tweak a system a bit; I think I'll turn down the front twitters a bit (by 2 dB, to be precise, using LPAD of two ceramic resistors, 0,8 and 15 Ohm) and the rear ones even more, probably by 4 dB. The way system is working now is too bright for my liking, and the twitters from behind confuse the stereo image.
I'll allow about two weeks for the HU to play-in, and then will start serious evaluation of my system. Also, the SQ is so good that I can hear the ,imitations of mp3 encoding from my iPod; all the music will have to be recoded in apple lossles format. The iPod is between seats; it was the easiest way to route USB cable there

aAUZzsy.jpg


Funny story regarding that iPod. I got it for free as it wasn't working. You could hear it powering up, and then grinding noise from inside. It wouldn't pass the apple logo on screen. Anyway, I saw it had a mark on one corner; it must have dropped on the floor and hard disc inside went south. So I oredered another one from e-Bay (and 250 Gb!) replaced it and now I have really BIG music collection with me in puma.

I would just want to stress one thing: ALL the components except HU in this project have been second hand. I spent 78 £ on amp and another 66 £ on rear speakers. These are really high quality components worth easily ten times that value. I am saying that because often there are question(s) here regarding the quality of speakers of all kinds.
My advice would always be: go for really good quality second hand components rather then new mass products. The quality never gets old, and speakers and amps are really durable; if they are operational, they should be OK and MILES better then something out of e_bay.

I just wished you could hear the sound from this system! :grin: :lol:
 
Just another update. I have tweaked system a bit. The front twitters are attenutaed by 2 dB using LPAD technique; it is very simple, using ceramic resistors smoothes everything a bit. Google a bit; there are plenty of online calculators. Anyway, when treated front speakers, the twitters from back were too loud and were confusing stereo image and dragging it back which is not natural way of listening to music. I mean, if you go to a concert, the band is not behind you, isn't it?
So, I let the HU to bed in; the sound is now better, with more clarity and smoothness. Still had the problem with stereo image being too far behind. Tried to deal with it switching the amp to low pass for the rear speakers, but the cutoff point is set at 90 Hz which is very low, meant for the subwoofer. It did solve the problem of stereo image, but the sound was lacking some force. The front woofers are installed in rather small enclosures in doors so I was after some attack from those ovals. And today it arrived! I installed the LPADs on them, reduced the twitters by 4 dB and now it is as it should be. Loads of power thanks to that Rockford Fosgate, attack when needed and sweet twitters. Now the project is complete and you can enjoy in SQ music without rattle!
 
I'm no lover of massive ICE installs, but nevertheless I so admire what you have done and the sheer professionalism of it all.

Bravo that man!
 
The idea was to get excellent SQ out of original ICE instalment points, so to say and to avoid masive if not any modifications to the interior...
But when you hear something good (the best ICE I have ever heard was in one twingo) there is no going back. The bug bit you....
 

Latest posts

Back
Top