FlashBastd
New member
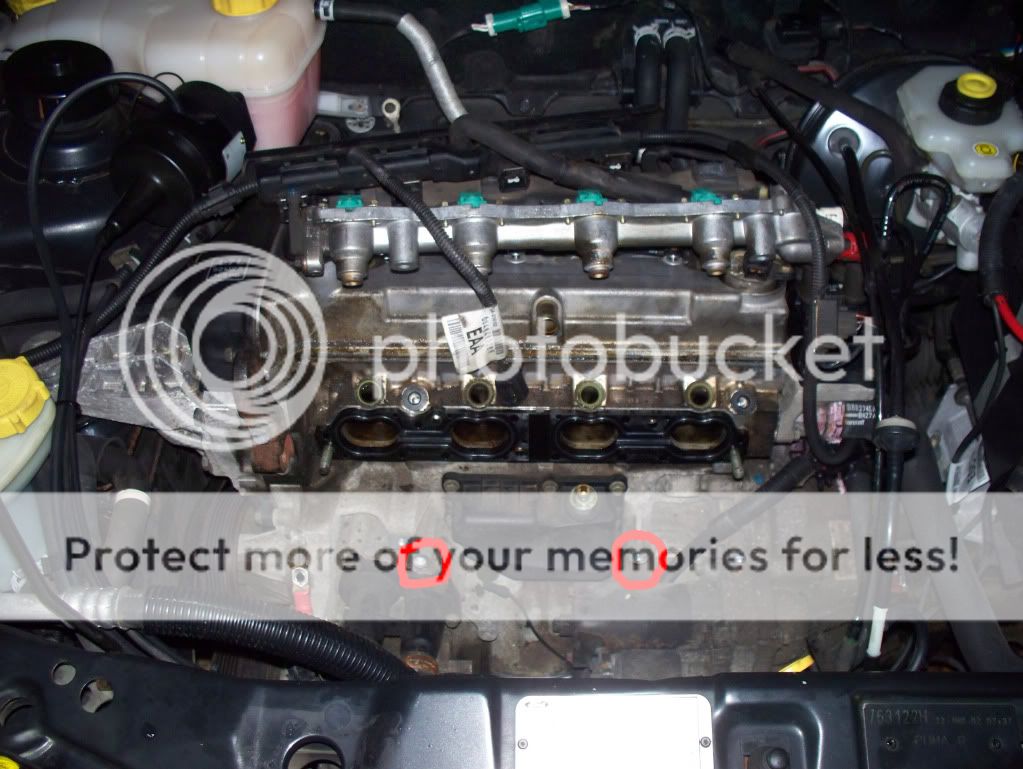
As promised, parts list and how to for fitting the inlet.
Recommended parts for fitting FRP inlet manifold, I have provided prices where they were readily available, no clue on the supports, but if you work off £0.50 each on the bolts you should be ok. You might get away without replacing the ISCV and manifold gaskets, but do you really want to get stuck with the engine in bits when you find out that the old ones are no good? My TB gasket was definately goosed, but the others looked ok, though the inlet gasket did have a split.
Puma, (+)"GB", Zetec 1.7 EFI, 3 Door Coupe, RHD
-TB Gasket
Part Number: 1031077
Retail Price: £7.59
Puma, (+)"GB", Zetec 1.7 EFI, 3 Door Coupe, RHD
-ISCV Gasket
Part Number: 7165249
Retail Price: £2.10
Puma, (+)"GB", Zetec 1.7 EFI, 3 Door Coupe, RHD
-Inlet Manifold Gasket
Part Number: 1031019
Retail Price: £46.17
2 x 1663888 – M6 bolts for support brackets to manifold
2 x 1012255 – M8 bolts for support brackets to block
9097886 – support bracket
9097885 – support bracket
9097900 – inlet pipe
And here is how I did it;
Disconnect negative terminal connection to battery
Remove oil filler cap
Remove hex bolts retaining engine cover
Remove engine cover
Replace bolts in rocker so you don’t loose them
Undo jubilee clips at each end of air intake
Remove air intake hose
Remove aux drive belt from alternator (jack up and support car, 13mm socket on tensioner, reach up and remove belt from alternator)
Remove front grille (2 x torx)
Remove o/s headlamp (2 x torx, twist clip, pull forward, undo electrical connector, undo vent hose)
Disconnect alternator (elec connector, single power cable (10mm nut))
Remove alternator (two 15mm bolts to end of engine, one on the front (13mm?), it is partly for access to the lower end bolt, that you remove the headlamp)
Disconnect VCT actuator (gearbox end of rocker cover)
Disconnect TPS
Disconnect IAT
Disconnect ISCV
Disconnect 3 x vacuum pipes from inlet
Disconnect throttle cable (remove circlip, pull off, including rubber section, twist and remove from bracket)
Remove four bolts retaining TB
Remove TB (mine did not want to come off, it took some taps with a hammer to remove)
Remove bolt from dipstick tube
Remove crank case breather pipe
Remove fuel rail, unclip each of the four injectors, then undo two bolts
Remove three retaining bolts from inlet
Remove two retaining nuts from inlet
Remove inlet
Remove inlet gasket
Clean up face on head
Fit new inlet gasket
Remove rubber tubes from old inlet
Test mount FRP inlet so you can see how much the dipstick needs to be bent
Bend dipstick tube, I used a spring type drain cleaner to strengthen the tube and stop it from kinking
Fit rubber tubes to FRP inlet

Fit supports to engine block, using M8x13mm bolts
Fit FRP inlet, connecting rubber hoses before mounting on studs
Fit dipstick to FRP inlet, I removed the plastic trim next to the bonnet latch to give better access
Tighten nuts and bolts in a diagonal type formation, the bottom middle bolt is a nightmare, I only managed to get to it with a thin ring spanner
Join support brackets to the bottom of the inlet, using the same bolts as for the dipstick, but with a washer. A ratchet spanner is very useful for these
Refit alternator, access through headlamp aperture is helpful in fitting the front mounting bolt, access is very tight
Refit aux drive belt, bit awkward, but you can do it on your own, easier with two though I would expect
Refit fuel rail
Connect VCT actuator
Clean up mating face of TB, refit with new gasket, tightening bolts diagonally
Clean up mating face of ISCV, refit with new gasket
Connect IAT, I had to go under the car to adjust the routing of the cable slightly
Connect alternator & power cable
Connect ISCV
Connect TPS (run cable under TB)
Test fit vacuum pipes, rubber pipe to fuel rail will need shortening, as will the stiff one going to the back of the inlet, this one is easiest to trim at the far end, near the bulkhead where it enters a rubber elbow. I just used some good scissors for both.
Check everything is tight.
Fit inlet hose, using original jubilee clips, do this last as once in place access under the plenum is much more difficult
Reconnect battery
Cross your fingers, touch wood, pray to your God, etc.
Good luck, anything I have got wrong, or any queries, please feel free to ask.
Recommended parts for fitting FRP inlet manifold, I have provided prices where they were readily available, no clue on the supports, but if you work off £0.50 each on the bolts you should be ok. You might get away without replacing the ISCV and manifold gaskets, but do you really want to get stuck with the engine in bits when you find out that the old ones are no good? My TB gasket was definately goosed, but the others looked ok, though the inlet gasket did have a split.
Puma, (+)"GB", Zetec 1.7 EFI, 3 Door Coupe, RHD
-TB Gasket
Part Number: 1031077
Retail Price: £7.59
Puma, (+)"GB", Zetec 1.7 EFI, 3 Door Coupe, RHD
-ISCV Gasket
Part Number: 7165249
Retail Price: £2.10
Puma, (+)"GB", Zetec 1.7 EFI, 3 Door Coupe, RHD
-Inlet Manifold Gasket
Part Number: 1031019
Retail Price: £46.17
2 x 1663888 – M6 bolts for support brackets to manifold
2 x 1012255 – M8 bolts for support brackets to block
9097886 – support bracket
9097885 – support bracket
9097900 – inlet pipe
And here is how I did it;
Disconnect negative terminal connection to battery
Remove oil filler cap
Remove hex bolts retaining engine cover
Remove engine cover
Replace bolts in rocker so you don’t loose them
Undo jubilee clips at each end of air intake
Remove air intake hose
Remove aux drive belt from alternator (jack up and support car, 13mm socket on tensioner, reach up and remove belt from alternator)
Remove front grille (2 x torx)
Remove o/s headlamp (2 x torx, twist clip, pull forward, undo electrical connector, undo vent hose)
Disconnect alternator (elec connector, single power cable (10mm nut))
Remove alternator (two 15mm bolts to end of engine, one on the front (13mm?), it is partly for access to the lower end bolt, that you remove the headlamp)
Disconnect VCT actuator (gearbox end of rocker cover)
Disconnect TPS
Disconnect IAT
Disconnect ISCV
Disconnect 3 x vacuum pipes from inlet
Disconnect throttle cable (remove circlip, pull off, including rubber section, twist and remove from bracket)
Remove four bolts retaining TB
Remove TB (mine did not want to come off, it took some taps with a hammer to remove)
Remove bolt from dipstick tube
Remove crank case breather pipe
Remove fuel rail, unclip each of the four injectors, then undo two bolts
Remove three retaining bolts from inlet
Remove two retaining nuts from inlet
Remove inlet
Remove inlet gasket
Clean up face on head
Fit new inlet gasket
Remove rubber tubes from old inlet
Test mount FRP inlet so you can see how much the dipstick needs to be bent
Bend dipstick tube, I used a spring type drain cleaner to strengthen the tube and stop it from kinking
Fit rubber tubes to FRP inlet
Fit supports to engine block, using M8x13mm bolts
Fit FRP inlet, connecting rubber hoses before mounting on studs
Fit dipstick to FRP inlet, I removed the plastic trim next to the bonnet latch to give better access
Tighten nuts and bolts in a diagonal type formation, the bottom middle bolt is a nightmare, I only managed to get to it with a thin ring spanner
Join support brackets to the bottom of the inlet, using the same bolts as for the dipstick, but with a washer. A ratchet spanner is very useful for these
Refit alternator, access through headlamp aperture is helpful in fitting the front mounting bolt, access is very tight
Refit aux drive belt, bit awkward, but you can do it on your own, easier with two though I would expect
Refit fuel rail
Connect VCT actuator
Clean up mating face of TB, refit with new gasket, tightening bolts diagonally
Clean up mating face of ISCV, refit with new gasket
Connect IAT, I had to go under the car to adjust the routing of the cable slightly
Connect alternator & power cable
Connect ISCV
Connect TPS (run cable under TB)
Test fit vacuum pipes, rubber pipe to fuel rail will need shortening, as will the stiff one going to the back of the inlet, this one is easiest to trim at the far end, near the bulkhead where it enters a rubber elbow. I just used some good scissors for both.
Check everything is tight.
Fit inlet hose, using original jubilee clips, do this last as once in place access under the plenum is much more difficult
Reconnect battery
Cross your fingers, touch wood, pray to your God, etc.
Good luck, anything I have got wrong, or any queries, please feel free to ask.
 k:
k: