FRP314 Under Shell Works

ProjectPuma

Help Support ProjectPuma:

This site may earn a commission from merchant affiliate links, including eBay, Amazon, and others.

Williamsclio1

Member
Joined
Oct 27, 2009
Messages
242
Ok all the time has started to protect the underside of the car. I hope my updates help others also looking to protect there car for years to come. Open to ideas and suggestions along the way as this is the first time I have attempted a task to this scale.

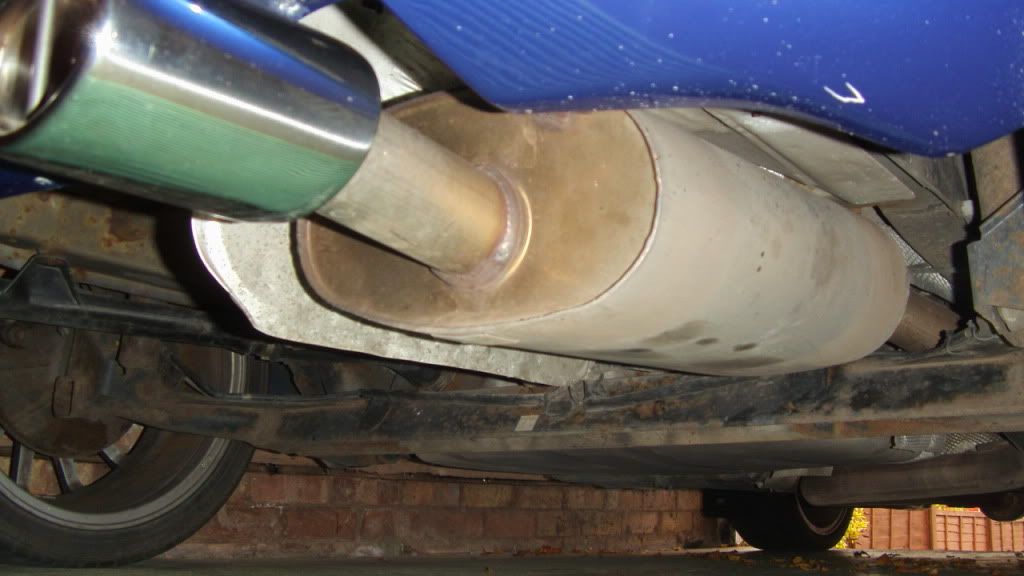
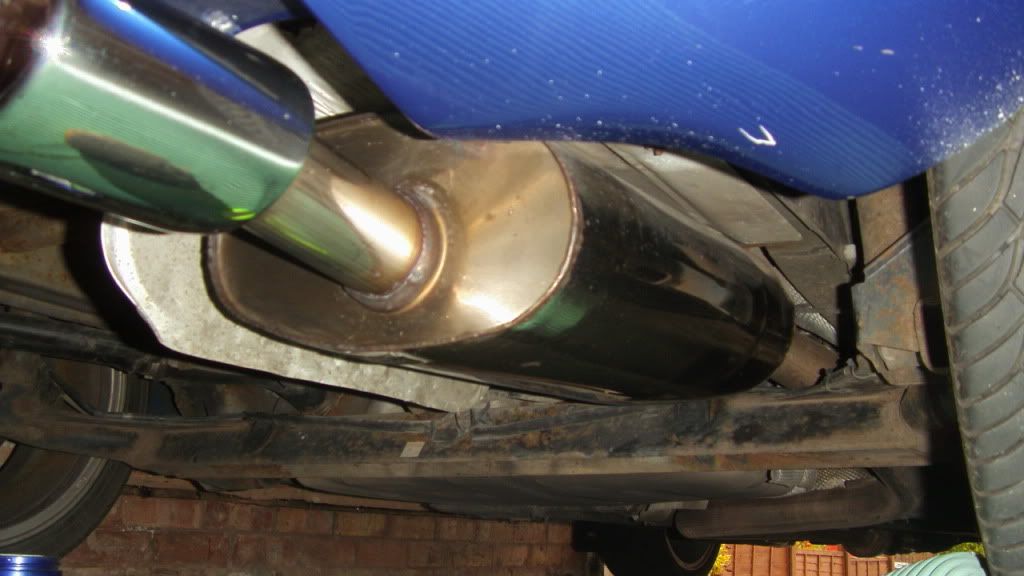
At lunch time today I had an hour to burn so decided to make a start on the back box, even tho in the next few days I will be removing it fully to seriously tweak.
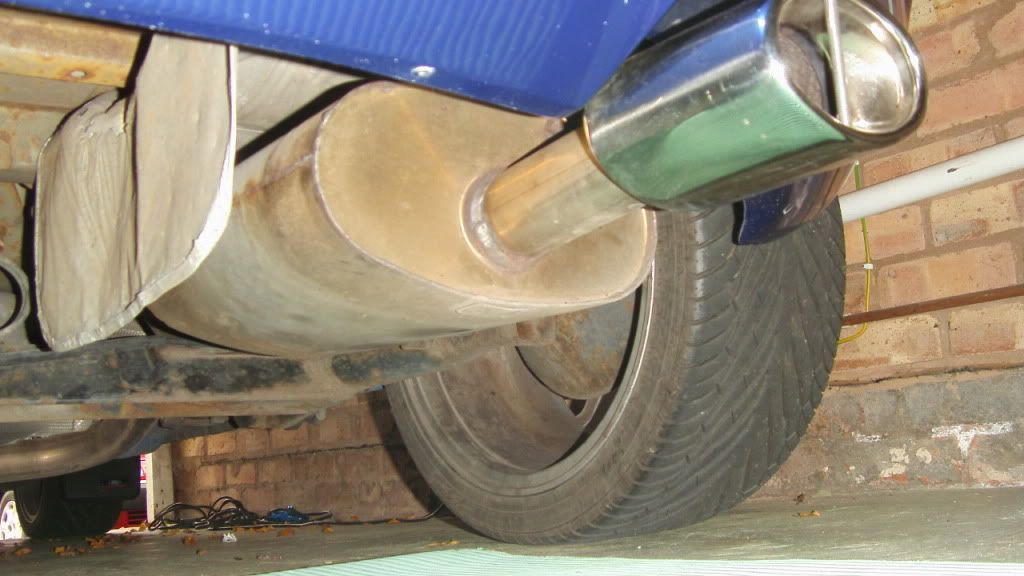
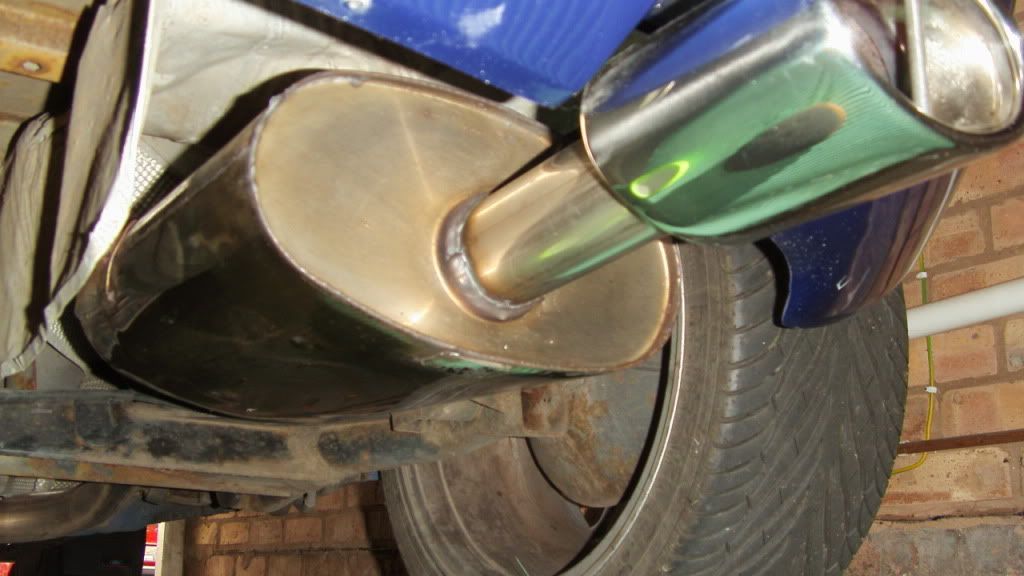
Exchaust-BEFORE.jpg

Exchaust-AFTER.jpg


ExchaustBEFORE.jpg

ExchaustAFTER.jpg


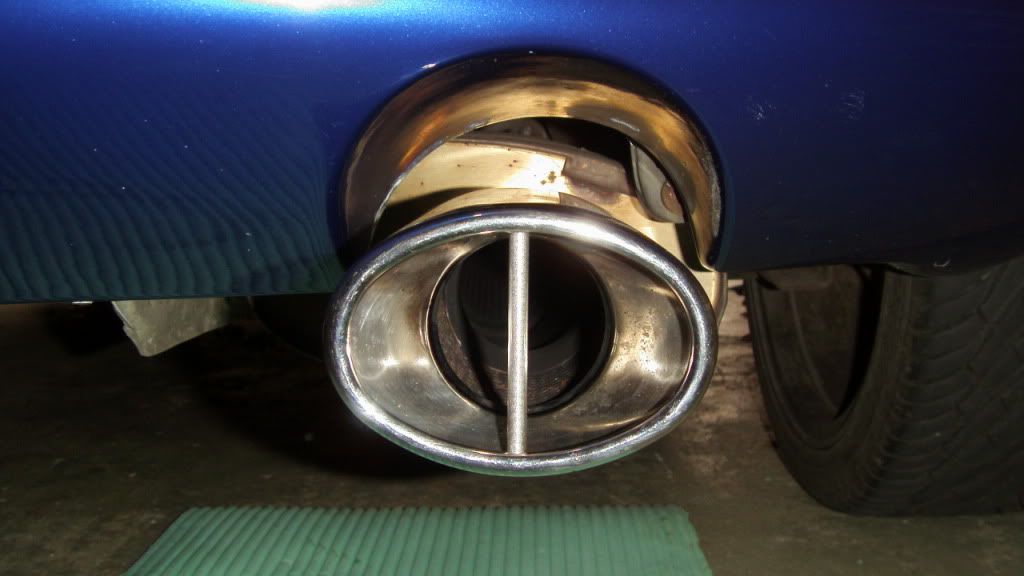
After coming across the forum peojectpuma I saw Jacko had started selling short stainless steel bars that fit in the Miltec exhaust to make them look similar to the standard exhaust tip so as that arrived first thing this morning I found 5 mins to fit it, took a little tweaking of the bar but with a gentle tap tap with the hammer all is well,
MiltecBar-JACKO.jpg


Personal I think it looks fantastic such a little modification but gives it that standard look. He’s currently selling it on ebay if anyone else is interested.

http://cgi.ebay.co.uk/ford-racing-puma-milltek-exhaust-bar_W0QQitemZ160374628151QQcmdZViewItemQQptZUK_CarsParts_Vehicles_CarParts_SM?hash=item2557129f37" onclick="window.open(this.href);return false;

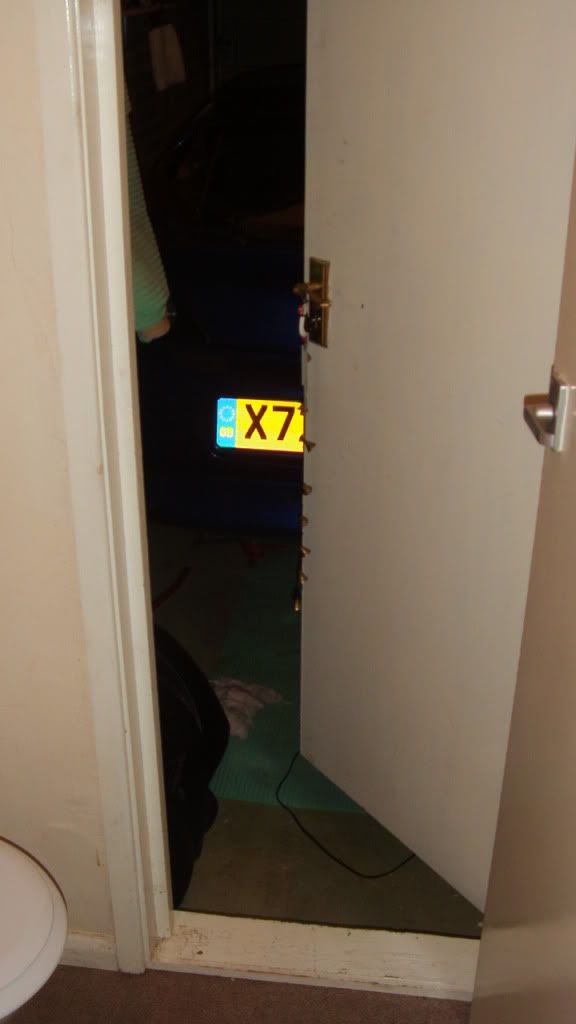
I’m fortunate enough to have a garage but its not much wider and longer than the car so its very tight for moving however once under the car space is not an issue its just getting under the car that’s the problem.
NotMuchRoom.jpg


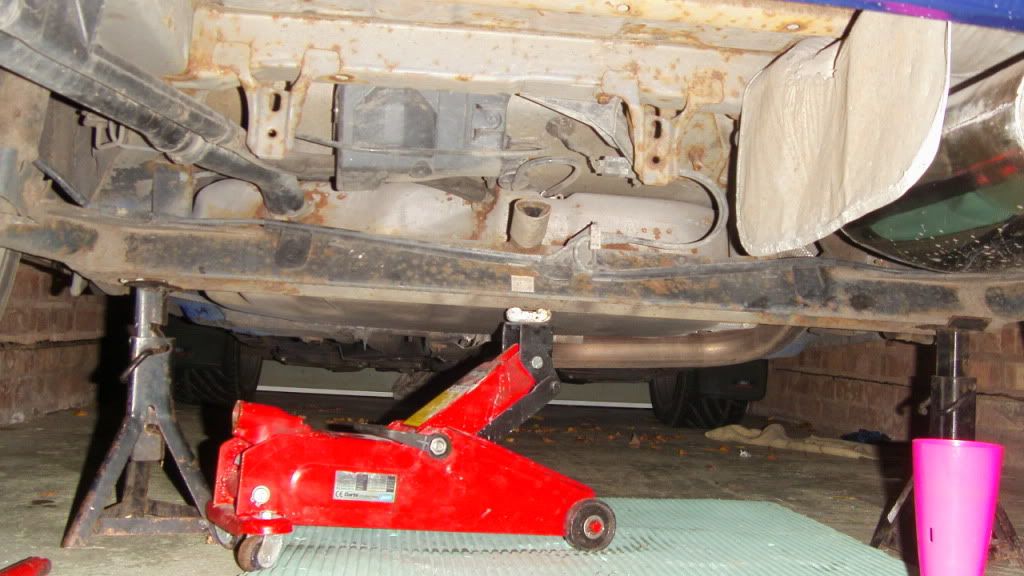
Ok started by jacking up the car and putting under axle stands
Stage1.jpg


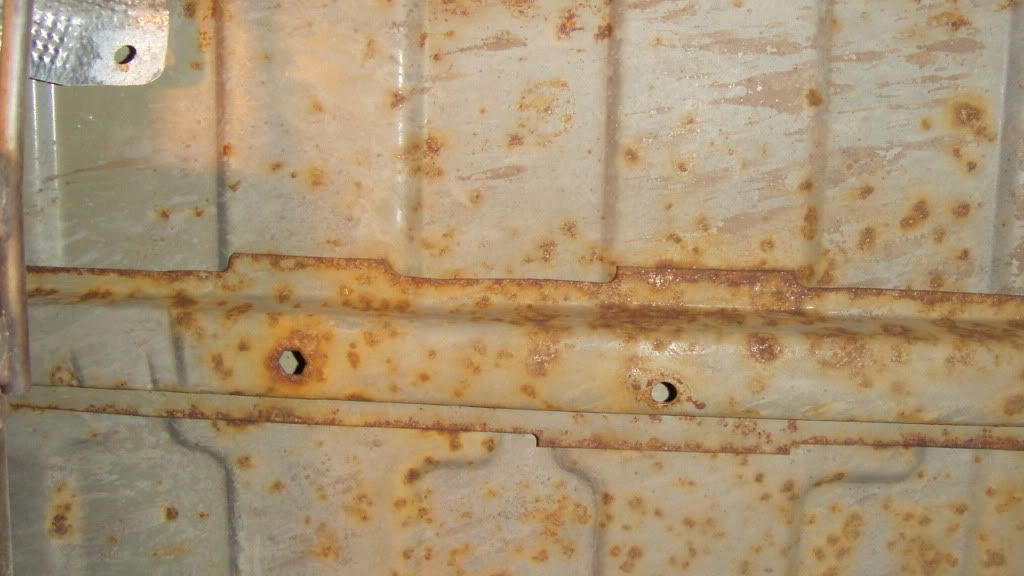
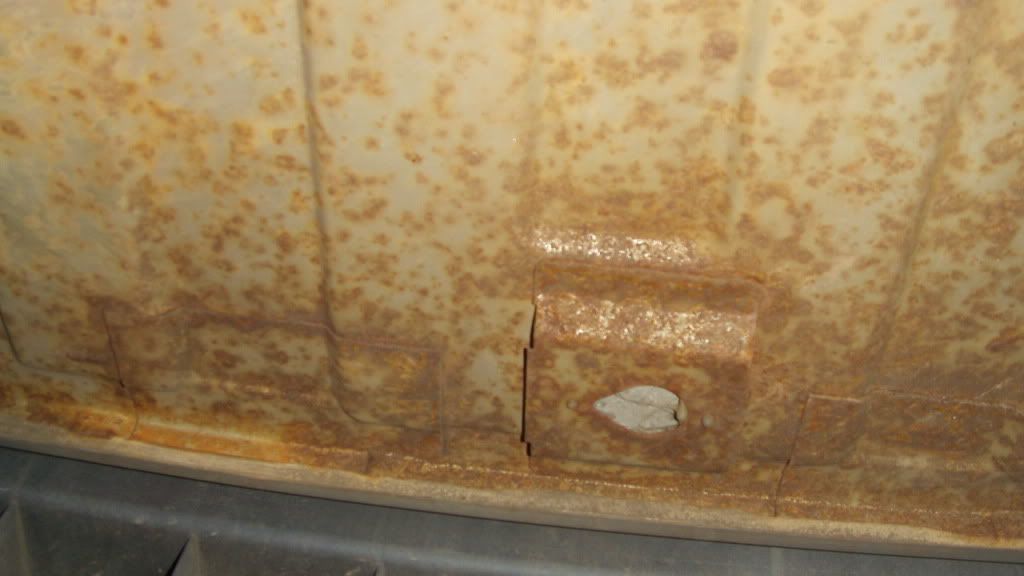
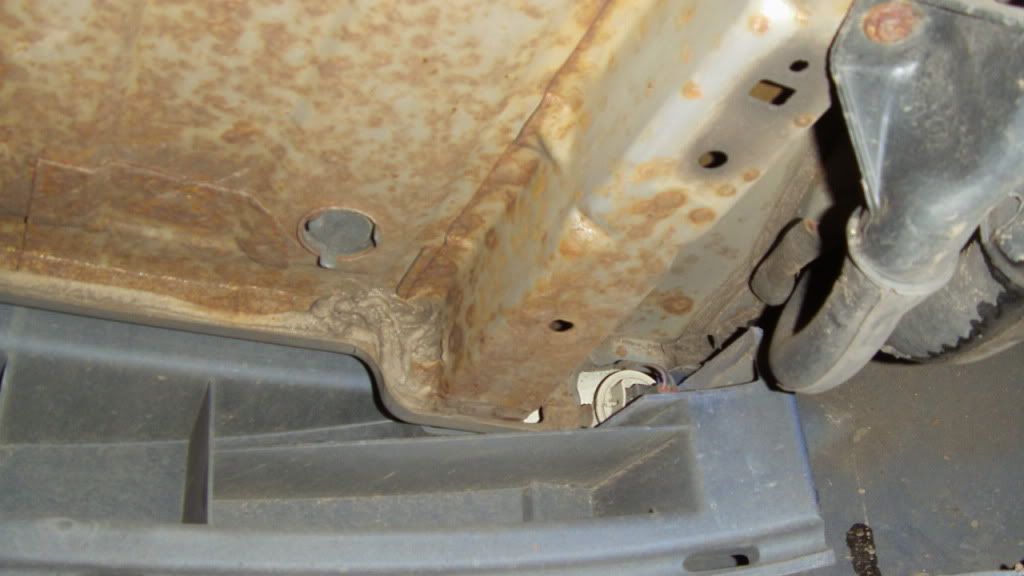
Photos of the rear carriage of the car, the majority of rust is surface however there are areas were its getting worse.
Rust2.jpg

Rust3.jpg

Rust1.jpg

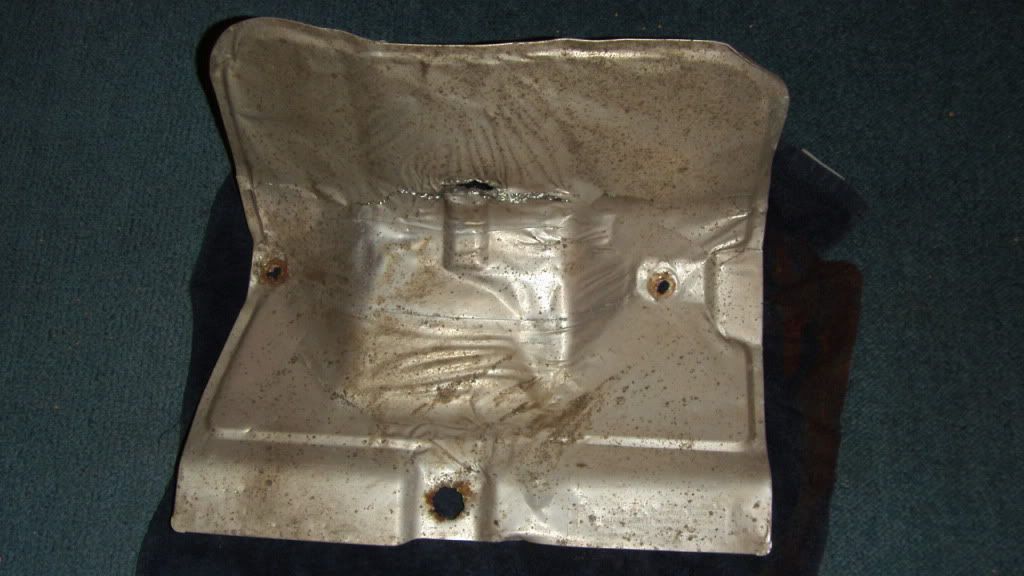
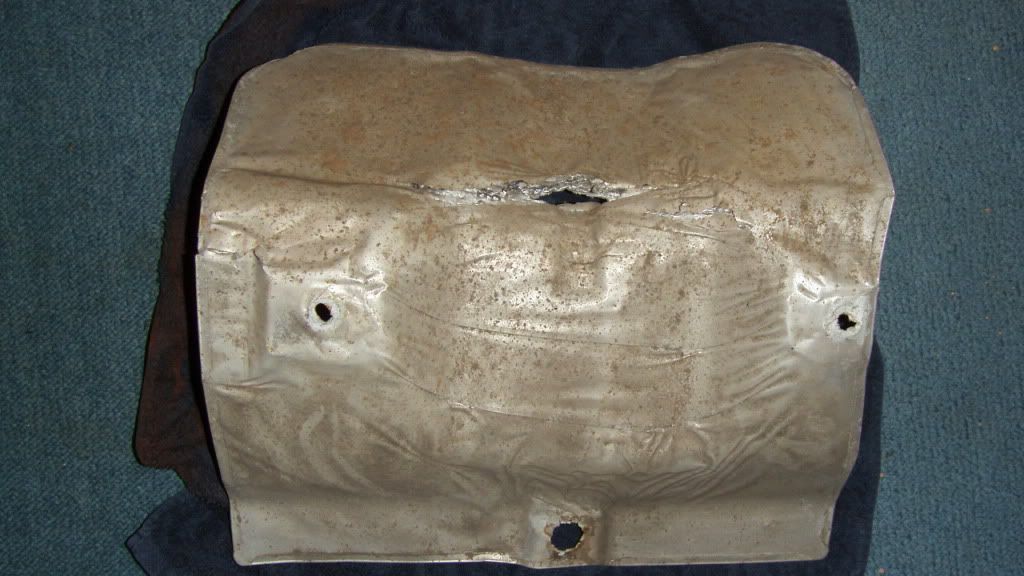
Removed heat shield

HeatSheild1.jpg


HeatShield2.jpg


Will be replacing as its cracked in the middle and has seen better days.

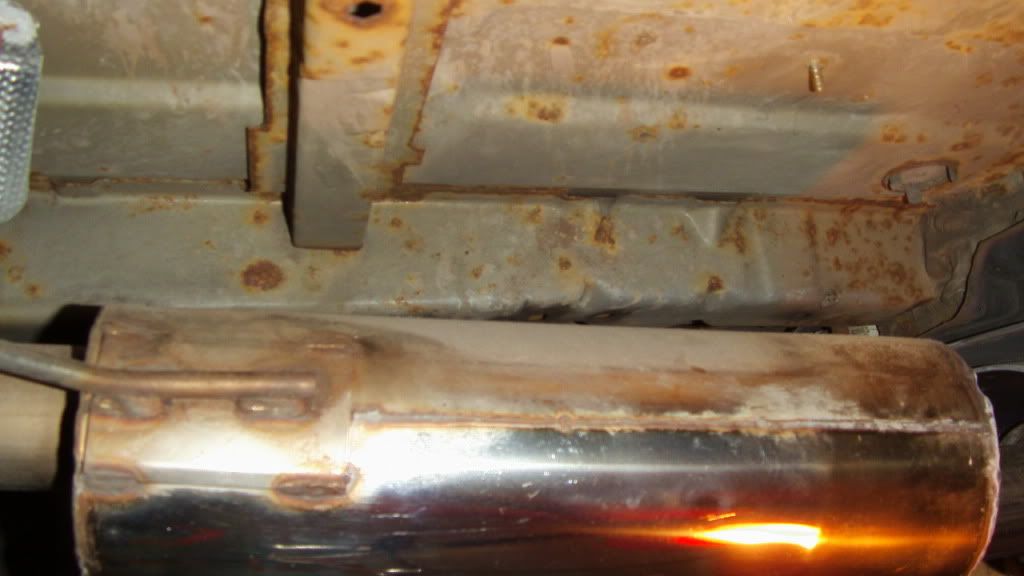
Photo of the corrosion under the back box heat shield
Stage2.jpg


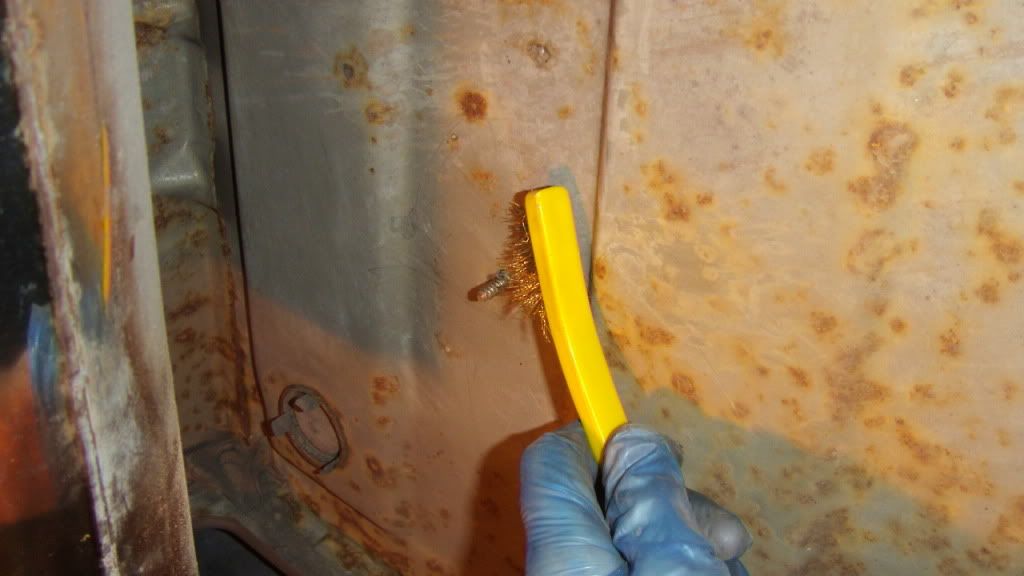
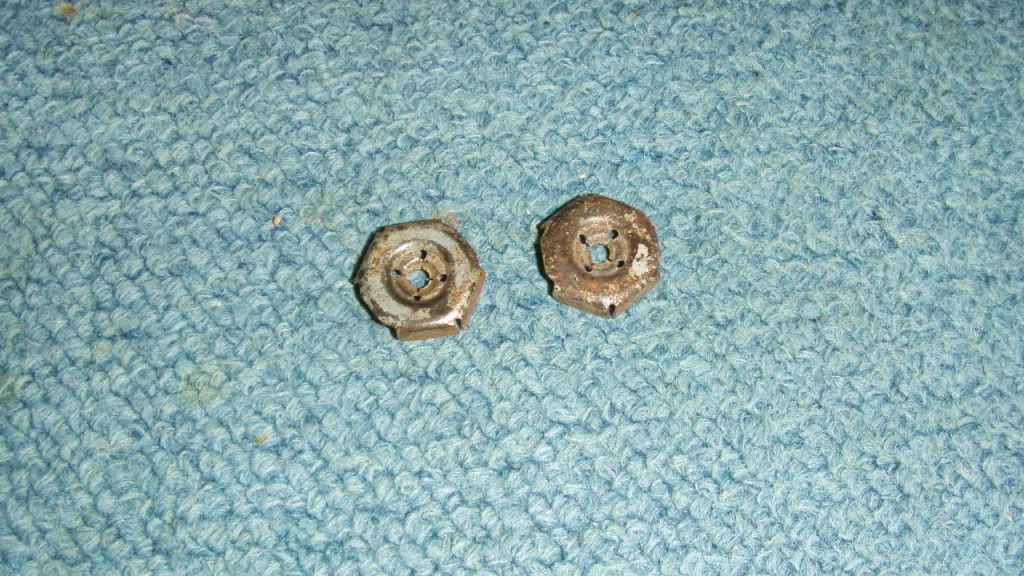
Photo of the two bolts holding the heat shield in place.
Stage4.jpg


Quick tidy up with a wire brush

Stage3.jpg


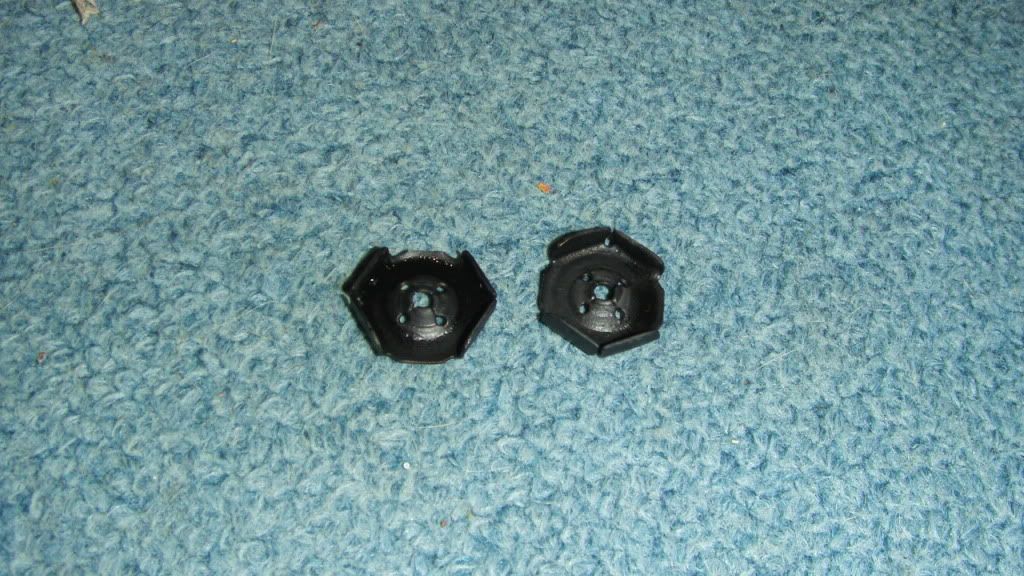
Cleaned the bolts up and sprayed in satin black.
Stage5.jpg


More to come tomorrow.

Not to sure on what product to use, but going towards smooth finish black hammerite on this section, any arguments against or for?????

All comments welcome

David
 
Looks good so far mate :eek:k:

Good to see your keeping her good :D
the garage deffo looks tight lol! mines similar as cant get down the sides, front very weel as its canny tight
 
Cracking job there David, keep up the good work :eek:k:
 
Hi there, Hammerite probably won't give the protection you want / need. I have used Bilt Hamber Hydrate 80 to stop the rust and prevent it coming back, and then Bilt Hamber Dynax UB as an anti-stone chip treatment, to essentially provide added protection for the Hydrate layer. Check out my project thread for more details.

Check out http://www.bilthamber.com" onclick="window.open(this.href);return false;, google Bilt Hamber and you will see that they have good reviews on several forums.

Way I see it, Hammerite, etc. would be easy, but if you are going to go to the trouble of doing it, you might as well use the best products available.

What is yours like along the bottom seam at the back of the wheelhouses? That is probably where mine was the worst, so far at least.
 
i did this in spring....
started with a rattly exhaust shield but went a bit mad...

all new shields
new bolts, all sprayed with high temp paint
all shields / bolts refitted with massive button stainless washers to try and stop the steel / ali corrosion from bolts to shield to chassis
while shields & exhaust were off used petrol to wipe down the chassis (fastest way iv found...so easy!)
fully waxoiled

fingers crossed shes good for the next ten years....
 
ps, glad you like the exhaust bar, they do look really good!
 
i also did this last winter, its a horrible job but worth it i think. Check out my project thread on here for afew pics and help if you need it
 
Thank you for your input so far all especially the comments in regard to underseal products i will be buying the special offer kit on the website below.

http://www.bilthamber.com/bilthamber-special-offers.php" onclick="window.open(this.href);return false;

I intend to paint over the bilthamber with a colour (no colour chosen yet, open to ideas) would hammerite be suitable?

mikeFRP Flashbastd finding your project threds extremely usefull many thanks for that, be prepared for many questions. :wink:

Ok quick update, after being to the hospital today for my EEG scan it looks as though i wont be able to drive for a year :cry: :cry: wont know for sure untill the results come back in a couple of weeks so its not looking good. :-( :-(

Absoultley gutted as only had my licence back for less than year as i was bannded for 9 months for drink driving (TW4T)

So as i cant use the car for a year i have decided that i may as well strip the whole under carriage and really go to town, as well as getting the car to concourse condition over the next 350 days.

Will be having to move the car on to the drive for the extra space for the removal of the rear beam, fuel tank suspension etc.

So first things first i need a car cover.

I know i said i would rather not use my car during the winter but i didnt mean for an entire year

A very gutted David
 
Hope all goes as well as possible with your results.

Anything you need to ask, just shout.

You may need more of the Dynax S80, I think I have used 3 cans so far, and haven't finished yet.

Once you get into it, it is pretty quick, especially if you can get the car fully dismantled before you start. You will need a shower cap and safety glasses / goggles, and also get a bundle of cheap paint brushes, painting a horizontal surface above it is pretty messy. Also lots of cardboard to save the driveway.

If there is any way you can get the rear beam off with the car in the garage, that would make things easier / less dependant upon the weather.

Also, cover your brakes / hubs to avoid drips. I just used carrier bags.
 
I just coming to the end of applying Bilt Hamber treatment.

I put my car on blocks (Wickes) with planks to spread the load. Jacked up one side, inserted one block and plank under each wheel and lowered back down. Round to other side, jacked up high enough to insert two blocks and a plank under each wheel, lowered car down. Back to first side, jacked car up and inserted other two blocks and planks, lowered down. Loads of room underneath, but you need a good jack to do this:

Having the back axle shot blasted and powder coated at the moment.

As FlashBastd says, shout if you need any info. Have taken loads of pics.
 
Thanks YOG, when you removed the rear axle was it difficult? as i would prefer to remove it completely to get in looking tip top, whilst the rear beam is removed were did you have the car jack up to ie were did you position the stands? I asume on the sills, but heard they are week ok the Puma's.

Have you a project thread showing some more photos?

Many thanks David
 
FlashBastd said:
Hope all goes as well as possible with your results.

Thanks Flash, not looking good tho, have to get the misses to pass her driving test and chauffer me around :wink:

FlashBastd said:
Anything you need to ask, just shout.

You may need more of the Dynax S80, I think I have used 3 cans so far, and haven't finished yet..

Thanks alot Flash

Will bare that in mind will probably order a little extra and see how i get on.

I intend to paint over the bilthamber with a colour (no colour chosen yet, open to ideas) would hammerite be suitable?

David
 
those wheels on that silver puma are tooooooo clean lol!

just look at the inside rear drivers rim?? whats going on there?? lol

awesome work! keep it up!
 
Regarding removal of the rear beam, I have done it on a lift, it wasn't tricky, remove the ABS sensor, remove the rear brake calipers and cable tie to the springs, remove the rear hub assemblies, then support beam, undo the bolts joining the beam to the bottom of each damper, then undo the bolts connecting the beam to the brackets which are bolted to the body. It is a bit heavy, so you should try to support it as much as possible. Also, given that you expect to have the time, you should probably remove the rear beam mounting brackets too.

While the beam is off, I would recommend replacing the bushes with new OE items, unless they have been done within the past 3 years or so.

As far as painting is concerned, I know you can paint over the Hydrate, but give the guys at BH a call, they are really friendly and helpful.
 
Williamsclio1 said:
Thanks YOG, when you removed the rear axle was it difficult? as i would prefer to remove it completely to get in looking tip top, whilst the rear beam is removed were did you have the car jack up to ie were did you position the stands? I asume on the sills, but heard they are week ok the Puma's.
Have you a project thread showing some more photos?
Many thanks David

Rear beam axle removal as FlashBastd's post, but in my case I had already removed the hubs/drums/brakes etc as cleaning/replacing bearings/fitting new cylinder seals/braided hoses, etc. Placed jack under the beam axle before removing the mounting brackets, then lowered and pulled it out. Shot-blasting and powder coating (including 4 wheels from ride-on mower) costing £80 "Cash" :wink: not worth doing it myself IMO.
I don't have a project thread at the moment, but there are some pre-treating pics "elsewhere". What sort of pics do you want to see?

I have my axle stands located here at the rear:
 
TyeBoi said:
those wheels on that silver puma are tooooooo clean lol!
just look at the inside rear drivers rim?? whats going on there?? lol
awesome work! keep it up!

That's my Thunder coming up to 20,000 miles, nowhere near the amount of rust seen under a lot of Puma's. When I did the rust treatment inside, the rear arches had a band of a "wax" type sealant applied on the panel/arch. Maybe Ford treated the last builds better (built 03/12/2001) as many of the last ones had to be "hand-built" due to the production line being shut to change to the Fiesta. Wheels are take off regulary and inside rims cleaned, don't treat at present but may try one of the "sealants" you can get.
 
Thanks for the early replies again gents, that photo was just what i was after, will be buying a car cover over the weekend so hopefully by the end of the weekend i'll have the car on the drive and will have rmoved:

2 x Rear Wheels
2 x Brake calipers etc
2 x Hubs
Rear bumper
Exchust system from CAT backwards.
Possibly rear beam and fuel tank but we'll see.

As not rolling in the cash i'll be detailing what i can ie wheels etc and will be getting the old elbow grease going with the wire brushes to prep the hubs etc for Bolt Hamper and painting.

As im in no rush with time now i can take my time and not rush any stage, thus hopefully giving me a fantastic finish.

Open to suggestions as ever

David
 
You may want to disconnect the battery first before removing the calipers:

The Fiesta manual says:
"disconnect the battery before disconnecting any braking system hydraulic union and do not reconnect the battery until after the brakes have been bled. Failure to do this could lead to air entering the ABS hydraulic unit, requiring the unit to be bled using special Ford test equipment".

The electronic test equipment allows the hydraulic unit to be switched into a special mode which purges the unit of all trapped air - it is not possible to remove trapped air from the unit by bleeding the system conventionally.
 
That YOG is why you've got to love the net and other peoples knowledge, many thanks, saved me troubles already

Just orrdered these to make the dark nights bright again lol

http://www.screwfix.com/prods/81278/Lighting-Lamps/Torches-Task-Lighting/Site-Lights/Double-Tripod-Site-Light-500W-240V" onclick="window.open(this.href);return false;

David
 

Latest posts

Back
Top