FRP Duratec Turbo Project!

ProjectPuma

Help Support ProjectPuma:

This site may earn a commission from merchant affiliate links, including eBay, Amazon, and others.
Yeah, you could have saved me a lot of time, but at the same time, the mounts cost me about £40 to make up!! That's the alternator bracket, rear gearbox mount, drivers side mount, power steering adaptor, and adaptor to fit puma AC pump to the duratec engine!! Looks like you've done a good job on them, and for the time it takes to work all the dimensions out, the £260 you are charging is a very good price, but for me, i'd rather meke my own. The same as I did with my hub adaptors, somebody offered me some for £80, but I made my own for £10! I think you might get a lot of custom for your mounts though, I've had a fair bit of interest in mine from people wanting to do the conversion, & bolt on conversion parts would be very popular.

paulob1 said:
i am warned, thanks for that, did you put the alloy tape around the heat wrap...sounds like a good idea to me...will give that a go...my turbo puma is getting a new manifold and we will heat wrap it all before it goes back on...

I don't think you are supposed to put the aluminium wrap over the ceramic heat wrap, it's an alternative, although you probably could use both??! You can use a high temp silicone spray on the ceramic wrap for extra protection, but the aluminium is just more suitable for bits that you can't ceramic heat wrap. The aluminium tape might be better but costs a lot more. I'd DEFINITELY reccomend gloves!! As said above, it's also reccomended to do the downpipe and cover the steering column plastic shield. And try and protect the middle shaft bearing. Do you have any info on your turbo puma? I've not seen a thread.
 
my turbo was a van aachen build i have simply just had the turbo rebuilt so I CAN WORK OUT ALL THE BITS AND HOW IT ACTUALLY GOES.

Overall its a very nice sert-up, reliable and tidy, the next plan is to stat upping the power and see how she works...got a lot to do on that point., I then want to decide if i go 1.7 witha turbo for the FRP or just jump in witha 2 litre or 1.8 duratec unit and go for bigger power...I dont think I want any more than 300 in it but i will see...power just makes you want more power....thats always been my experience...
 
no problem at all...not very good at posting all the work I get done to be honest, not that i actually do the work i just pay others to do it...I am these days the ideas man not the handi-man, or mechanic-man...
 
Ok thanks for the link, I'll check it out when I get home, I've got a long flight ahead of me!! 300 out of the 1.7 or 1.8 will be some achievement, but as ling as you upgrade internals and use the mtx75 box, it's do-able. I think the 1.7 is an awesome engine, but uprated parts are VERY expensive, so if your paying someone to do the work, you'll have to look at what will be better and most cost effective for you. Is there a reason you are choosing to use only the 1.8 or 1.7? The best option for me would be the 2.0 or if you can get hold of one, a 2.3. There are so many upgrades available for them, you can get an inlet plenum like mine but not the cosworth version for about £200, compared to getting a custom made one or an FRP plenum (I know you've probably already got an FRP one), you can buy a cas turbo manifold for about £150, there isn't one available for the 1.7 so it would have to be custom, the van aaken one doesn't flow very well so might not reach your goal of 300. Forged pistons and rods are at entry level about £400 for the duratec, when I last enquired about 1.7 equivalent, they were £1600! It would be nice to keep the 1.7 in the FRP, but for me, the duratec is the only option.
 
Any updates? Any chance you would make a mount and turbo manifold kit to make the conversion easier for other people? £260 for 2 mounts sounds way overpriced IMHO. Even if i buy the cast turbo manifold and you make the mounts.
 
The drivers side mount is easy enough, the issue is with the rear mount, it needs to be welded on the sub frame, so youd need to send an ST150 mount and a subframe, and i could do it.
 
Does anybody know if there are any other tailgate struts that will fit the puma, off a bigger car? Ive got my spoiler fitted on, and now the tailgate is too heavy for the struts! :? I was wondering if mondeo or focus struts might fit?
 
Well id have thought something would fit, ford have a habit of using the same stuff on a lot of their cars, its cheaper to produce, and then just put slightly different weighted internals in. Its just finding out what!!
 
warrenpenalver said:
fiesta mk 4/5 tail struts are what you need. they are more powerful than puma ones.

most people only need one of the fiesta struts depending on the spoiler.

oh?? That really surprises me, I'd have thought they werent as strong as the puma. My spoiler is the same as yours, so I guess whatever struts you use will work.

Thanks for the info though, I'll have a look for some and give them a go!
 
Flying Scotsman said:
Just had a look at your engine and that is ridiculously sexy!! Stop it!! You're going to have a better car than me!!! Ahhhhhhh!!!
Lol, thanks, not sure it will look better then the frozen white beast, but I'm hoping it will be something special!! Thanks for the confirmation on the struts, I brought a set from the bay last week after Warren told me they would work. So does your boot stay open now with the F2 on it??
 
Yeah it stays open just fine and had to change them on the silver one too which has the evo spoiler on aswell. Strange how roughly the same model and age of car yet the strength of the struts are very different.
How long do you expect it will be until your car is fully built?
Mac
 
Im not sure on a time frame, i really dont have a lot left to do on it, to get it running, it just needs a switched live to the ecu, the battery fitting in the boot, power steering plug extending, and 5 hose clamps fitting to the intercooler pipework. Im waiting for a few bits to arrive, but im hoping by the end of January, it will be just tweaking bits left to do. The list of other things left to do are as follows

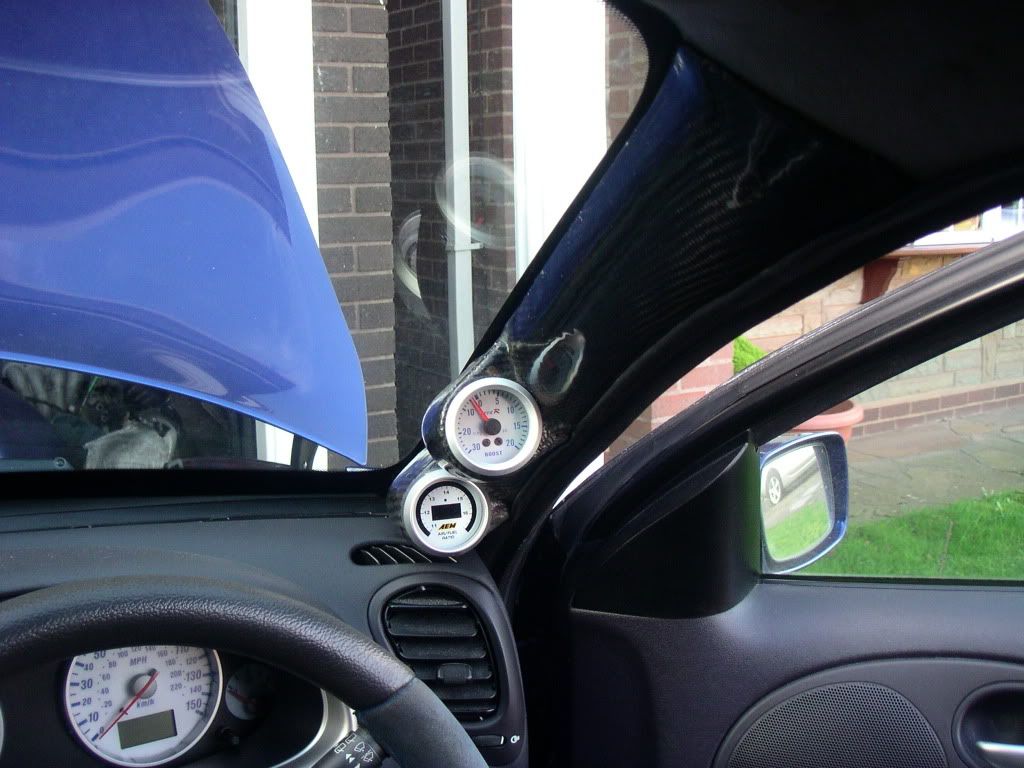
Fit pillar pod
Fit Air Fuel gauge and boost gauge in the pod and wire up
Fit EGT gauge in glove box
Fit Vac hose to Wastegate, dump valve, Fuel pressure reg, and ecu.
Get front and back bumpers sprayed and fit.
Fit rear brake hoses
Fit Fiesta tailgate shocks
Fit new FRP door cards as the ones fitted are a bodge
Fit headlights
FIt new alloys

I think thats about it, its only a few days work, ive still got to finish making the pillar pod, ill try and get some pics up in the next few days, but im waiting on a few tools to arrive to get the best finish on my pillar pods. Ive got to find a way to wire in the water temp gauge in, ive had to use the standard water temp sensor for the aftermarket ECU, but 2 ECU's cant use that type of sensor, they both send a 5v signal and measure the resistance through the sensor, but if you wired 2 ECU's to the same sensor, they would both be sensing a 5v signal to each other, and getting a tatally incorrect figure!! I think ive figured out a way around it now though. Its just a few things tha need ironing out!
 
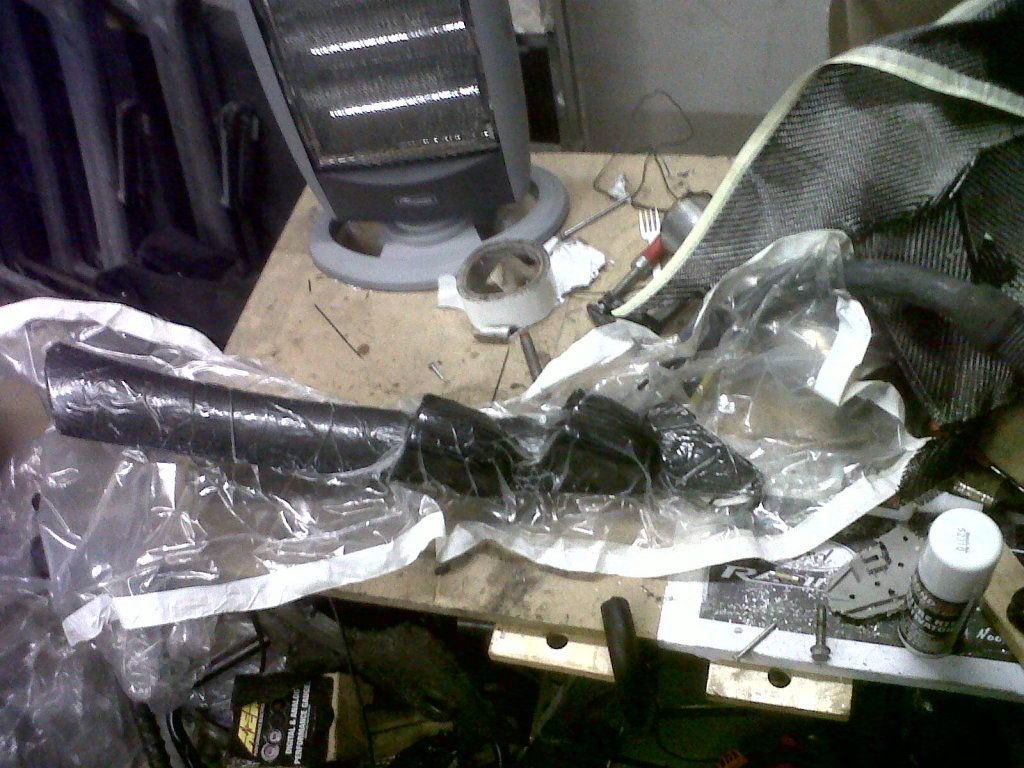
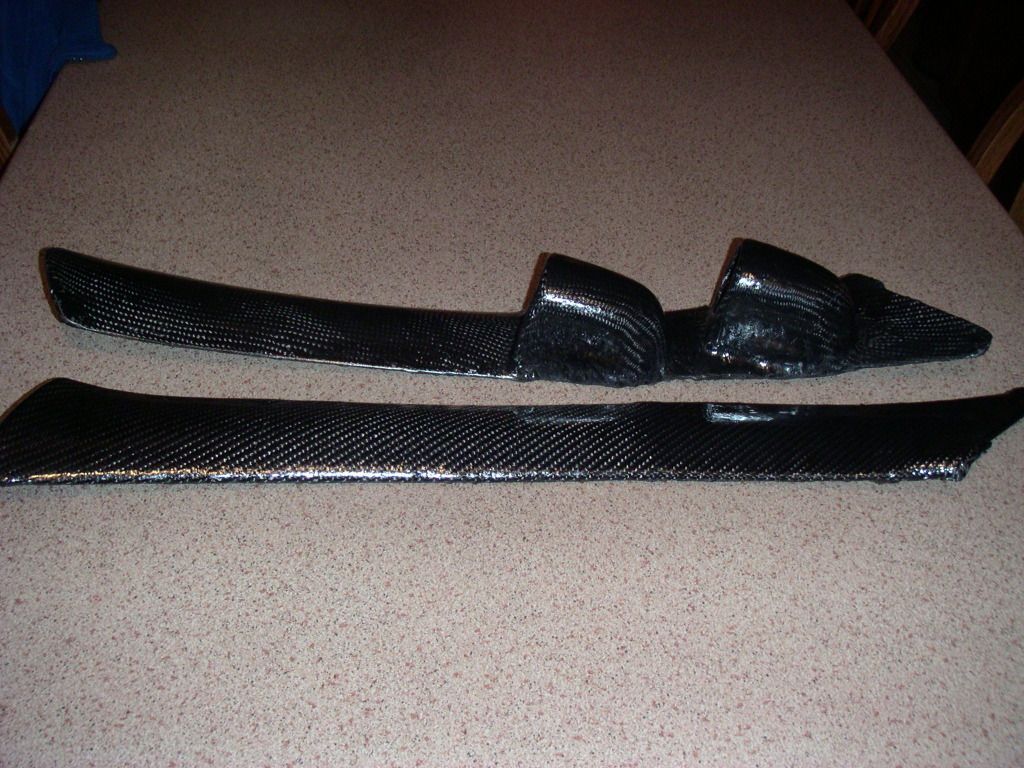
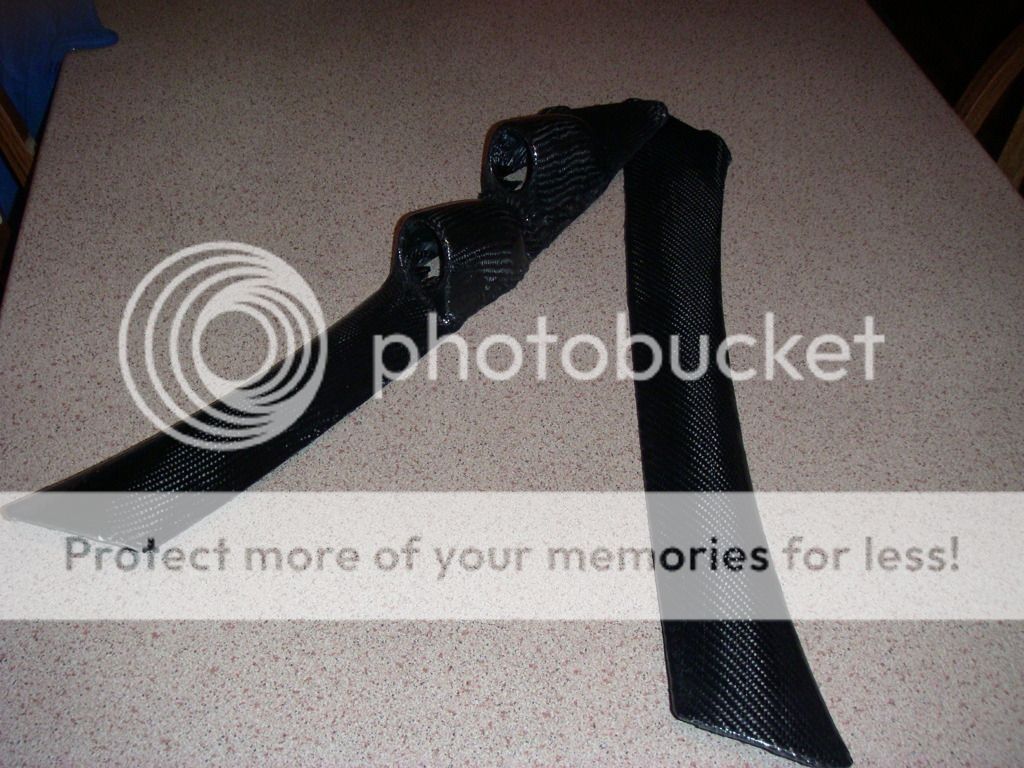
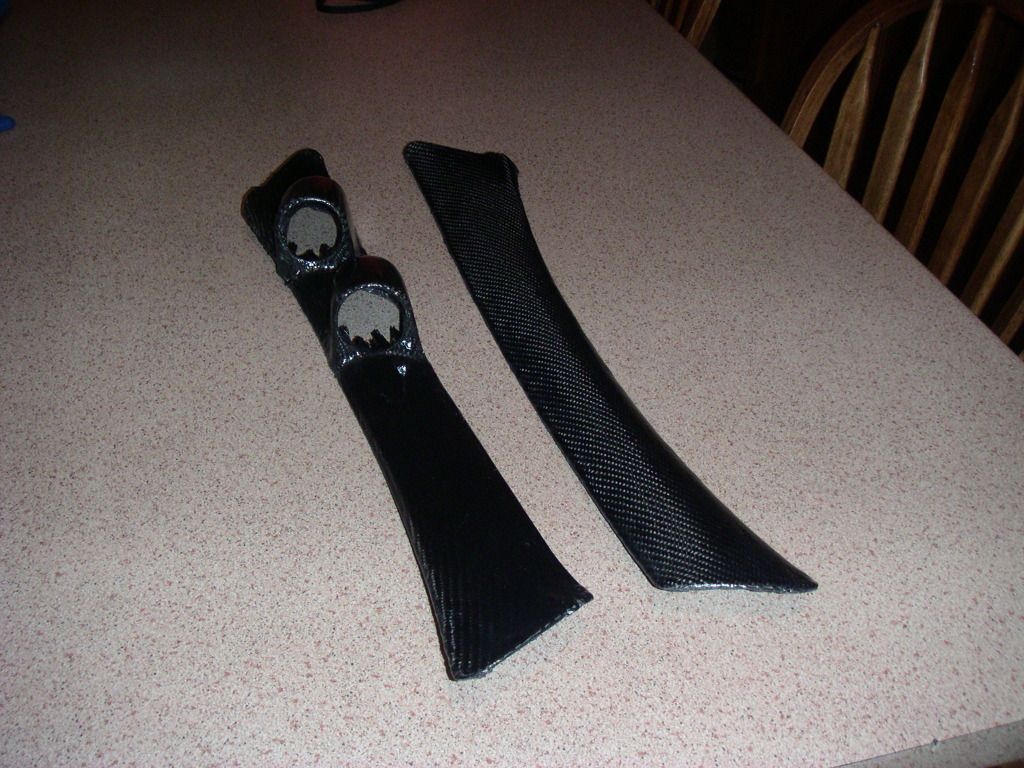
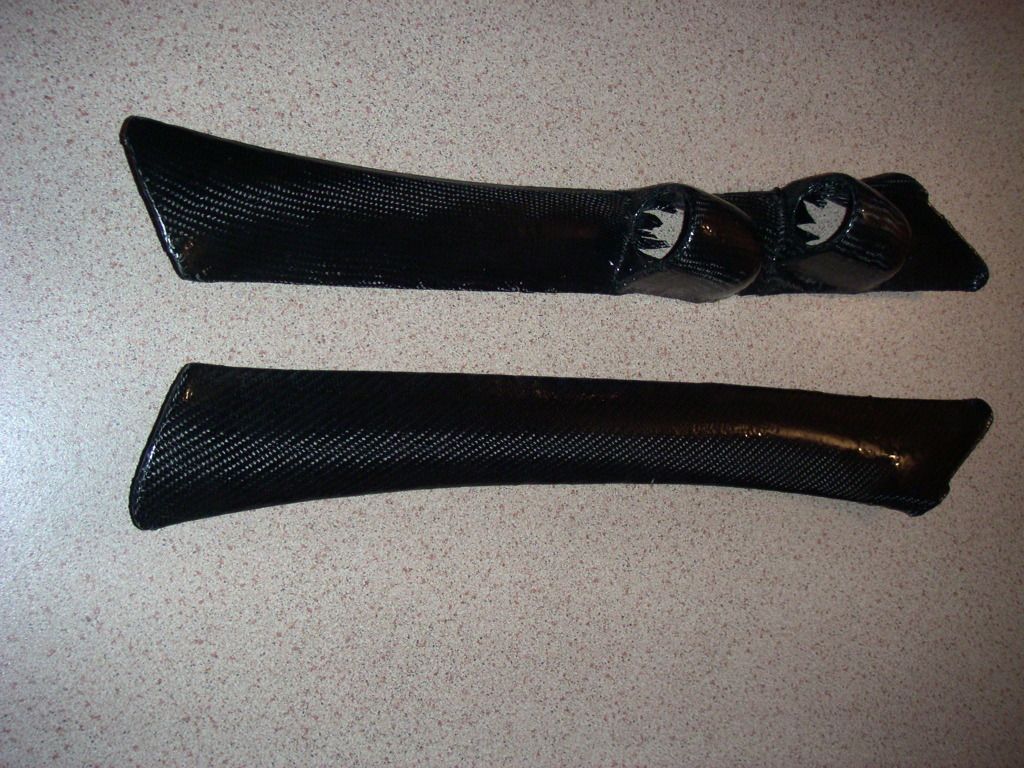
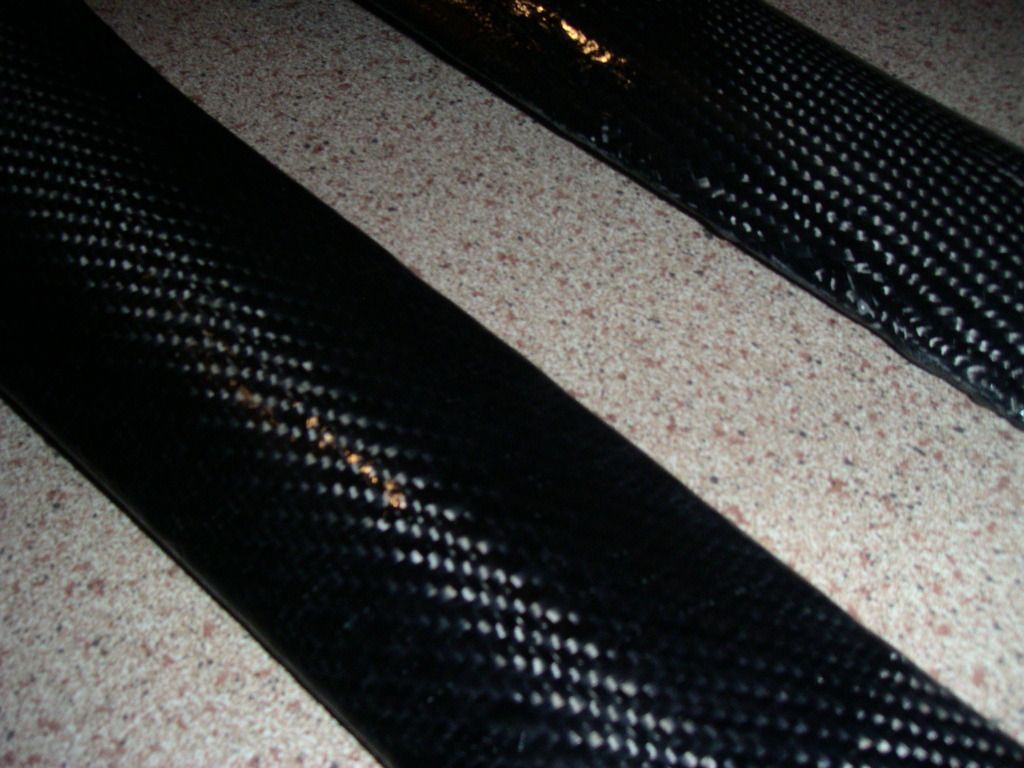
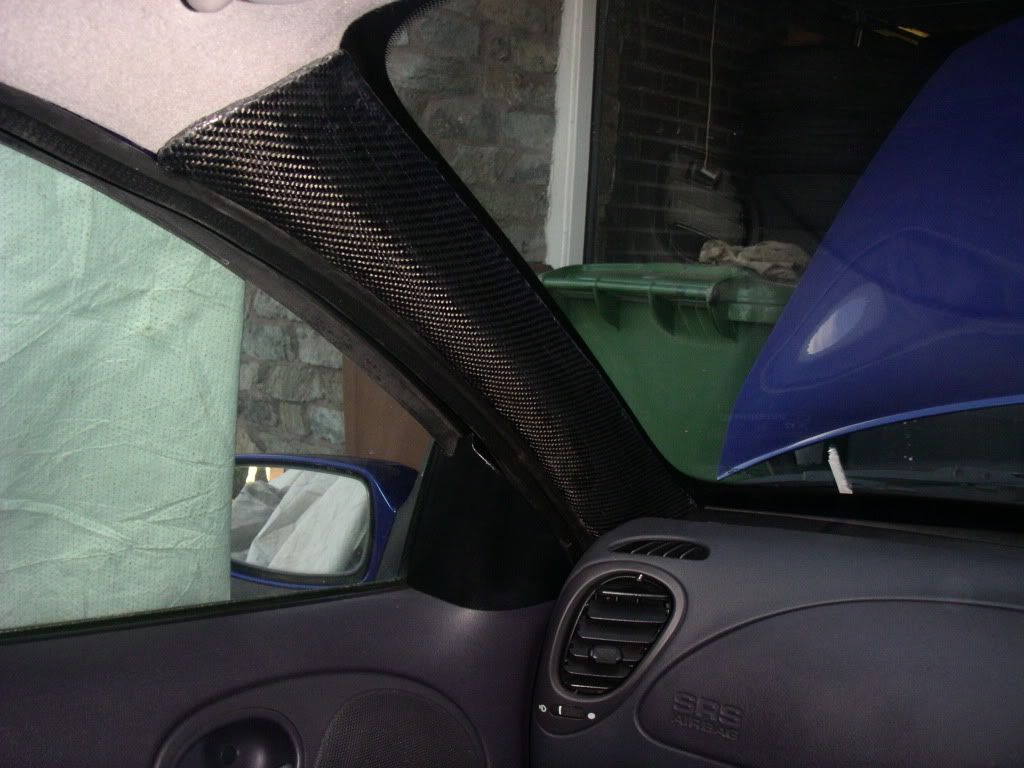
As some of you know, i was contemplating making some carbon fibre pillars, but in true noob style, i decided to do it on a budget. I dont like the look af that carbon effect vinyl, so it had to be real carbon fibre. I cut up a genuine pillar for the drivers side pillar, and then cut up cheap twin pillar pod from ebay. I used tiger seal to glue them together so i could use them as a mould for the carbon fabric, and used the passenger side as it was. Ive not taken any pics at this stage, i got too carried away! This is where i went budget!!! First i coated the pillars in resin, and let it set for a few hours. I have some large sheets of plastic in my garage, i cut them up so i could make a bag to fit the pillars in, then coated them with PVA release agent so the carbon wouldnt stick. Then i wrapped the pillars in some genuine carbon fibre fabric, large 2 x 2 twill is best to contour to intricate shapes, 1 x 1 doesnt look as good in my opinion, and is a pig to contour around curves.

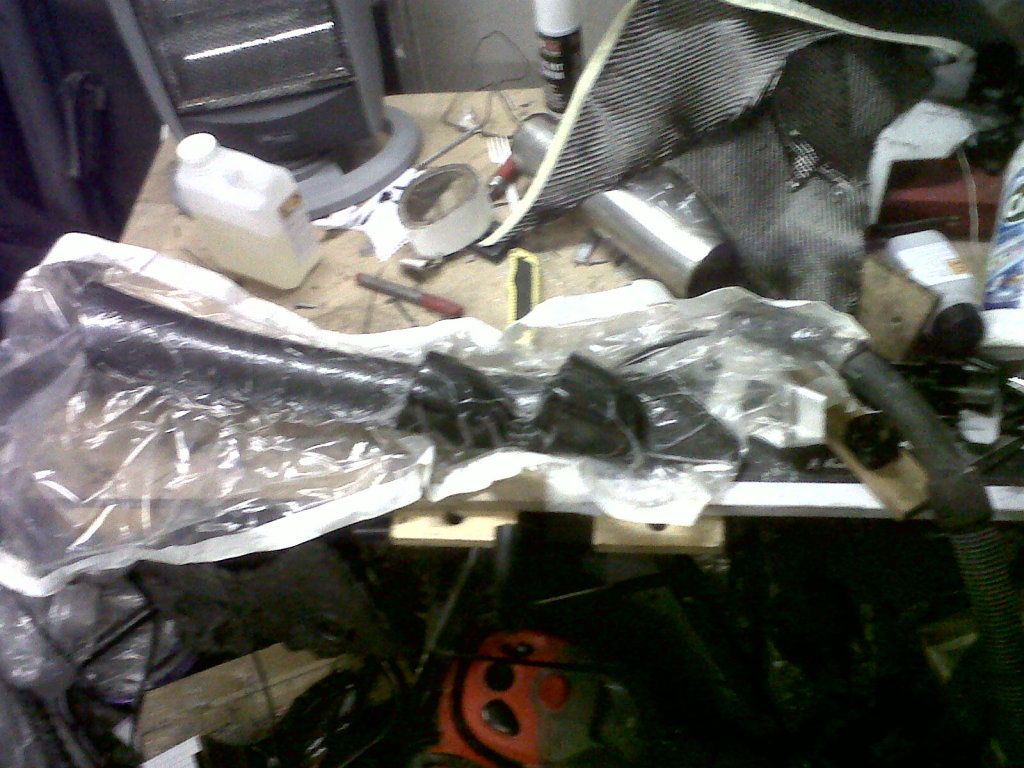
Anyhow, once wrapped, i used some of the already setting resin, and coated on top of the carbon fabric, then put it into the bags, with a few 10mm flexible tubes to suck air out of the bag. Then i stuck an ordinary house hold vacuum in the opening and sealed it.I switched the vacuum on, and voila!! Worked a treat!!!

IMG00387-20111223-1342.jpg


IMG00389-20111223-1502.jpg

You can see the cheap red vacuum in that pic!!

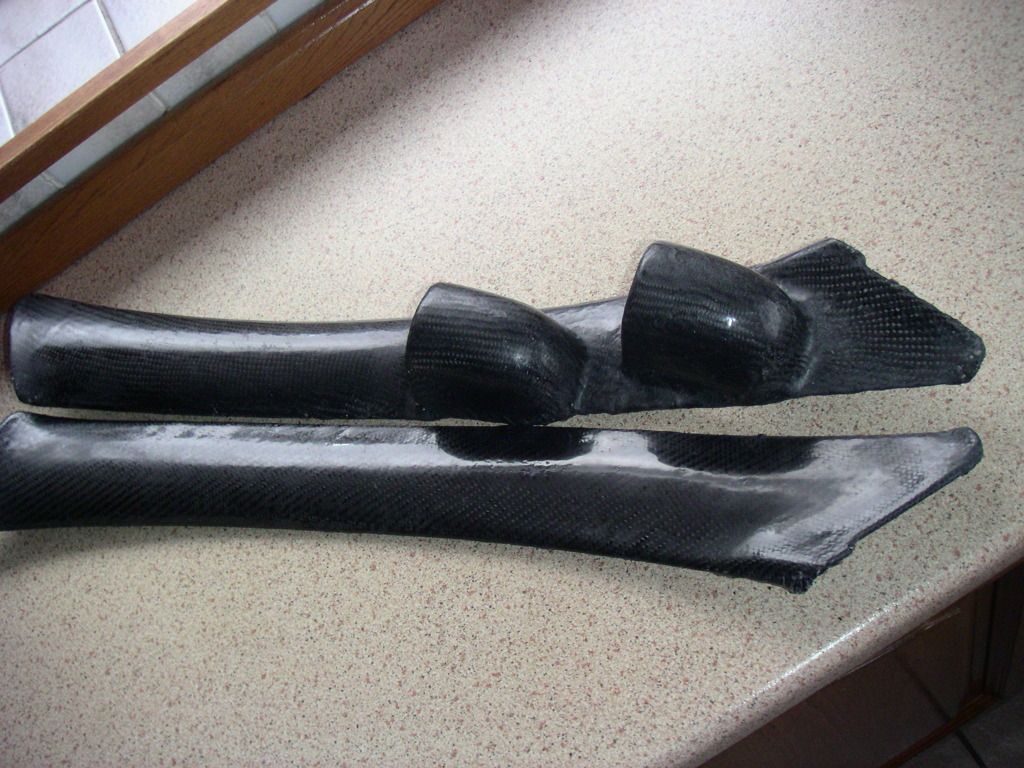
Here are the pillars out the bag with the PVA release agent removed.

PICT0614.jpg


PICT0615.jpg


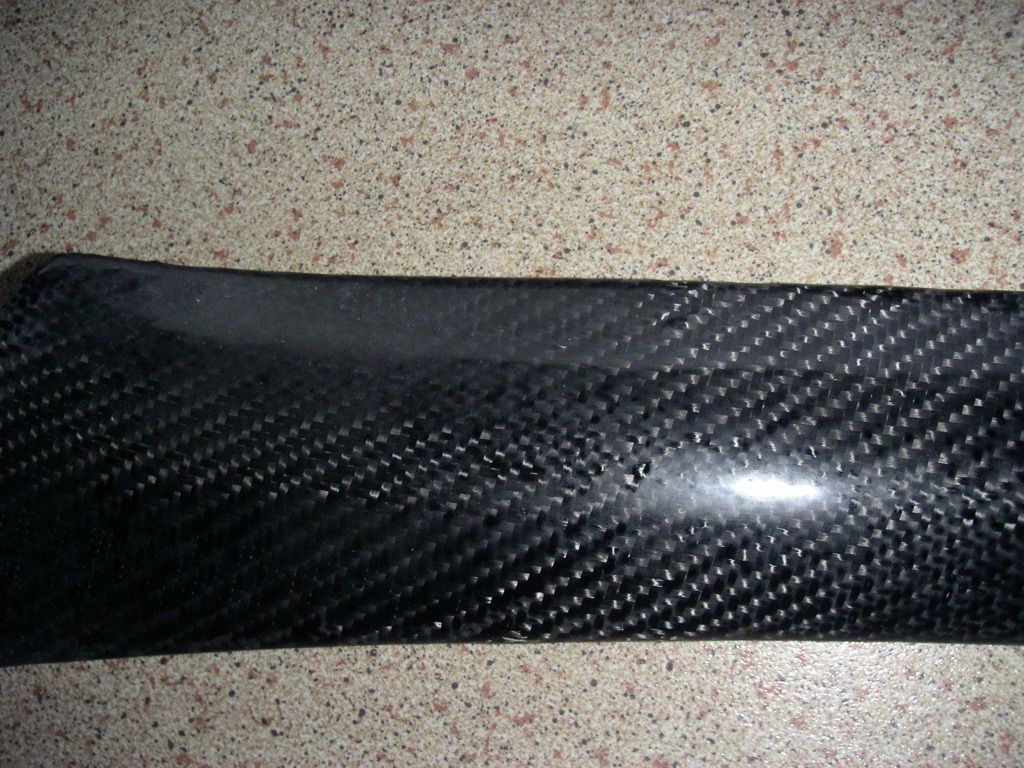
And here they are after being cleaned up, they are not perfect, but im very pleased with the result for my first try. They just need mopping and they are ready to fit!!

PICT0624.jpg


PICT0623.jpg


PICT0622.jpg


PICT0621.jpg


PICT0620.jpg


This is the first time ive used real carbon, but ill definitely be using it again!!
 
Back
Top