XAF
Active member
- Joined
- Apr 8, 2012
- Messages
- 1,056
Right, well prompted by Chris' comments, time to put thumbs to iPhone and get some updates!
Thanks to the legend that is Simon (Blue3), I now have a brand new genuine rear bumper to replace the damaged old one that had cracks, moisture related acne (more on that later) and had been hacked about for mudflaps. Trouble is, even from the factory the bumper quality leaves a lot to be desired. Simon warned me that the fog lights need fitting and fettling before fitting, and he wasn't wrong. Both sides were a really bad fit:
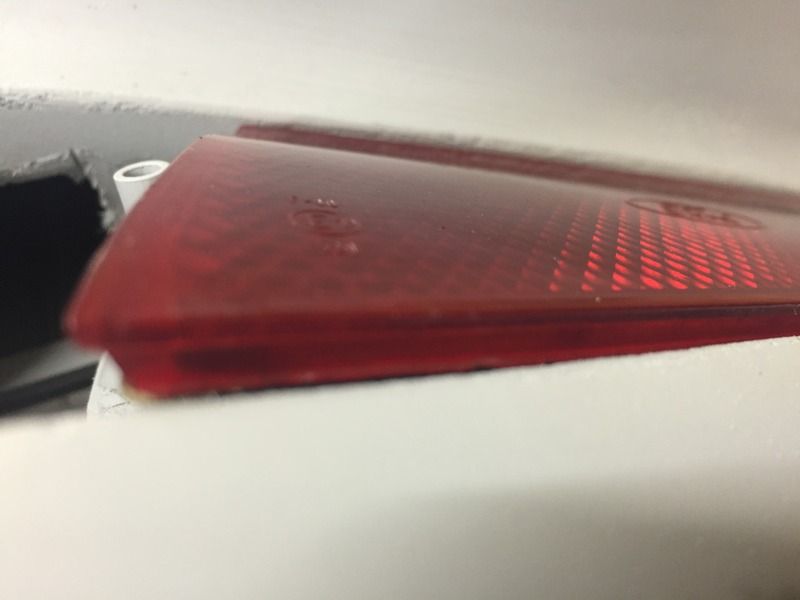
It wouldn't even sit flat.... And when I'd sorted that issue, it didn't sit square in the hole either...

The towing eye covers didn't fit properly either, so armed with a Dremel, file and sandpaper, I set about making the buggers fit properly before I even put it in the car to go to the bodyshop.
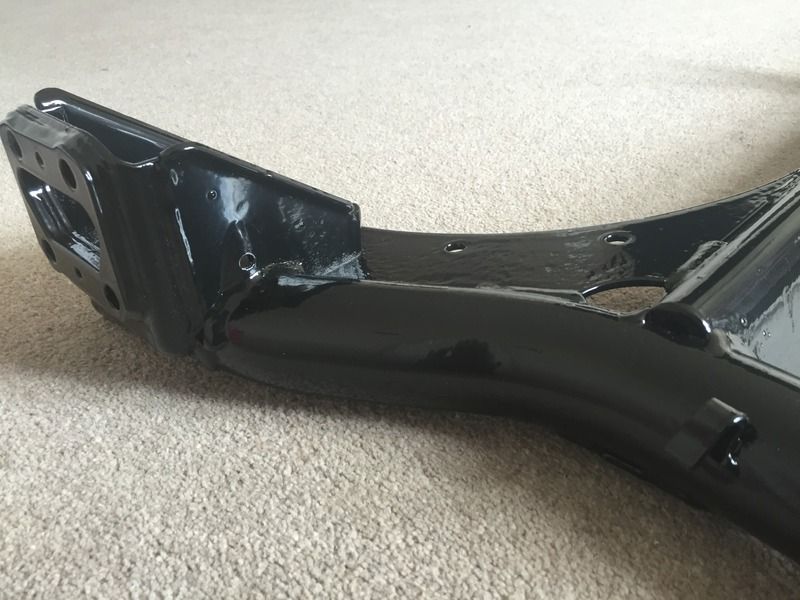
Next up was the rear beam, as you can see from the picture, it was a bit crusty.

The one behind it is a spare I was getting powdercoated for my black Puma. So, off to the powdercoaters for the two beams, all the front bumper grills and axle brackets. Got them back and all I can say is 'Wow!'. Simply amazing job, thanks so much to JK Powdercoaters in Wakefield. Top job!
Good job the wife to be never goes on this forum, the wedding would be off if she saw my car parts in the living room!

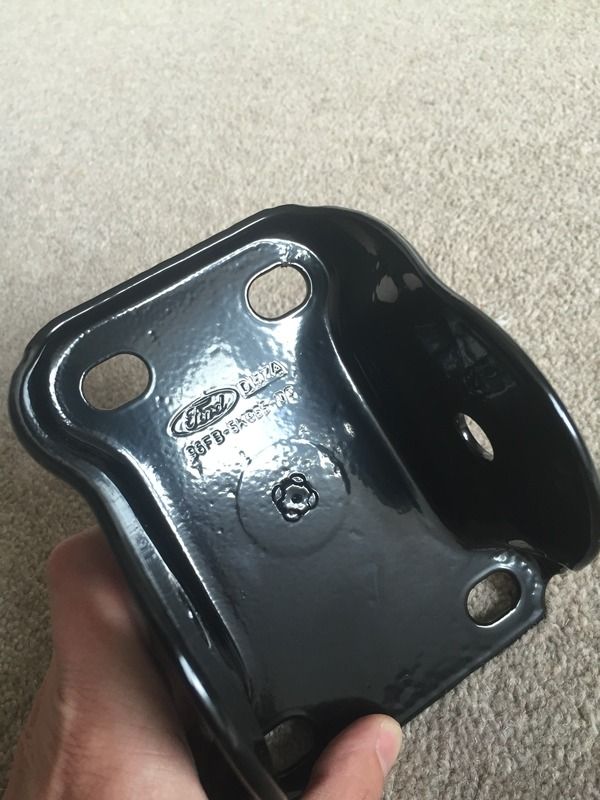
Even the brackets came up first class:
So, back to the body....
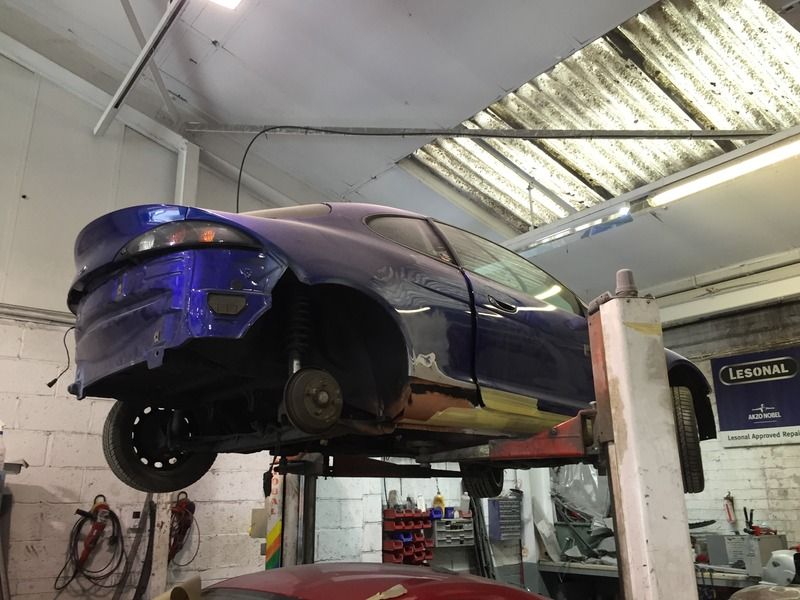
Work has been really cracking on. The inner sill has been replaced, and a new outer sill fitted courtesy of Ex Pressed Steel Panels and Evil Rob, Emma and Barry's perseverance to get them made.
The bodyshop said they were excellent quality and they look amazing to boot. Being a. FRP, they had to beat the panel about just like Tickford did so there is room for the outer quarter!

I got a bit OCD as normal and got them to paint the sill and inner (original quarter) before putting the outer on.
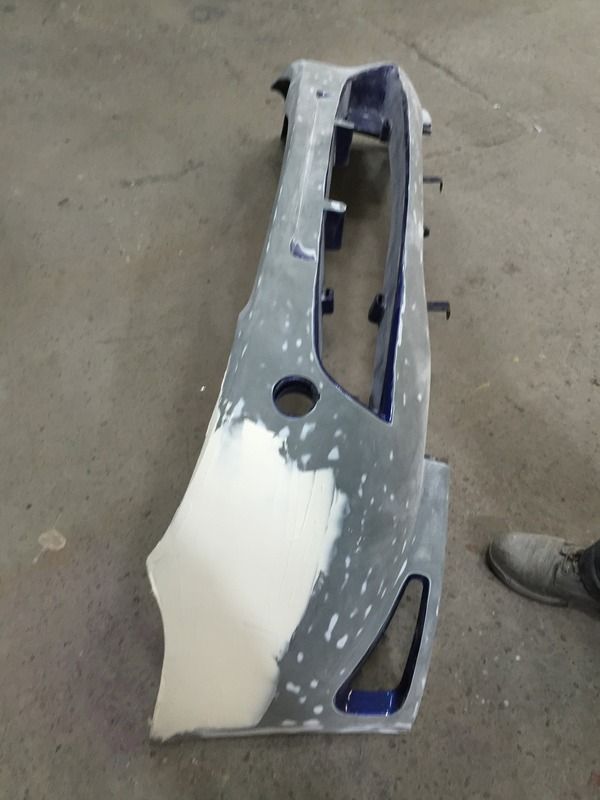
So to the bumpers. Oh dear. So it looks like they've never been painted, but they were covered in moisture blisters, the bodyshop had to sand down right to the gel coat. As mine was the third last to be built and last to be delivered, it's quite possible that unpainted parts were left exposed to moisture until mine was thrown together
Lastly for now, there was the floor which didn't look too bad. I'd bought a new outer floor strengthener from Ford as the old one was caved in from being jacked up poorly over the years. It took a bit of removal, but once out more rot was exposed:
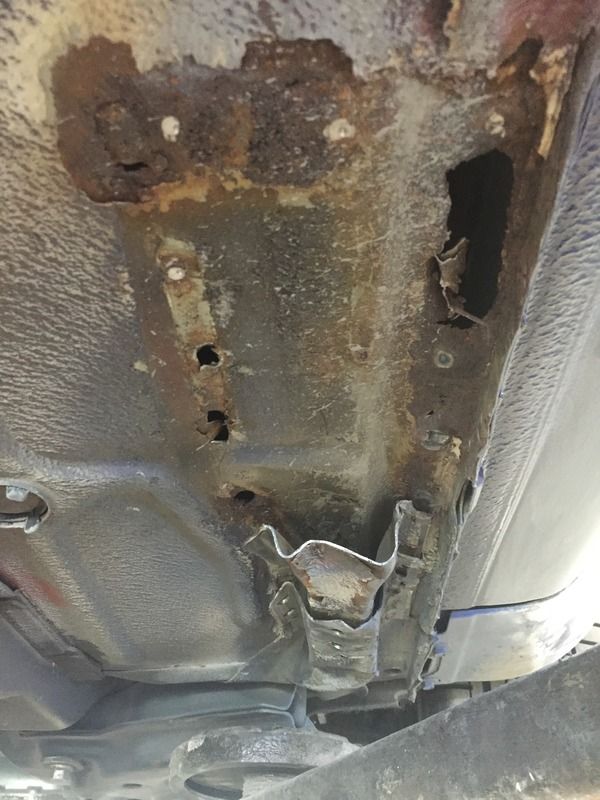
So more welding to the floor before the strengthener can go back in. I want it to look like its never been off and straight from the factory.
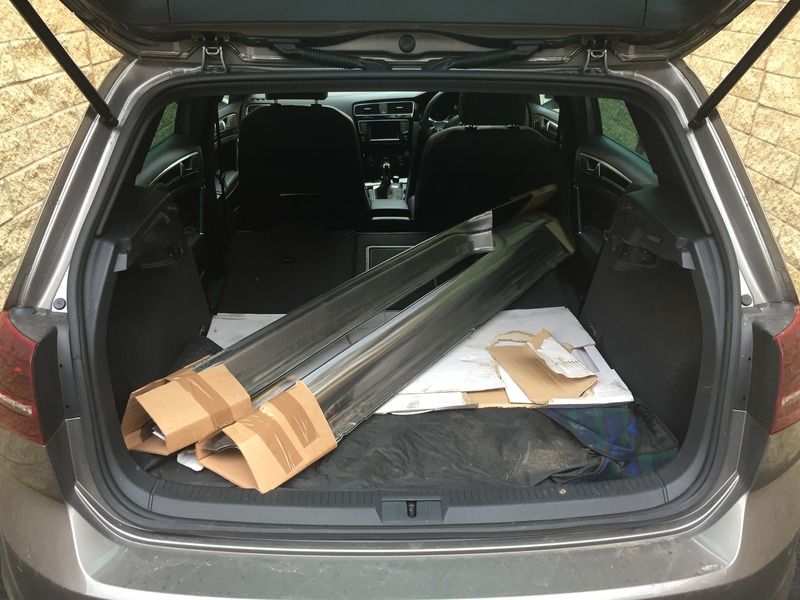
While the car is away, I've been busy doing other bits ready for it to come back. The rear brake lines needed replacing, but I really wanted the proper olive green ones, not copper. It turns out you can get the original pipe, but it's on a roll. So, armed with a little knowledge and a lot of hope, I set off...

Now you'll notice that the original square return on the pipe I've not replicated as my pipe benders just didn't do a tight enough radius. When I'd finished I was really pleased with the rest of the pipe, but I just couldn't live with a bad pipe when you've gone to the trouble of getting the proper pipe. So with some off cut, time to get some practice with the vice, block of wood and screwdriver!
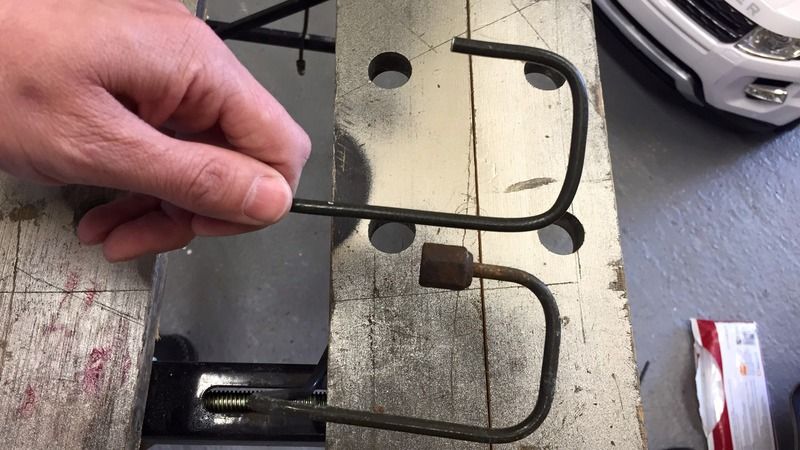
Got it cracked, now onto making another pipe. Can't mess it up though at over £10 a meter! Thankfully, really happy with the results!
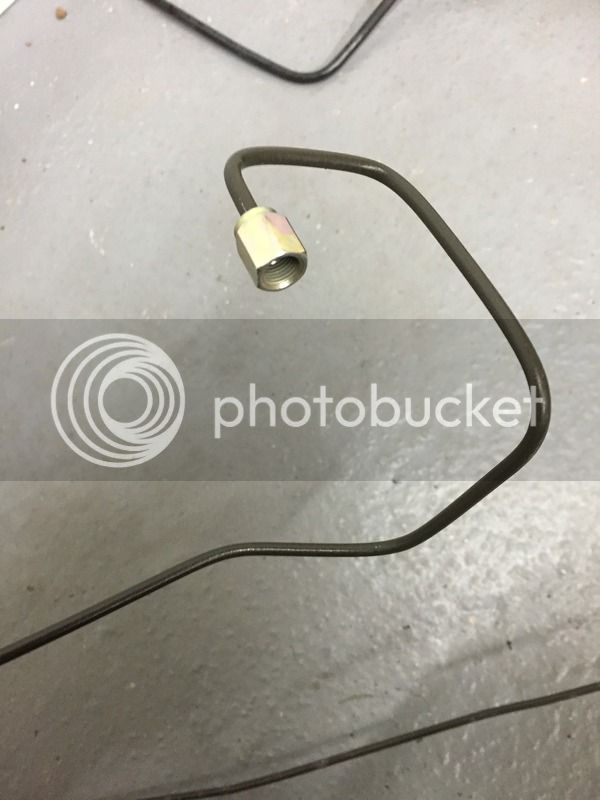
And they are pretty dam close to the originals
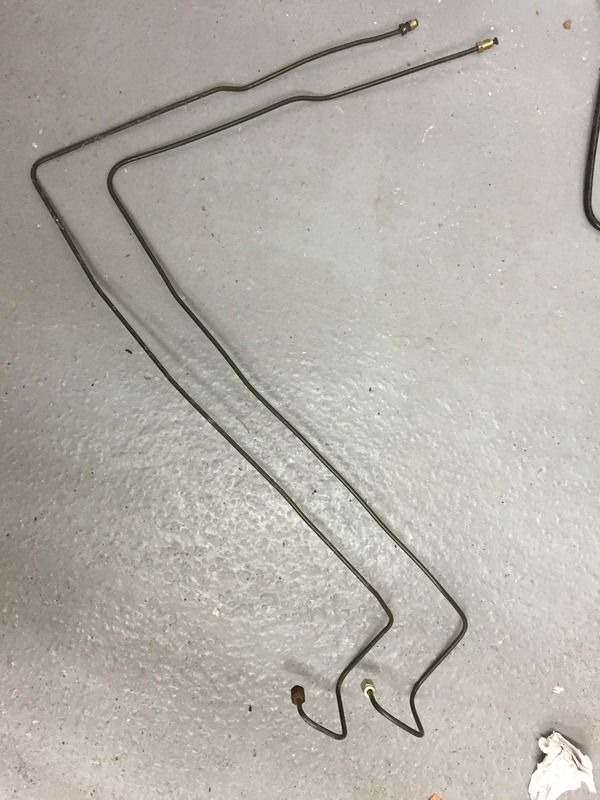
Now the testing time will be when the car comes back.... Will they fit?!!!!
Thanks to the legend that is Simon (Blue3), I now have a brand new genuine rear bumper to replace the damaged old one that had cracks, moisture related acne (more on that later) and had been hacked about for mudflaps. Trouble is, even from the factory the bumper quality leaves a lot to be desired. Simon warned me that the fog lights need fitting and fettling before fitting, and he wasn't wrong. Both sides were a really bad fit:

It wouldn't even sit flat.... And when I'd sorted that issue, it didn't sit square in the hole either...

The towing eye covers didn't fit properly either, so armed with a Dremel, file and sandpaper, I set about making the buggers fit properly before I even put it in the car to go to the bodyshop.
Next up was the rear beam, as you can see from the picture, it was a bit crusty.

The one behind it is a spare I was getting powdercoated for my black Puma. So, off to the powdercoaters for the two beams, all the front bumper grills and axle brackets. Got them back and all I can say is 'Wow!'. Simply amazing job, thanks so much to JK Powdercoaters in Wakefield. Top job!


Good job the wife to be never goes on this forum, the wedding would be off if she saw my car parts in the living room!

Even the brackets came up first class:

So, back to the body....

Work has been really cracking on. The inner sill has been replaced, and a new outer sill fitted courtesy of Ex Pressed Steel Panels and Evil Rob, Emma and Barry's perseverance to get them made.

The bodyshop said they were excellent quality and they look amazing to boot. Being a. FRP, they had to beat the panel about just like Tickford did so there is room for the outer quarter!

I got a bit OCD as normal and got them to paint the sill and inner (original quarter) before putting the outer on.
So to the bumpers. Oh dear. So it looks like they've never been painted, but they were covered in moisture blisters, the bodyshop had to sand down right to the gel coat. As mine was the third last to be built and last to be delivered, it's quite possible that unpainted parts were left exposed to moisture until mine was thrown together

Lastly for now, there was the floor which didn't look too bad. I'd bought a new outer floor strengthener from Ford as the old one was caved in from being jacked up poorly over the years. It took a bit of removal, but once out more rot was exposed:

So more welding to the floor before the strengthener can go back in. I want it to look like its never been off and straight from the factory.
While the car is away, I've been busy doing other bits ready for it to come back. The rear brake lines needed replacing, but I really wanted the proper olive green ones, not copper. It turns out you can get the original pipe, but it's on a roll. So, armed with a little knowledge and a lot of hope, I set off...

Now you'll notice that the original square return on the pipe I've not replicated as my pipe benders just didn't do a tight enough radius. When I'd finished I was really pleased with the rest of the pipe, but I just couldn't live with a bad pipe when you've gone to the trouble of getting the proper pipe. So with some off cut, time to get some practice with the vice, block of wood and screwdriver!

Got it cracked, now onto making another pipe. Can't mess it up though at over £10 a meter! Thankfully, really happy with the results!

And they are pretty dam close to the originals

Now the testing time will be when the car comes back.... Will they fit?!!!!


