- Joined
- Oct 3, 2007
- Messages
- 14,816
If anyone wants to build a shed, then this is what we did today as some sort of a guide:
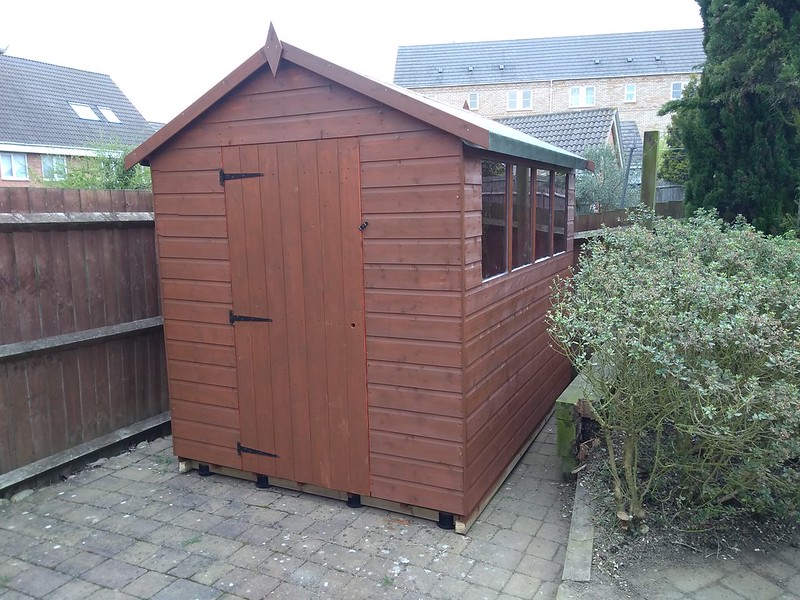
After many recommendations I plumped for an 8'x6' Tiger shed when they had their latest discounts going.
I thought I'd share some pictures and my experiences for those (like me) that had never made up a shed from flat pack. I'll add links to things for reference too in case it helps some people wanting to do the same.
Went for this shed:

https://www.tigersheds.com/product/tiger-shiplap-apex-shed/?option=428
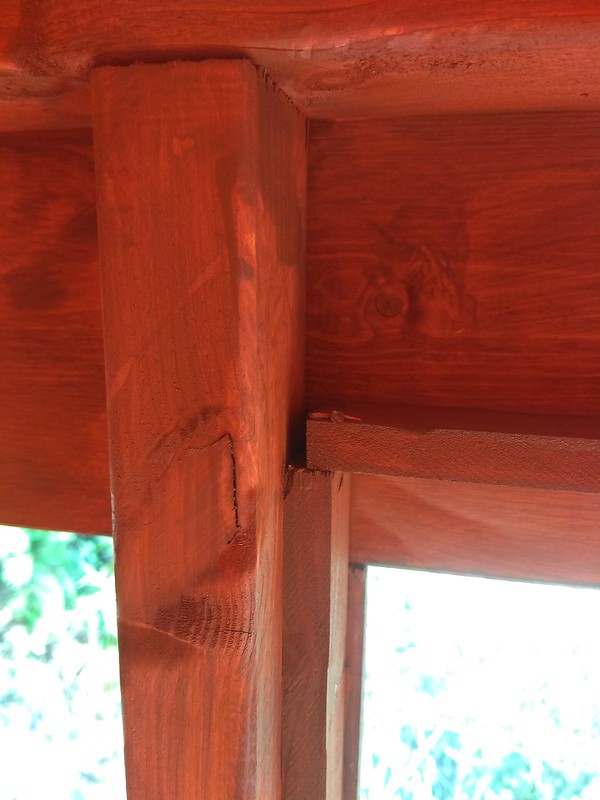
The great thing with these tiger sheds is that they're tongue and groove all round including the floor rather than some rot prone MDF or similar.
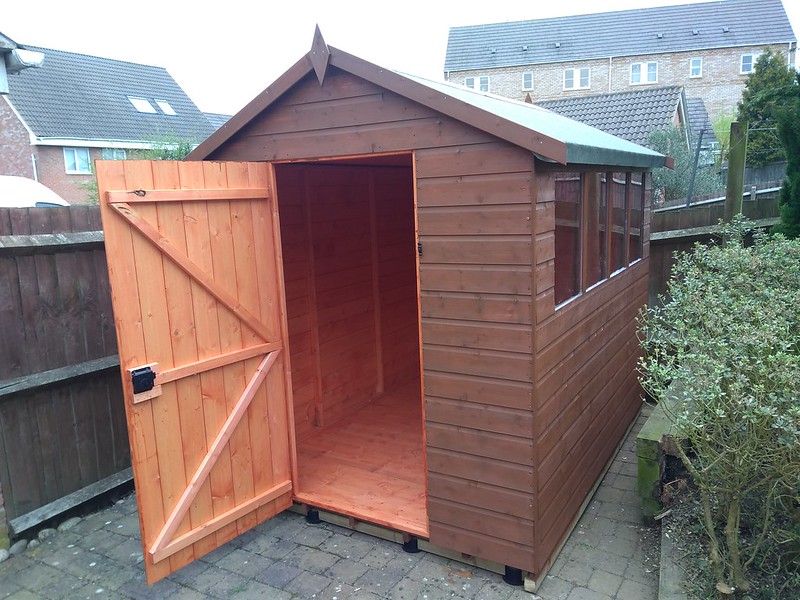
I ordered a left hand door option and the glass kit (rather than plastic windows). There's lots of other extras you can add if you need - including an installation team building it for you. The email communications with Kristian at Tiger sheds couldn't have been better - answering some of the daft questions I had including delivery timings.
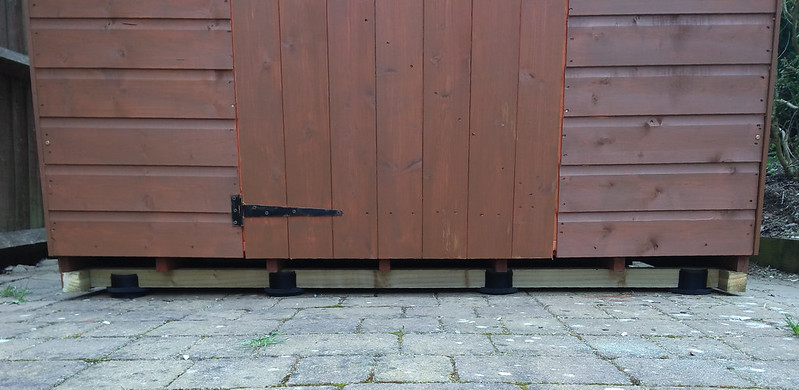
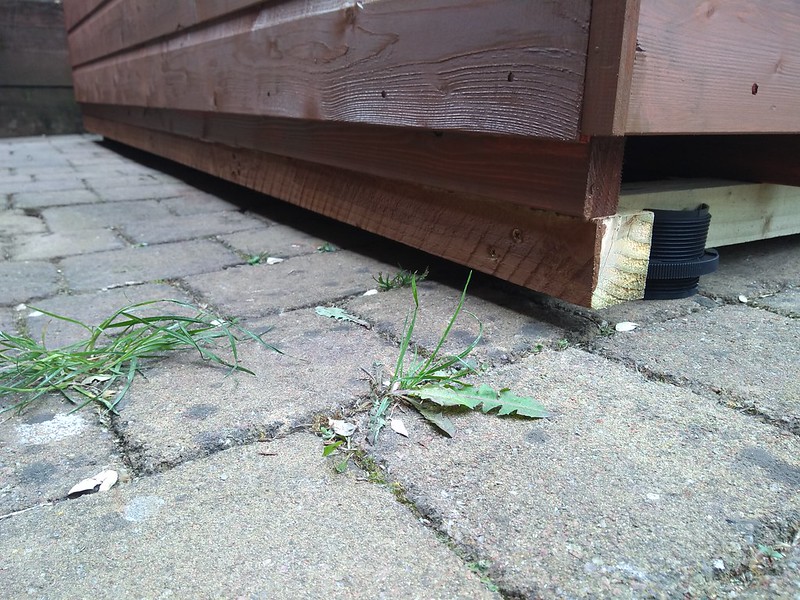
Where it was going to go was a bit uneven so to ensure a level base I ordered some adjustable decking / flooring cradles.
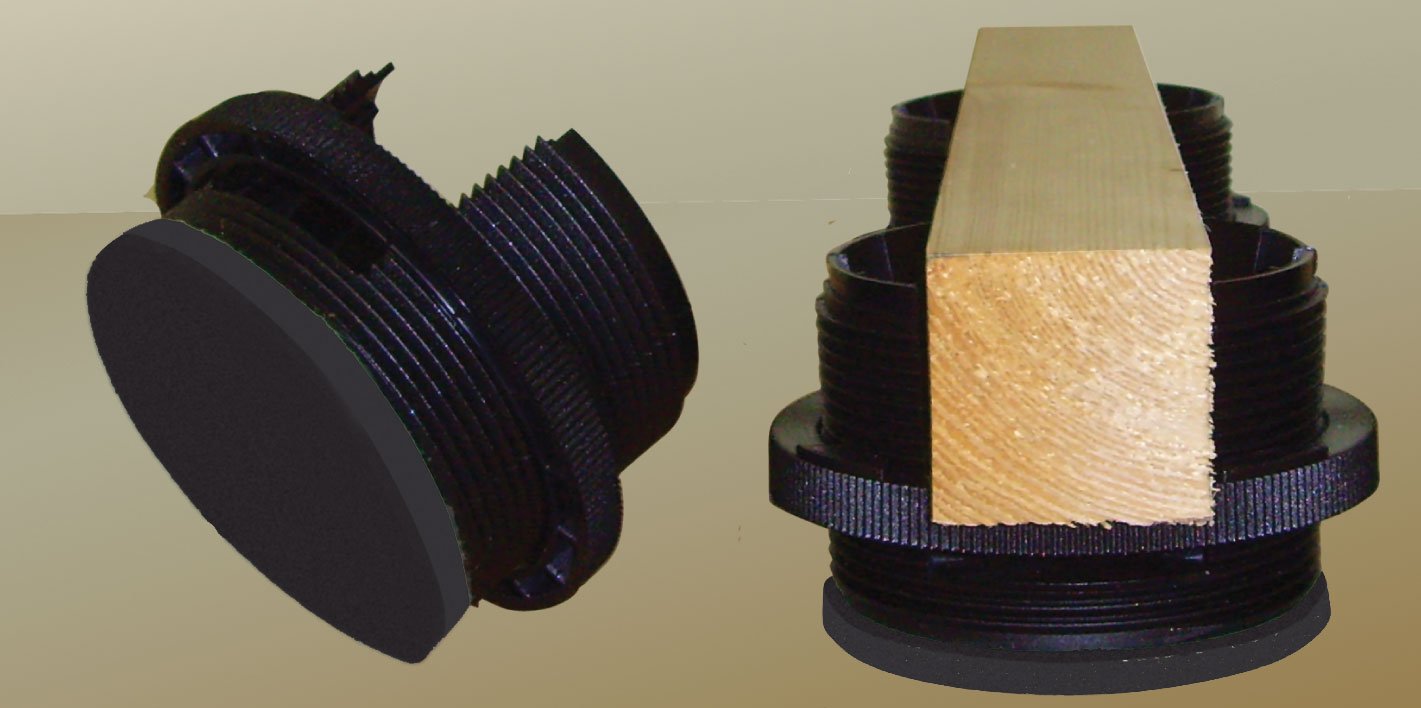
https://www.amazon.co.uk/gp/product/B06XGG3PZQ/
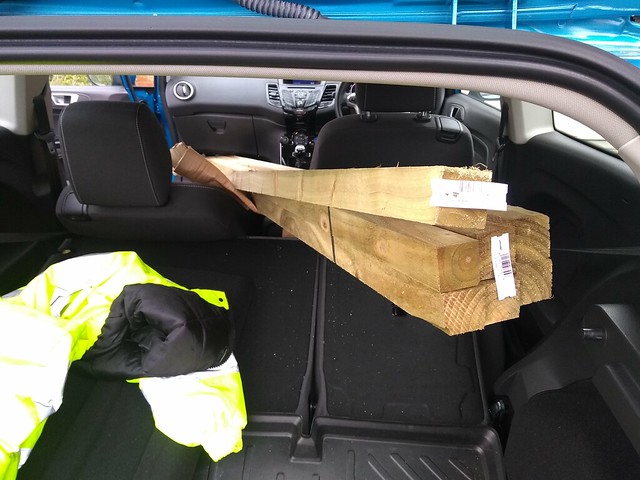
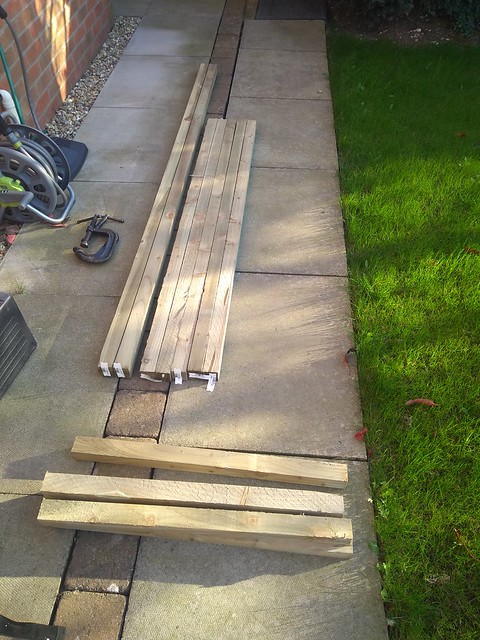
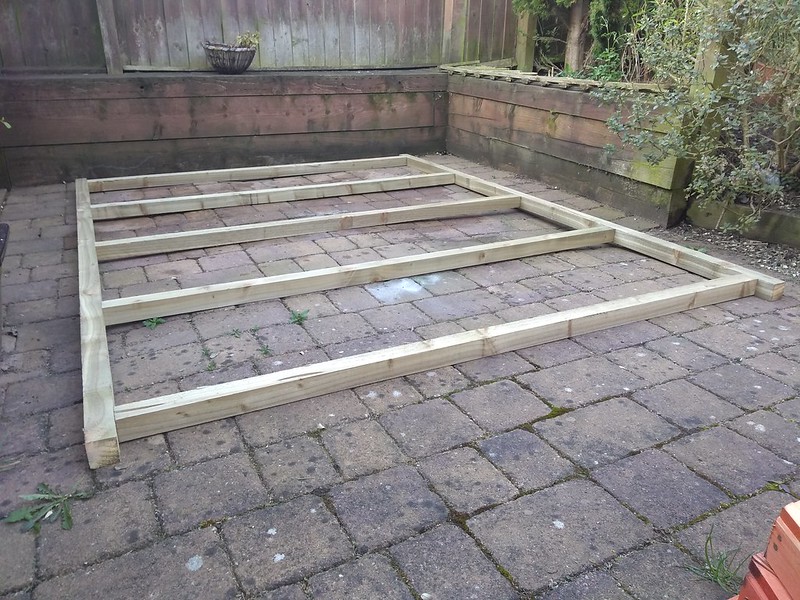
I then made up some 50x50 kiln dried and treated timber into a framework to suit the Tiger floor. Who knew 2400mm timber would fit in my little daily chugger Fiesta?
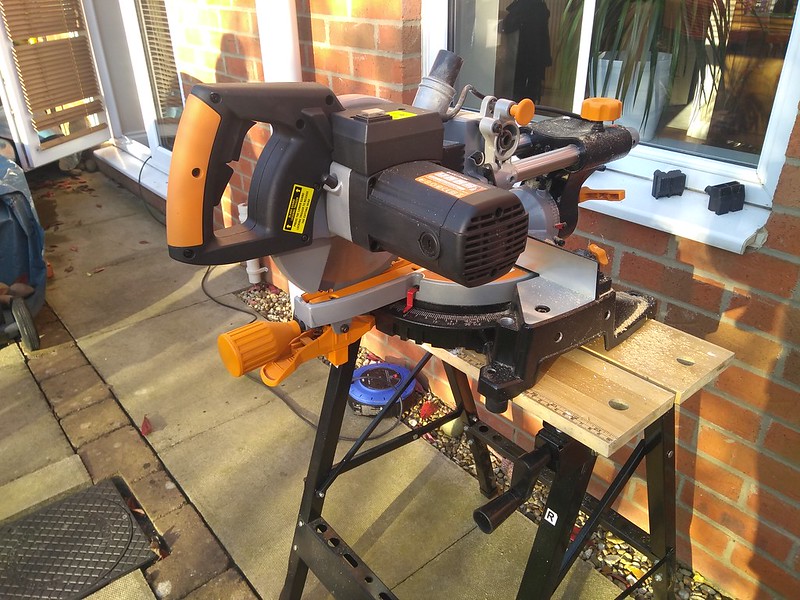
Mmmm, power tools,
Then leveled it up with the cradles underneath. This also helps any running water pass underneath it as the right side is a bit higher than the left.
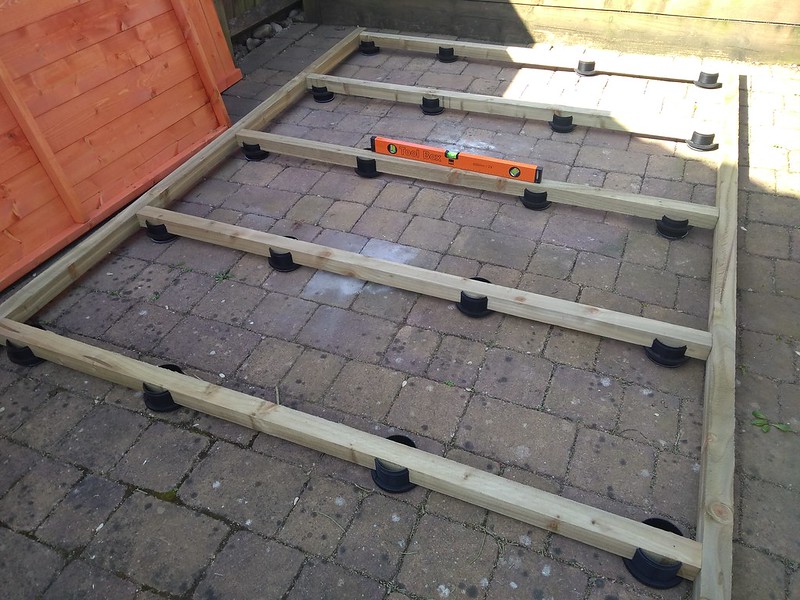
Doing this I could level it up without the floor down - something which would have been very tricky with just the floor. Level floor = a door that opens and closes and a properly square construction.
Then the floor went on.
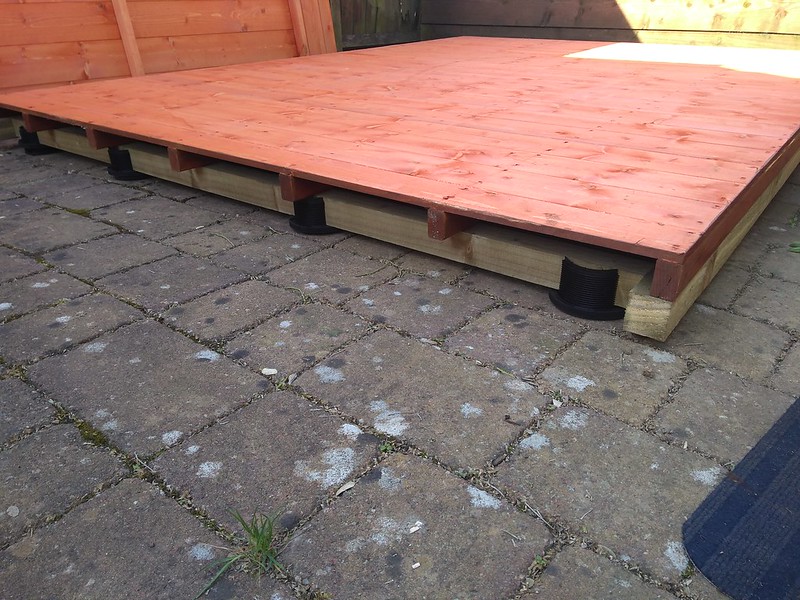
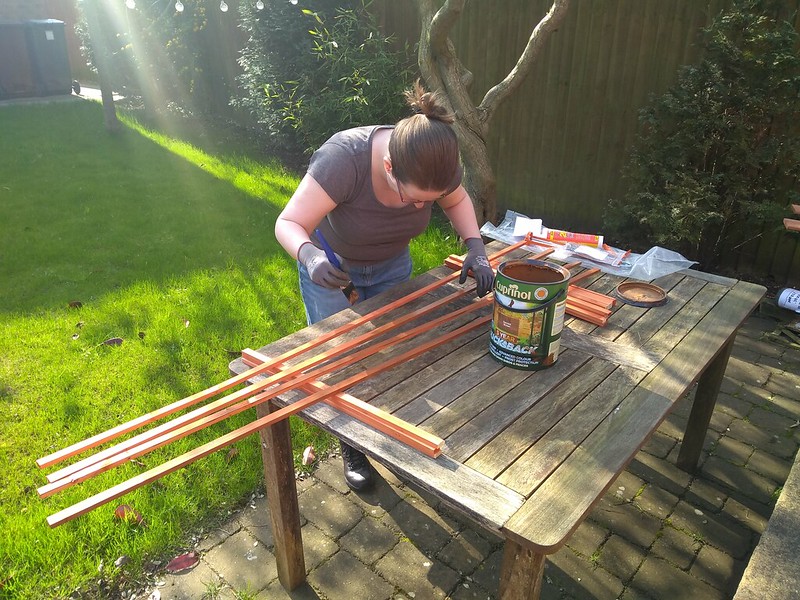
The underside of the floor is recommended to paint to maximise protection. I pre-painted all the other panels before assembling it to make sure I got everywhere. (then went over again when it was assembled)
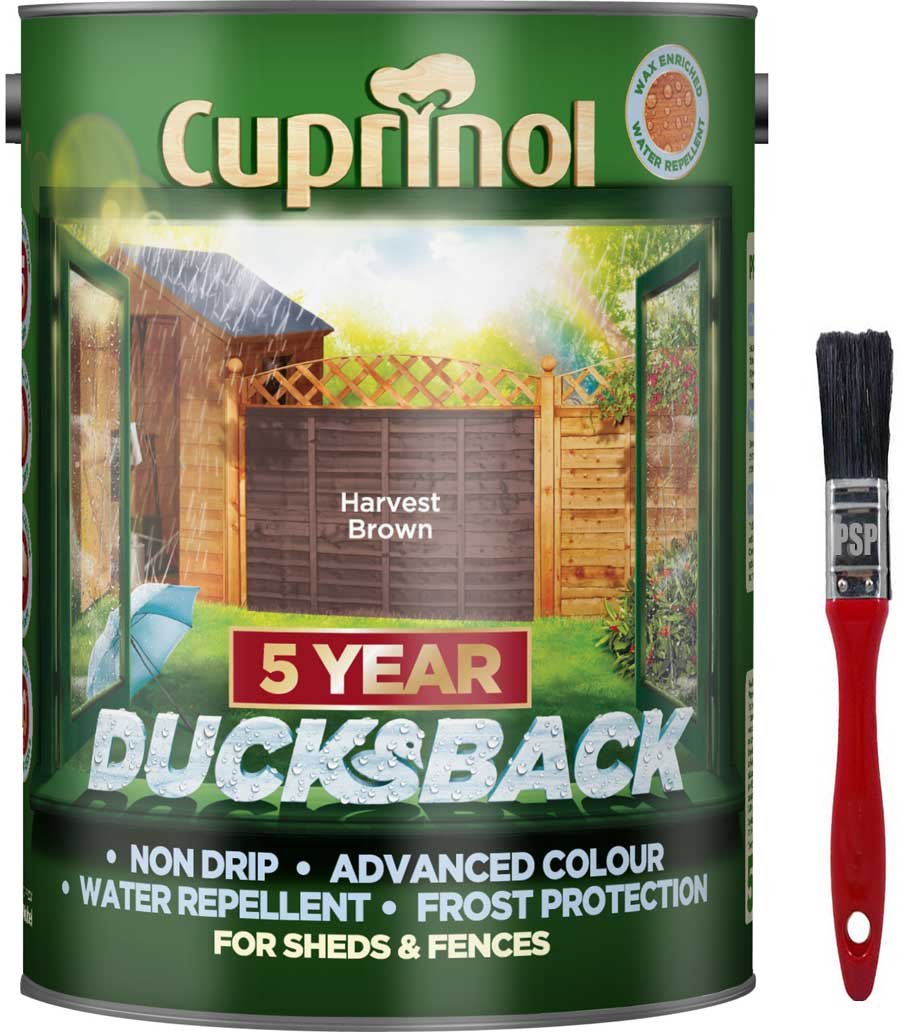
I used Cuprinol Ducksback - Harvest Brown which went on well.
https://www.amazon.co.uk/dp/B003612EA4/
Then put on a side and gable end. All the screws and coachbolts are supplied by Tiger. I only put a few nails in to hold it together to start with in case I had to re-align something later.
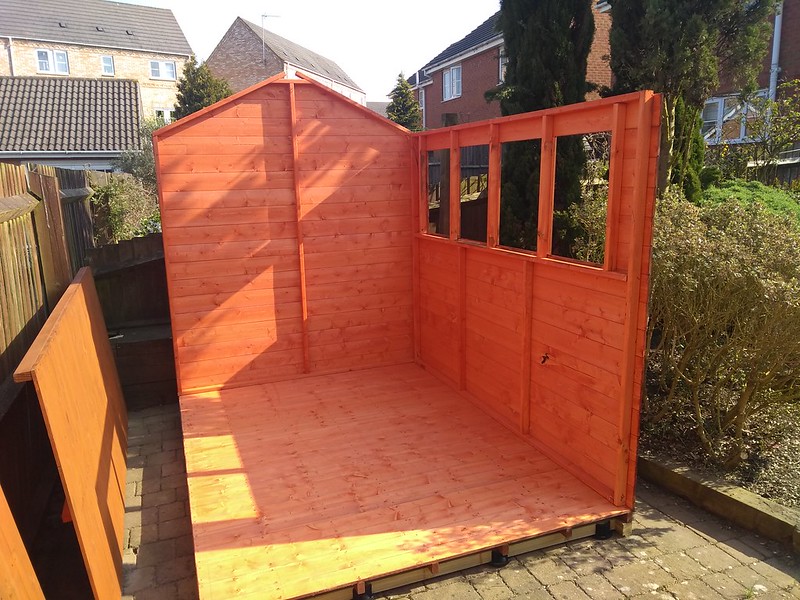
Then another side and the front,
Then the two halves of the roof goes on.
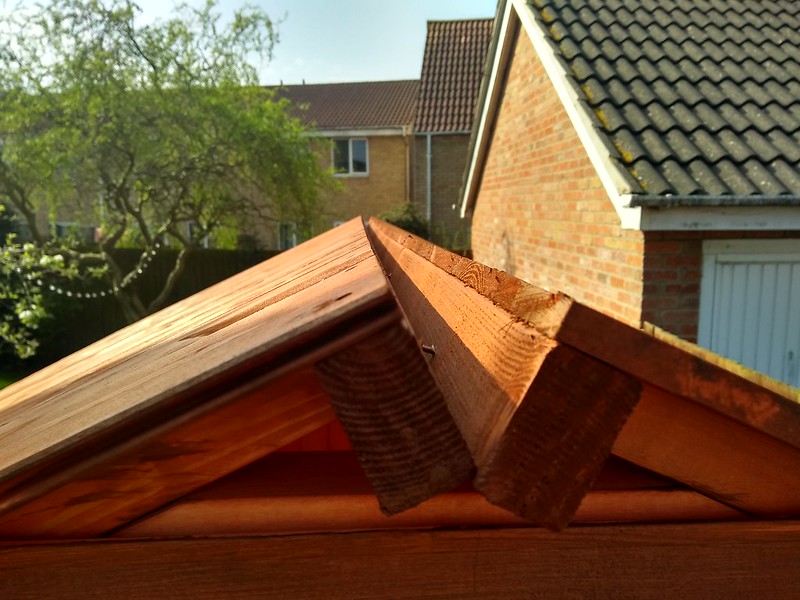
They're nailed together from the inside and then nailed on to the gable ends.
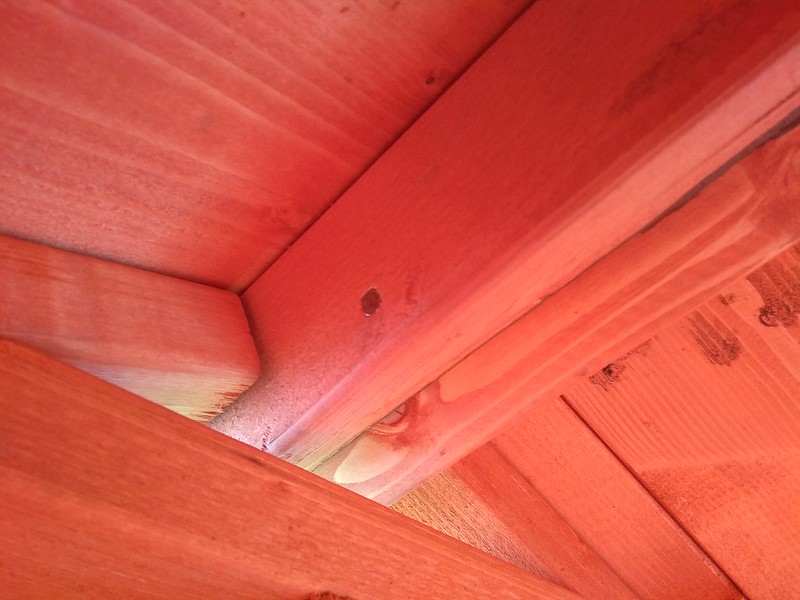
Then knowing the roof was aligned correctly and the door was fine I put the rest of the nails through the floor, ends, side and roof to make sure it was nice and secure.
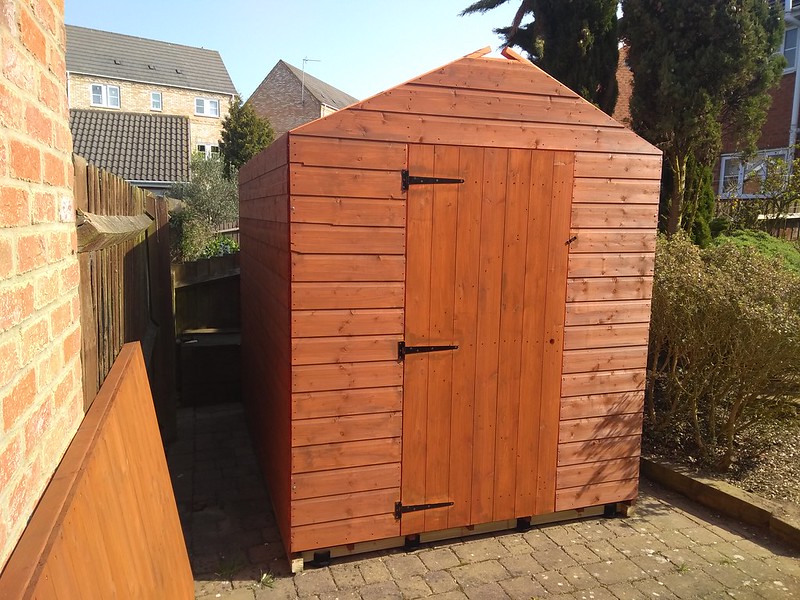
Next was laying on the roof felt. Each side then the over-cap. All secured with clout nails.
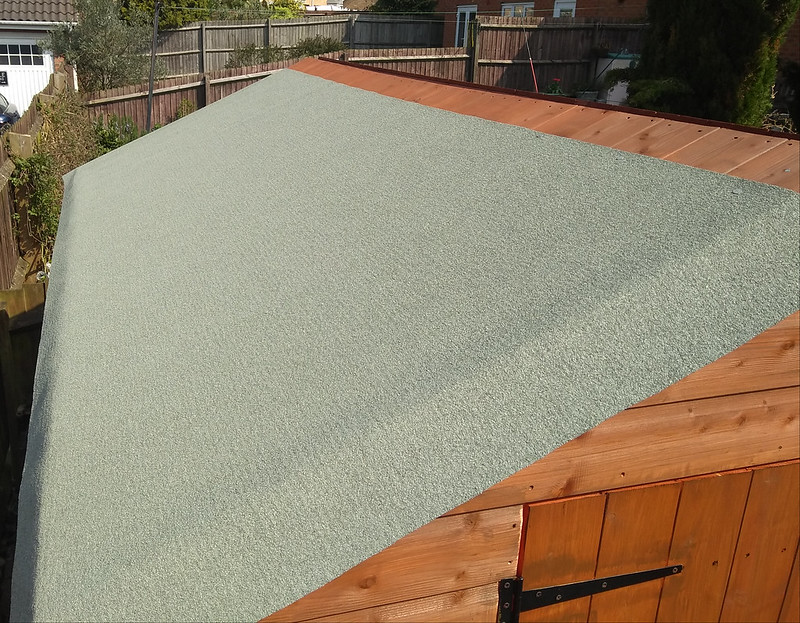
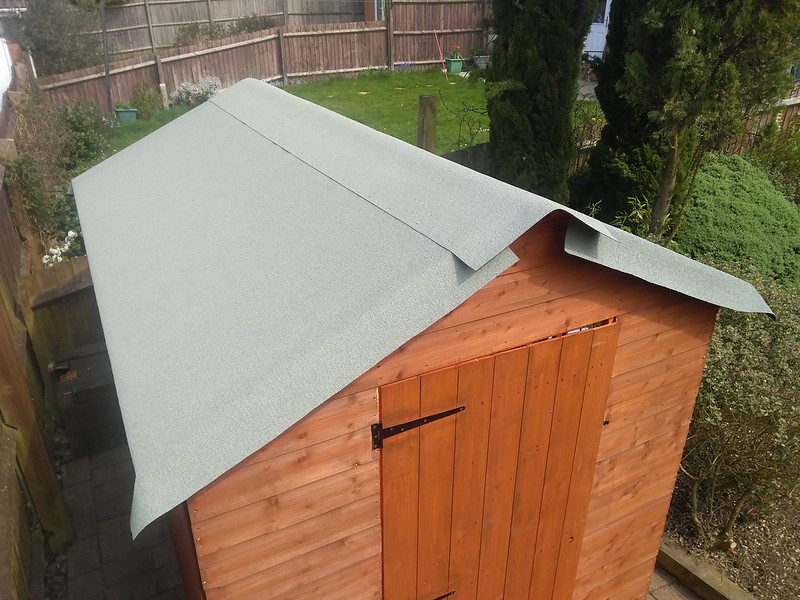
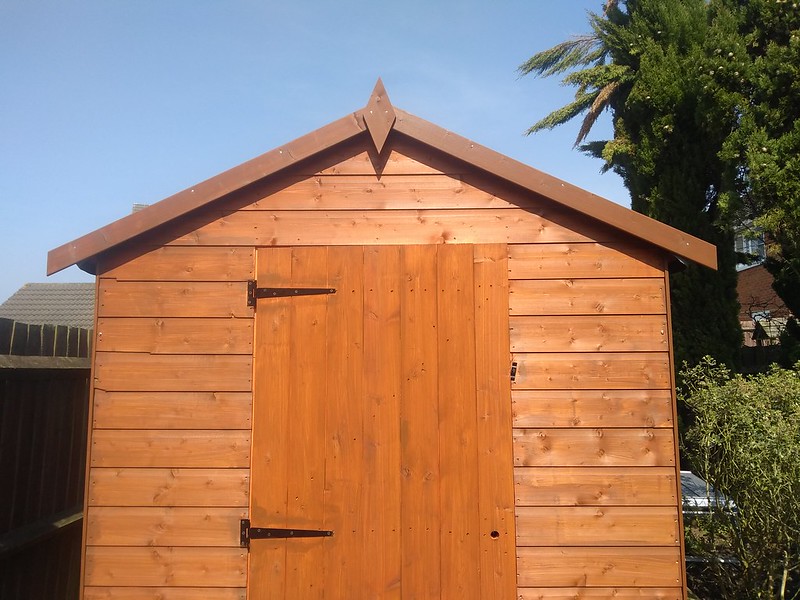
Then the barge boards went on - trapping the ends of the felt which I trimmed to suit along with the corner pieces to finish it off.
Cherie had already started going around the whole thing with another coat of Ducksback whilst I was assembling so by the time I started the glazing, she'd nearly finished - she also did all the fiddly bits which wind me up no end,
The only problem I had was that one of the uprights by the windows was a few mm too far one way, so one pane didn't fit. So I had to chisel it a bit wider before fitting the glass (tempered). So check that before putting it together as moving it before it's together would have been far simplier.
Then a bit of sealant around the outside outside window edge. With thunderstorms forecast we called it a day as it was water tight. I'll probably fix some "skirting" on to the bottom to hide the adjustable feet at some point - whilst allowing water flow underneath but for now it's all done. Took about 5 hours yesterday with the floor frame and panels first coat, and another 6 today.
Will do something with the inside too (paint / shelves etc) soon too.
Sides,
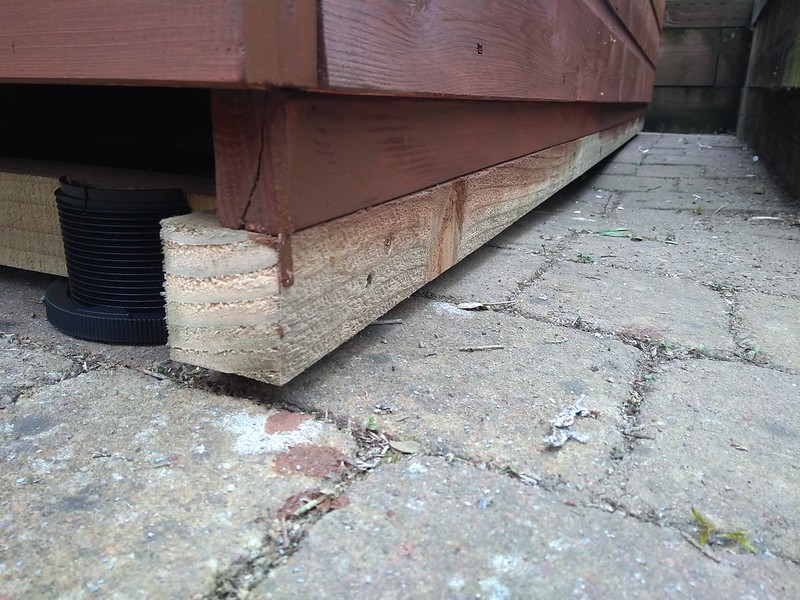
Much more adjustment height this end,
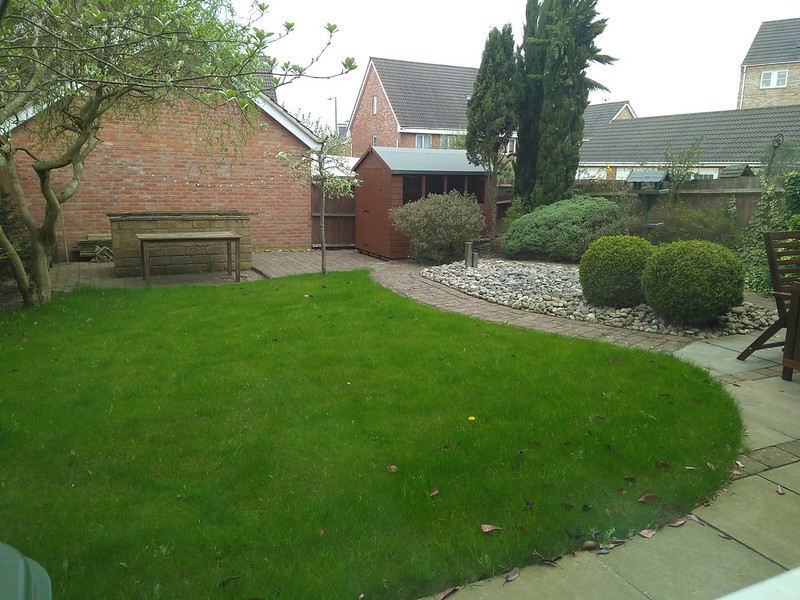
Blends in nicely at the bottom of the garden,
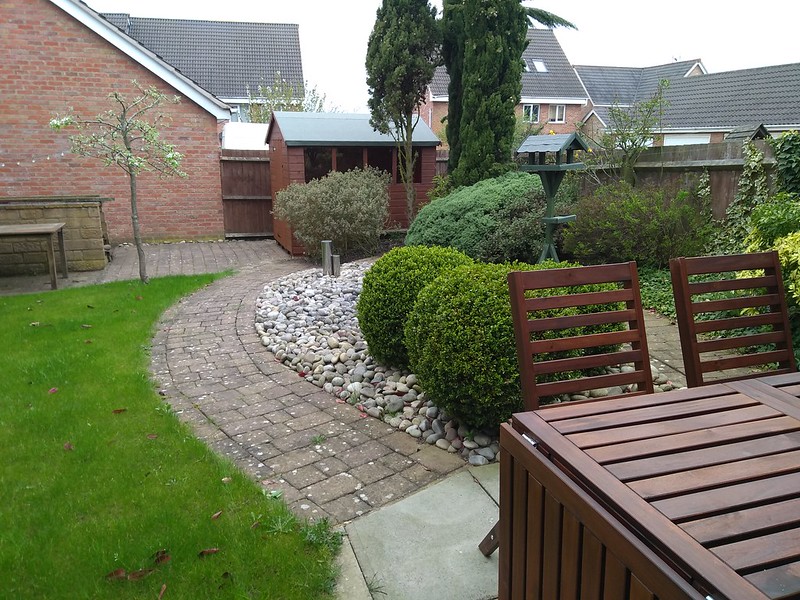
View from kitchen window:
I found the whole process pretty easy - just got to be methodical and take your time. Full instructions come with the shed as well as all the hardware you'll need.
Hope that's useful for someone - any questions, just ask.")
Now off for a hard earned beer!
After many recommendations I plumped for an 8'x6' Tiger shed when they had their latest discounts going.
I thought I'd share some pictures and my experiences for those (like me) that had never made up a shed from flat pack. I'll add links to things for reference too in case it helps some people wanting to do the same.
Went for this shed:
https://www.tigersheds.com/product/tiger-shiplap-apex-shed/?option=428
The great thing with these tiger sheds is that they're tongue and groove all round including the floor rather than some rot prone MDF or similar.
I ordered a left hand door option and the glass kit (rather than plastic windows). There's lots of other extras you can add if you need - including an installation team building it for you. The email communications with Kristian at Tiger sheds couldn't have been better - answering some of the daft questions I had including delivery timings.
Where it was going to go was a bit uneven so to ensure a level base I ordered some adjustable decking / flooring cradles.
https://www.amazon.co.uk/gp/product/B06XGG3PZQ/
I then made up some 50x50 kiln dried and treated timber into a framework to suit the Tiger floor. Who knew 2400mm timber would fit in my little daily chugger Fiesta?
Mmmm, power tools,
Then leveled it up with the cradles underneath. This also helps any running water pass underneath it as the right side is a bit higher than the left.
Doing this I could level it up without the floor down - something which would have been very tricky with just the floor. Level floor = a door that opens and closes and a properly square construction.
Then the floor went on.
The underside of the floor is recommended to paint to maximise protection. I pre-painted all the other panels before assembling it to make sure I got everywhere. (then went over again when it was assembled)
I used Cuprinol Ducksback - Harvest Brown which went on well.
https://www.amazon.co.uk/dp/B003612EA4/
Then put on a side and gable end. All the screws and coachbolts are supplied by Tiger. I only put a few nails in to hold it together to start with in case I had to re-align something later.
Then another side and the front,
Then the two halves of the roof goes on.
They're nailed together from the inside and then nailed on to the gable ends.
Then knowing the roof was aligned correctly and the door was fine I put the rest of the nails through the floor, ends, side and roof to make sure it was nice and secure.
Next was laying on the roof felt. Each side then the over-cap. All secured with clout nails.
Then the barge boards went on - trapping the ends of the felt which I trimmed to suit along with the corner pieces to finish it off.
Cherie had already started going around the whole thing with another coat of Ducksback whilst I was assembling so by the time I started the glazing, she'd nearly finished - she also did all the fiddly bits which wind me up no end,
The only problem I had was that one of the uprights by the windows was a few mm too far one way, so one pane didn't fit. So I had to chisel it a bit wider before fitting the glass (tempered). So check that before putting it together as moving it before it's together would have been far simplier.
Then a bit of sealant around the outside outside window edge. With thunderstorms forecast we called it a day as it was water tight. I'll probably fix some "skirting" on to the bottom to hide the adjustable feet at some point - whilst allowing water flow underneath but for now it's all done. Took about 5 hours yesterday with the floor frame and panels first coat, and another 6 today.
Will do something with the inside too (paint / shelves etc) soon too.
Sides,
Much more adjustment height this end,
Blends in nicely at the bottom of the garden,
View from kitchen window:
I found the whole process pretty easy - just got to be methodical and take your time. Full instructions come with the shed as well as all the hardware you'll need.
Hope that's useful for someone - any questions, just ask.
Now off for a hard earned beer!