- Joined
- Oct 3, 2007
- Messages
- 14,816
Glovebox light installation
Guide Overview:
This guide will hopefully explain the basic principles to install a glovebox light, if you find any inaccuracies then please let me know.
(Please read the entire guide before attempting)
Difficulty: 1/5
Time: 1/2 hour
Required Tools:
The Puma didn't come with a glovebox light as standard, yet there is a hole specifically made to accept one (As the Puma dash is the same as the fiesta dash, which sometimes did have the glovebox light.)
Procedure:
1st of all get yourself the light assembly:
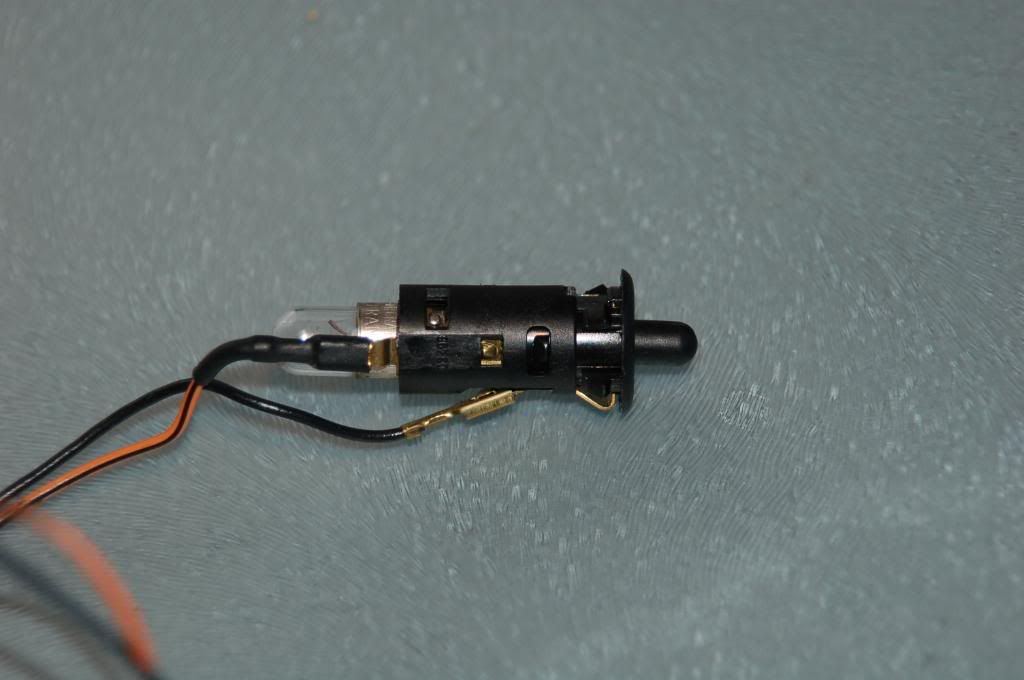
They are very often on ebay as "Fiesta / Escort / Puma glove box light upgrade" or something similar. Should only be a few pounds. Or a scrap yard. You could even go to Ford. Part Number 6114331. shouldn't be more than a fiver. (Although you'll then need to get some wire and connectors to connect it to the lamp assembly)
Then, as with all electrical work on the car - Disconnect the battery.
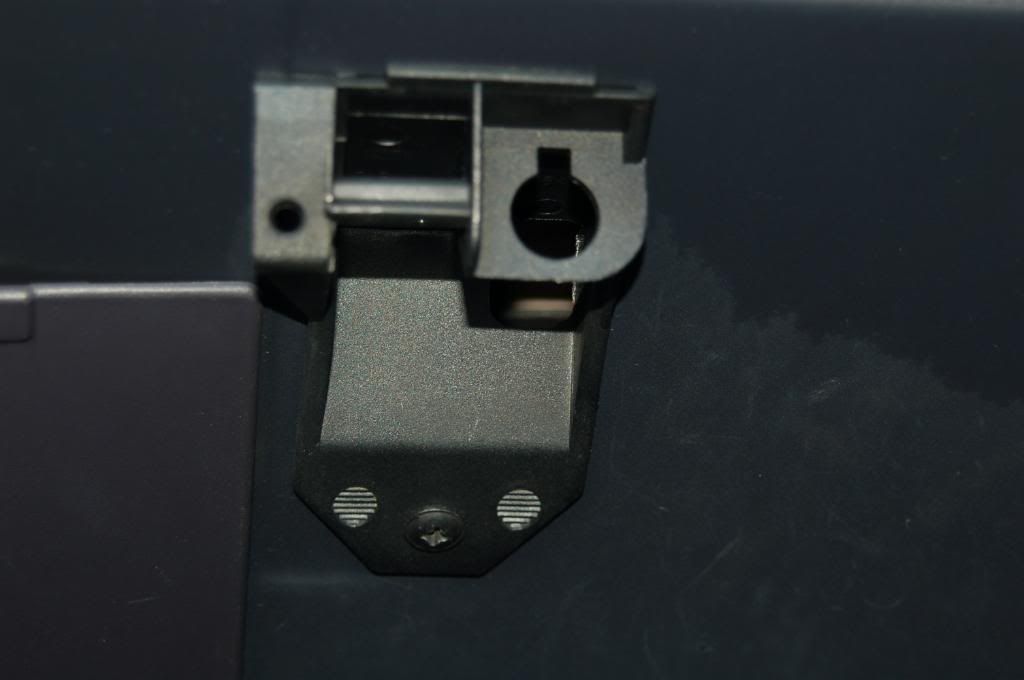
Now open the glovebox to find the bracket / latch. Remove it by removing the screw at the back and sliding it out.
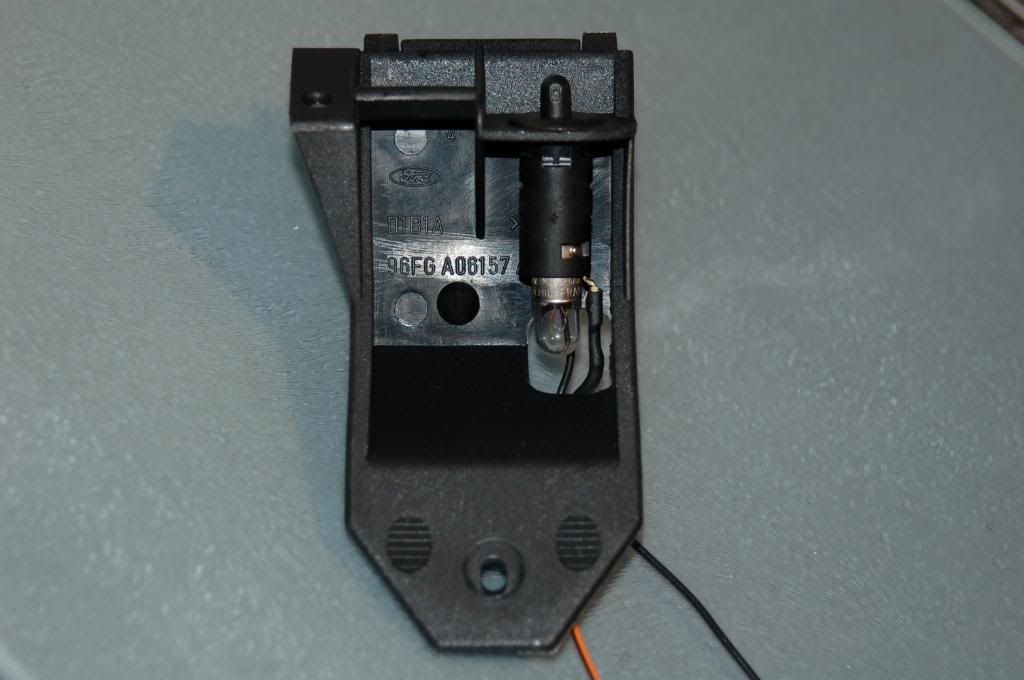
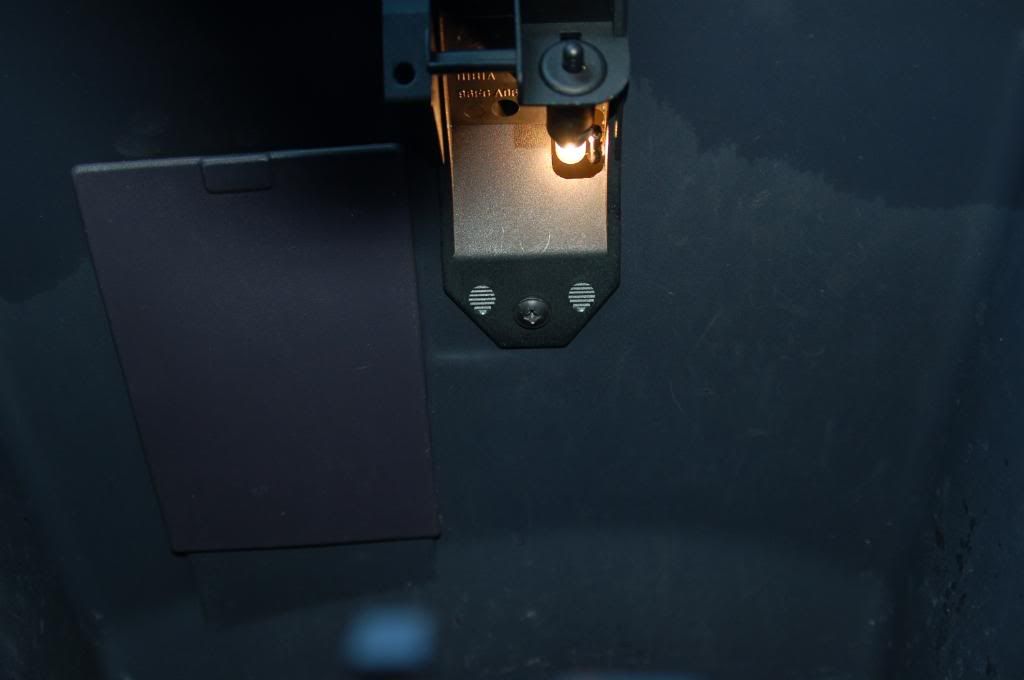
Fit the lamp assembly as shown below:
Note : it only goes in one way due to the copper connector shown in the 1st photo above.
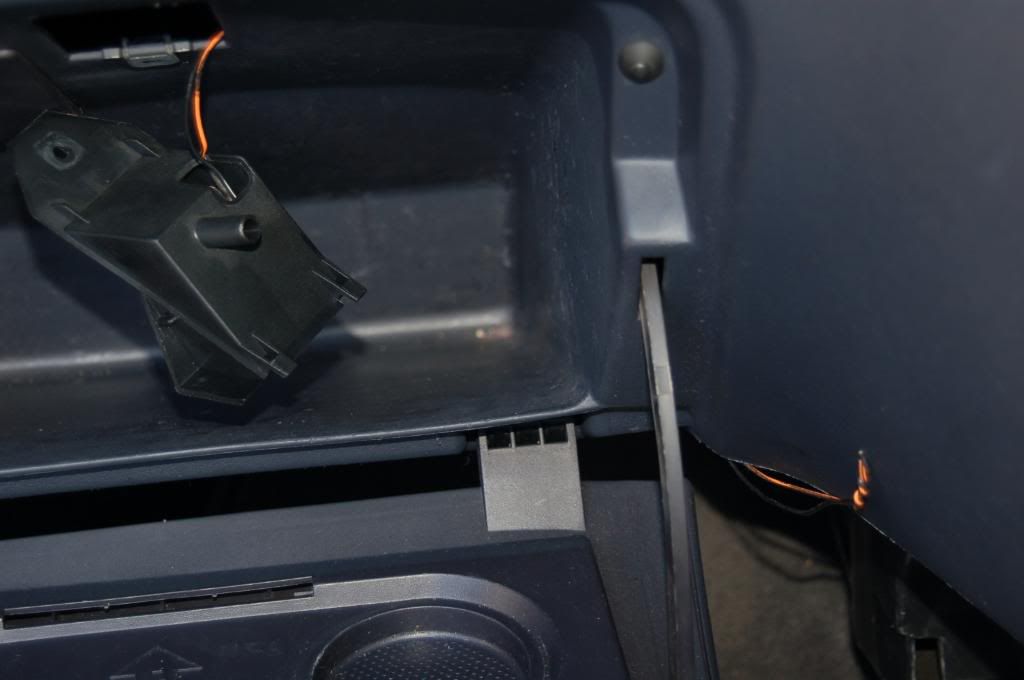
Now feed the wires up through the gap in the top of the glovebox and out towards the centre of the car. Reach up from the area below / to the left of the ashtray to feel the wires. Pull them out.
The next step is for pumas with a seperate cigarette lighter in the ashtray. For later models with it in the heater facia, a live source can be found from either the radio connections, or the clock.
Remove the ashtray. You'll see 2 fairly thick wires going to a connector behind the cigarette lighter.
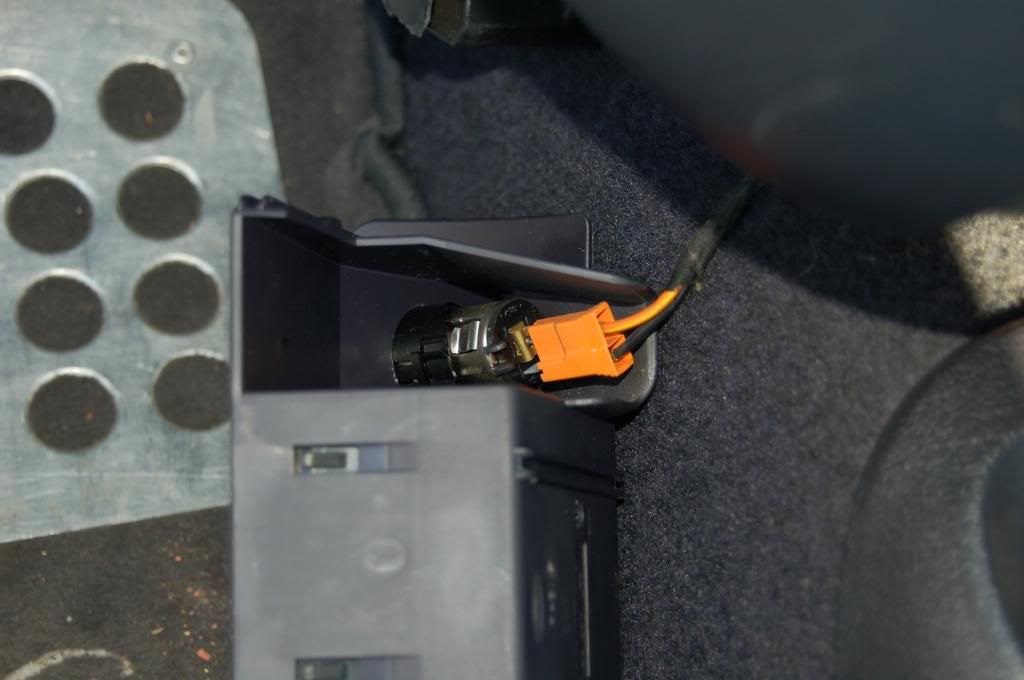
Remove the connector, and cut the wires about 6" from the connector.
Now connect the 2 glovebox light wires in with the cars existing cigerette lighter wires into a connecting block after stripping back the insulation to show 8-10mm of bare wire. Ensure the connecting block is rated to at least 20 amps, as the lighters fuse rating is 15 amps. *
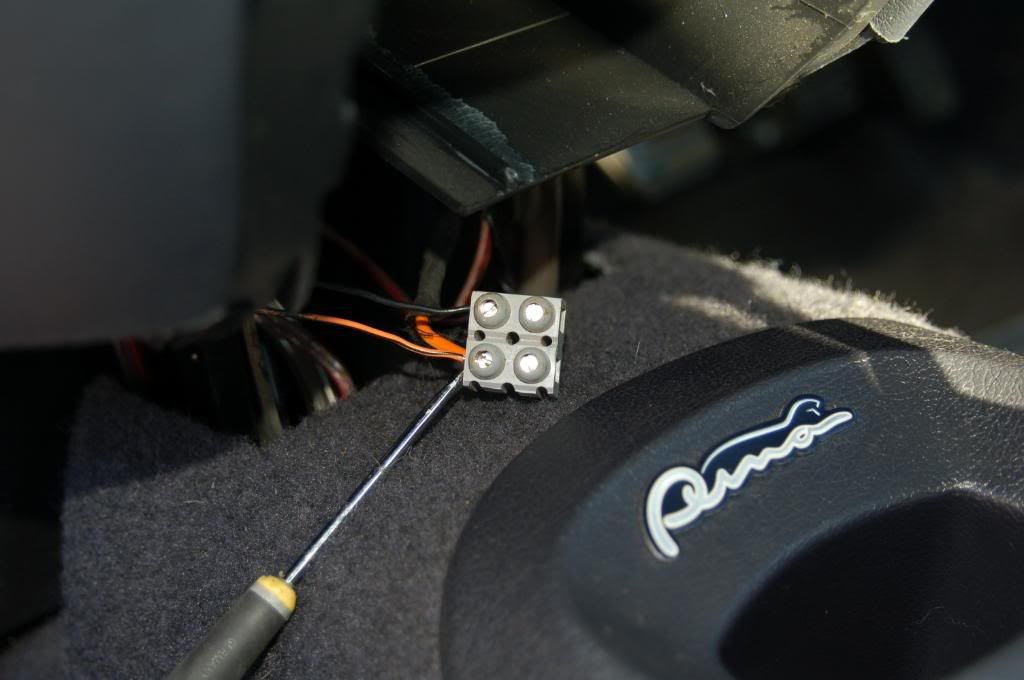
Ensure the wires are well secured, without stray wires.
Now connect the connector end, again, after stripping approx 8-10mm of wire.
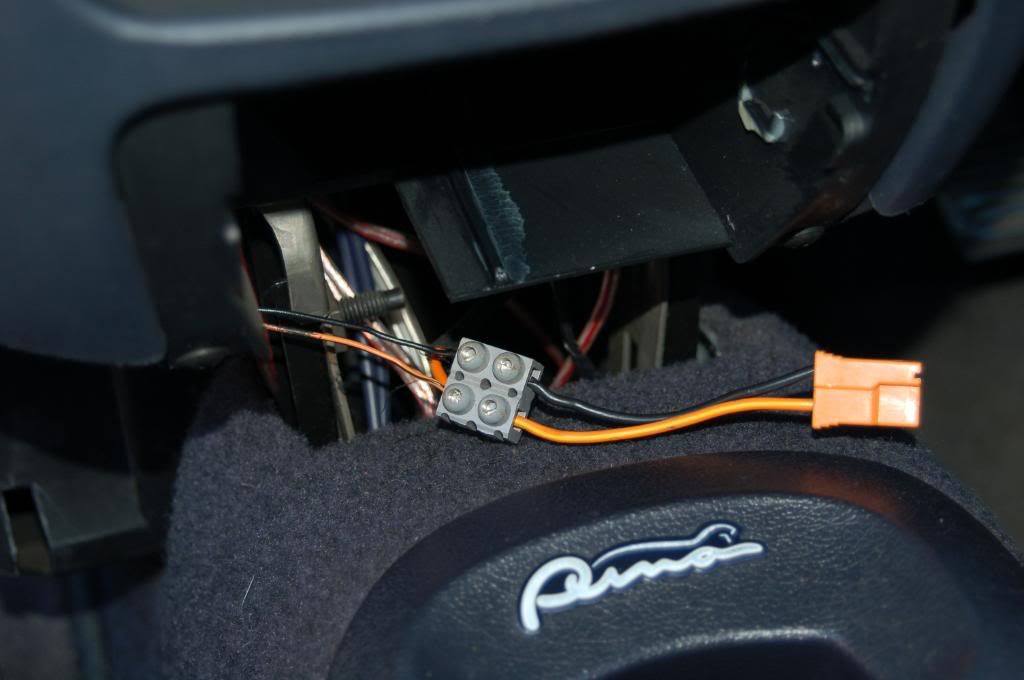
For peace of mind, it is a good idea to completely cover the wires and block with electrical insulating tape. This not only acts as an insulator should a wire come out, but also gives the wires some mechanical strength to stay in place.
Give another check to ensure the wires are securely fitted. Refit the connector to the cigarette lighter and re-insert the ashtray. Ensure the connector block is not fouling anywhere as you open and close the ashtray.
Reconnect the battery. Now when you open your glovebox, you should have a nice little light.
* Do not use the common 'scotch lock' type connectors to make this connection. They are not rated sufficiently enough to accept the 15-20amps that can pass to the cigarette lighter.
Guide Overview:
This guide will hopefully explain the basic principles to install a glovebox light, if you find any inaccuracies then please let me know.
(Please read the entire guide before attempting)
Difficulty: 1/5
Time: 1/2 hour
Required Tools:
- 10mm socket (For the battery nut)
- Cross headed screwdriver (for glovebox latch removal)
- Side cutters
- Wire strippers
- Small flat blade screwdriver (for connector block)
The Puma didn't come with a glovebox light as standard, yet there is a hole specifically made to accept one (As the Puma dash is the same as the fiesta dash, which sometimes did have the glovebox light.)
Procedure:
1st of all get yourself the light assembly:
They are very often on ebay as "Fiesta / Escort / Puma glove box light upgrade" or something similar. Should only be a few pounds. Or a scrap yard. You could even go to Ford. Part Number 6114331. shouldn't be more than a fiver. (Although you'll then need to get some wire and connectors to connect it to the lamp assembly)
Then, as with all electrical work on the car - Disconnect the battery.
Now open the glovebox to find the bracket / latch. Remove it by removing the screw at the back and sliding it out.
Fit the lamp assembly as shown below:
Note : it only goes in one way due to the copper connector shown in the 1st photo above.
Now feed the wires up through the gap in the top of the glovebox and out towards the centre of the car. Reach up from the area below / to the left of the ashtray to feel the wires. Pull them out.
The next step is for pumas with a seperate cigarette lighter in the ashtray. For later models with it in the heater facia, a live source can be found from either the radio connections, or the clock.
Remove the ashtray. You'll see 2 fairly thick wires going to a connector behind the cigarette lighter.
Remove the connector, and cut the wires about 6" from the connector.
Now connect the 2 glovebox light wires in with the cars existing cigerette lighter wires into a connecting block after stripping back the insulation to show 8-10mm of bare wire. Ensure the connecting block is rated to at least 20 amps, as the lighters fuse rating is 15 amps. *
Ensure the wires are well secured, without stray wires.
Now connect the connector end, again, after stripping approx 8-10mm of wire.
For peace of mind, it is a good idea to completely cover the wires and block with electrical insulating tape. This not only acts as an insulator should a wire come out, but also gives the wires some mechanical strength to stay in place.
Give another check to ensure the wires are securely fitted. Refit the connector to the cigarette lighter and re-insert the ashtray. Ensure the connector block is not fouling anywhere as you open and close the ashtray.
Reconnect the battery. Now when you open your glovebox, you should have a nice little light.
* Do not use the common 'scotch lock' type connectors to make this connection. They are not rated sufficiently enough to accept the 15-20amps that can pass to the cigarette lighter.
")