Small(ish) update. Just couldn't stand the fact that overhaul of alternator wasn't complete so completed it :lol:
EDIT: for future reference, these are the bearings I used:
I used PFI bearings (http://www.pfibearings.com/eCatalogue).
The big one is 17/47 mm x 14(ID/OD x width). #6303-2RS C3.
The small one is 8/23 x 14 mm (ID/OD x width). #B8-23D
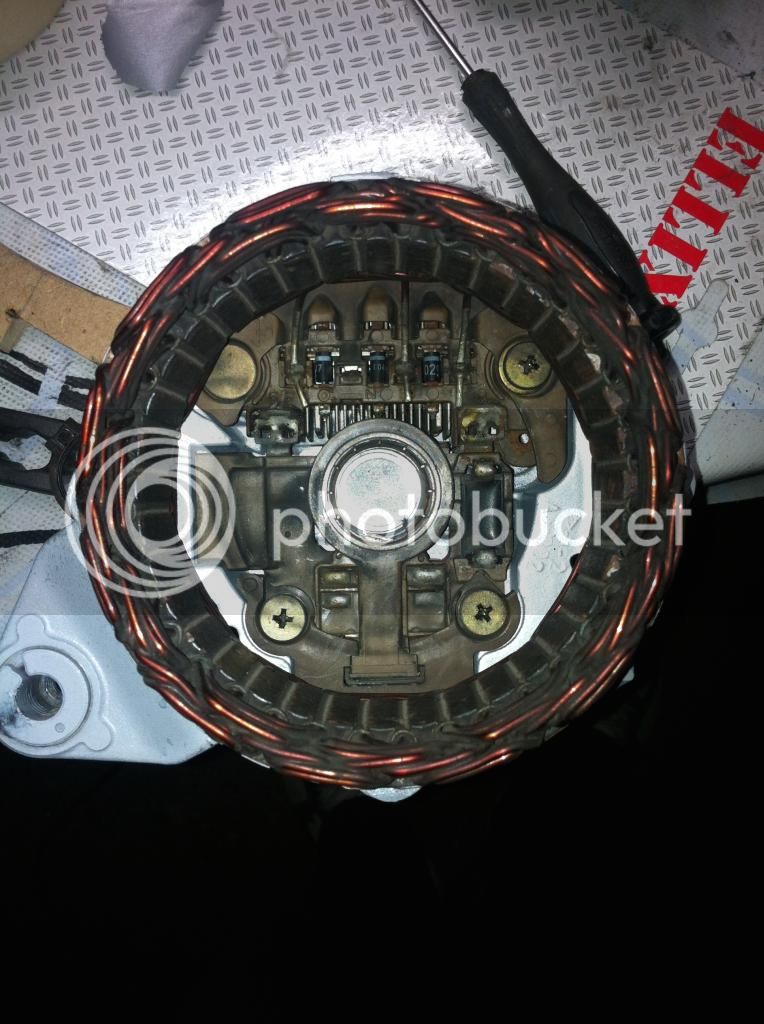
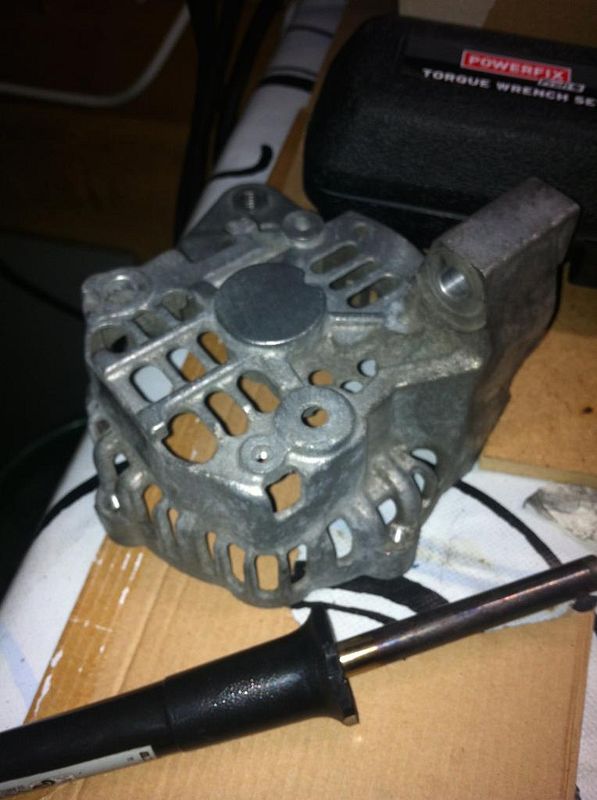
Now now how to dismantle the mitsubishi alternator which is in puma. After taking the 4 screws down left on it pulley and bearing and just pulled the front (which has a new bearing) out. It came out completely with some gentle persuasion not to break anything.
The bearing was bone dry, spinning like crazy, but rather noisy. It created very high frequency pitch at idling that was audible but barely. But the slider contacts are as good as new, incredible condition! No need for changing them, one slodering less to do!

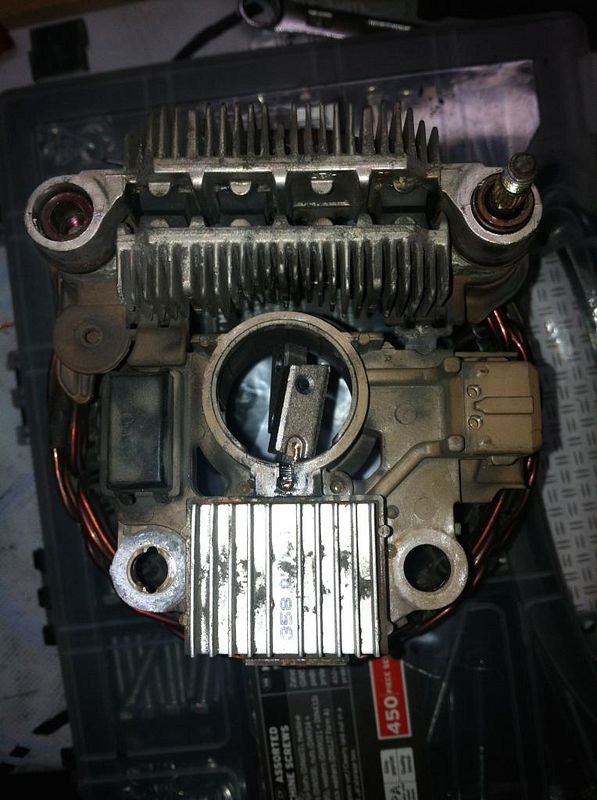
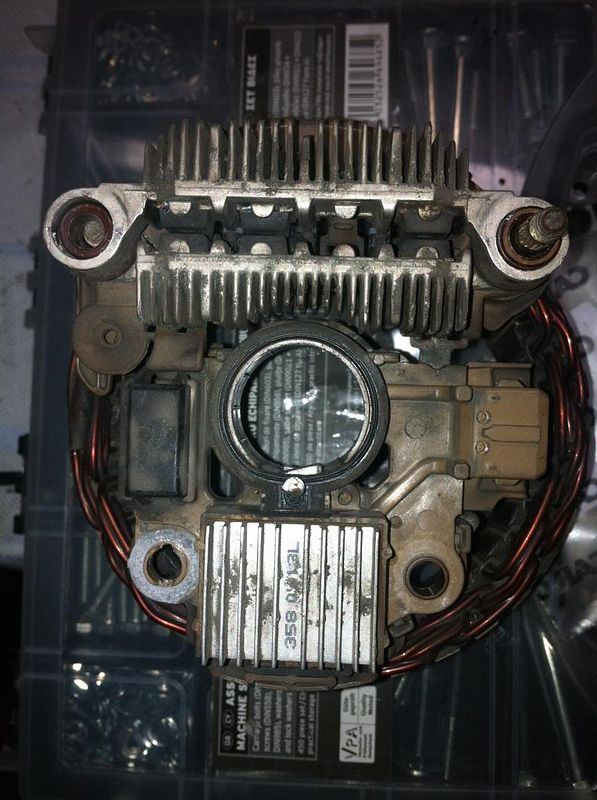
The other part of alternator with electronic section still in. You just undo these three screws and pull it out completely
And that is it!
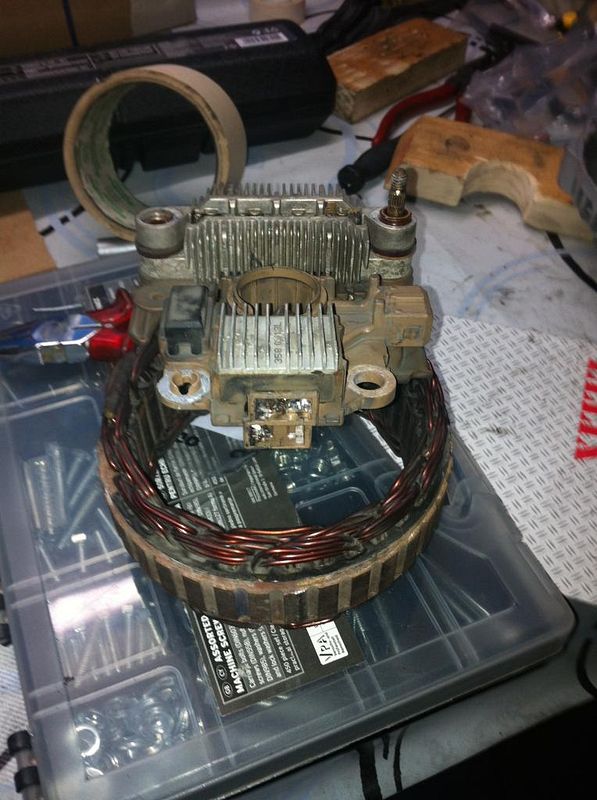
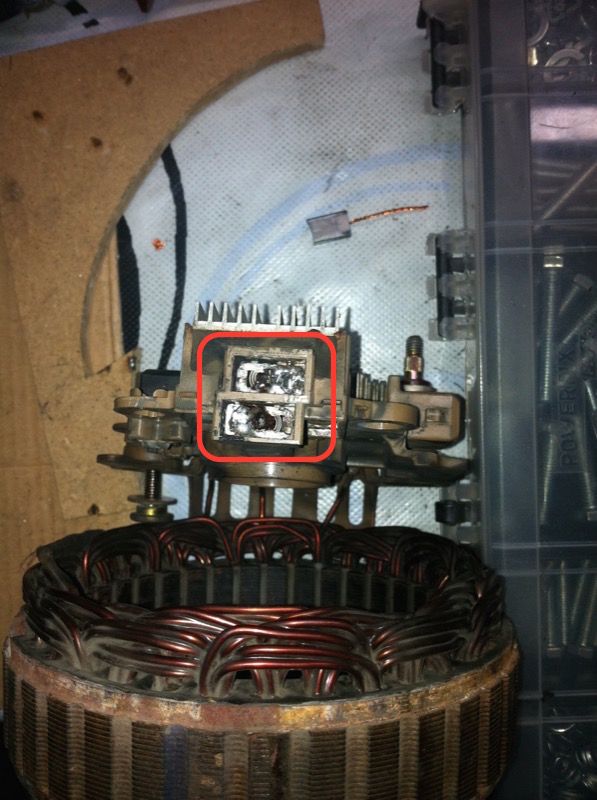
Pull down this plastic thing, it comes very easily
Carefully pry this plastic cover open. I heated it up first with a heat gun to prevent it from breaking
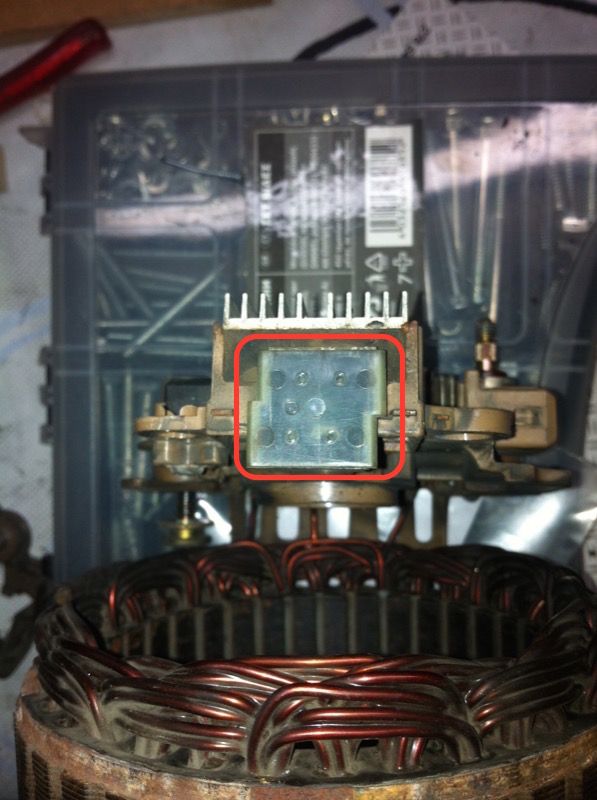
You will now see the contacts of the brushes that need desoldering
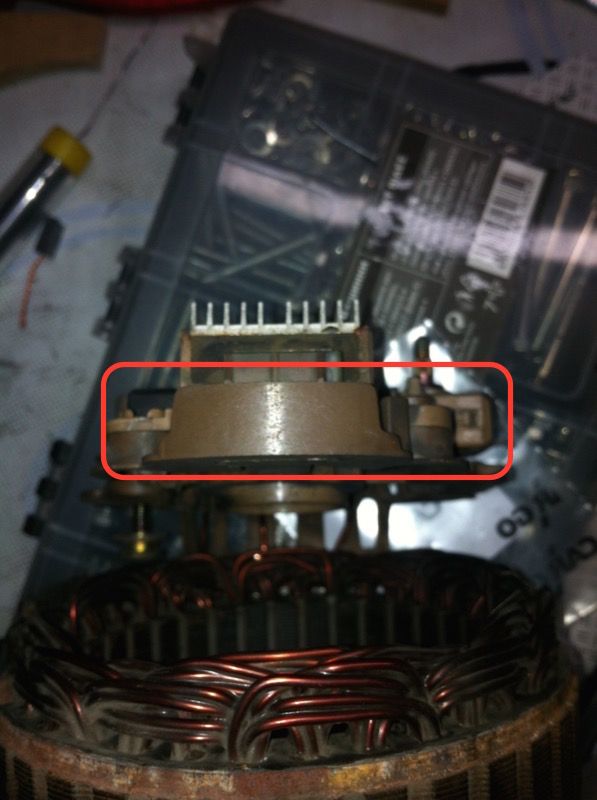
Once you do it, you can take the brushes out. Comparison of the new and the old one. The old is so worn that it has eaten the hole section
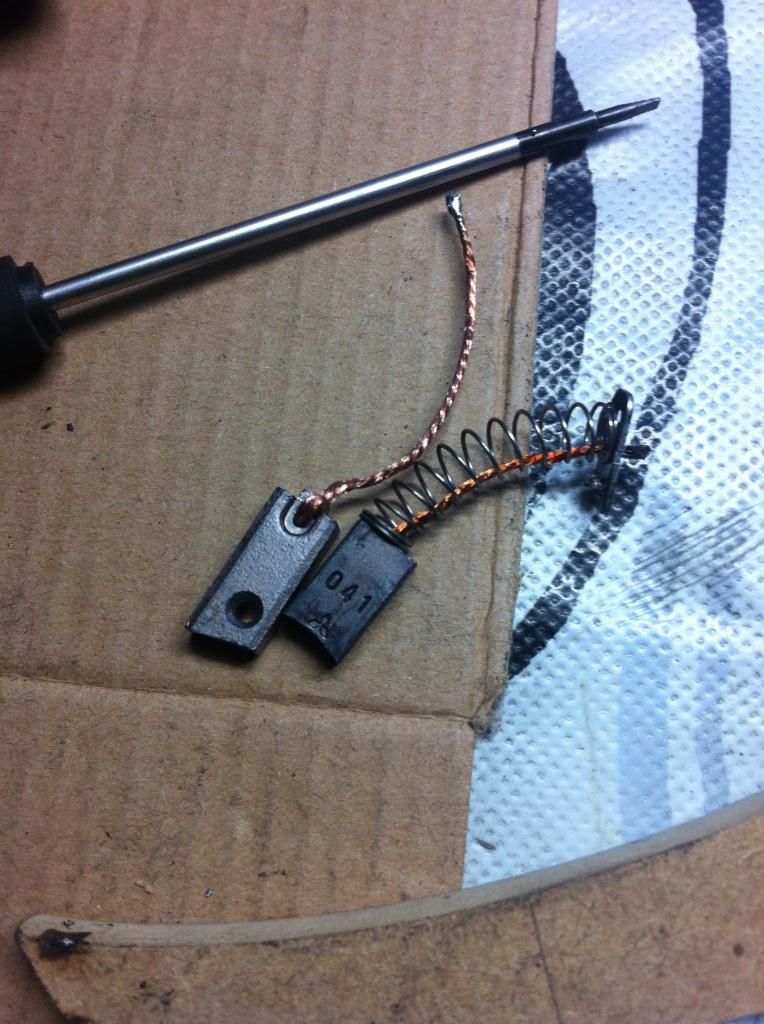
That hole is important in reassembly phase. Through it you will guide a wire that will hold the brushes in their place against the spring. Without you wouldn't be able to assemble it back!
So, resoldered the new brushes to the little plate with spring in between. I believe there are some kits on eBay that come complete with the spring and the little plate to save you the hussle of one soldering! I didn't have such, so had to do some soldering. After that was done, you are left with them protruding in the shaft area
That is why you need the wire to hold them back in! Then it looks like this
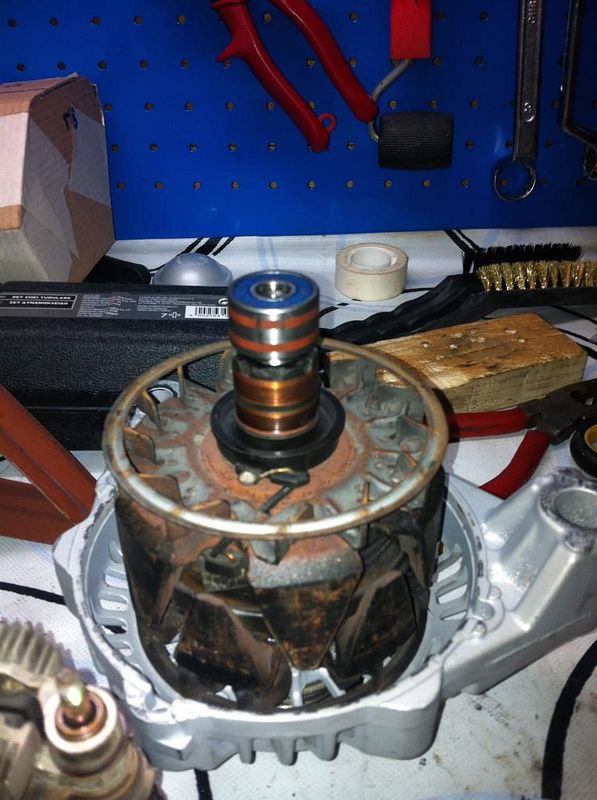
In the meantime I cleaned the other part of housing and gave it a spray to look nicer

Also changed the little bearing. It was pig to be takend down, actually. The puller couldn't reach it as the gap to the slider was to small. So used all the tricks I could. First clamped it really tight in big vice. That will ALWAYS make the outer bearing runner crack. After that grinded it a bit and basically broke it in pieces and took away. The inner part grinded through and then pulled from the shaft. Always use it to tap the new bearing in its place. It went on without problems and here it is
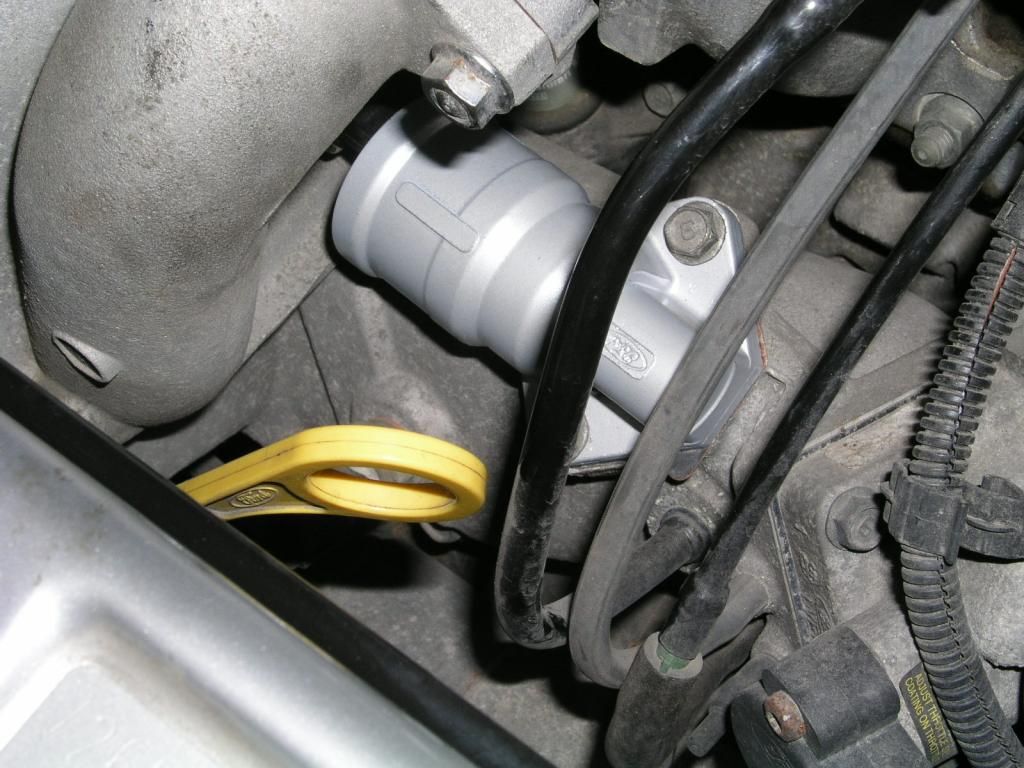
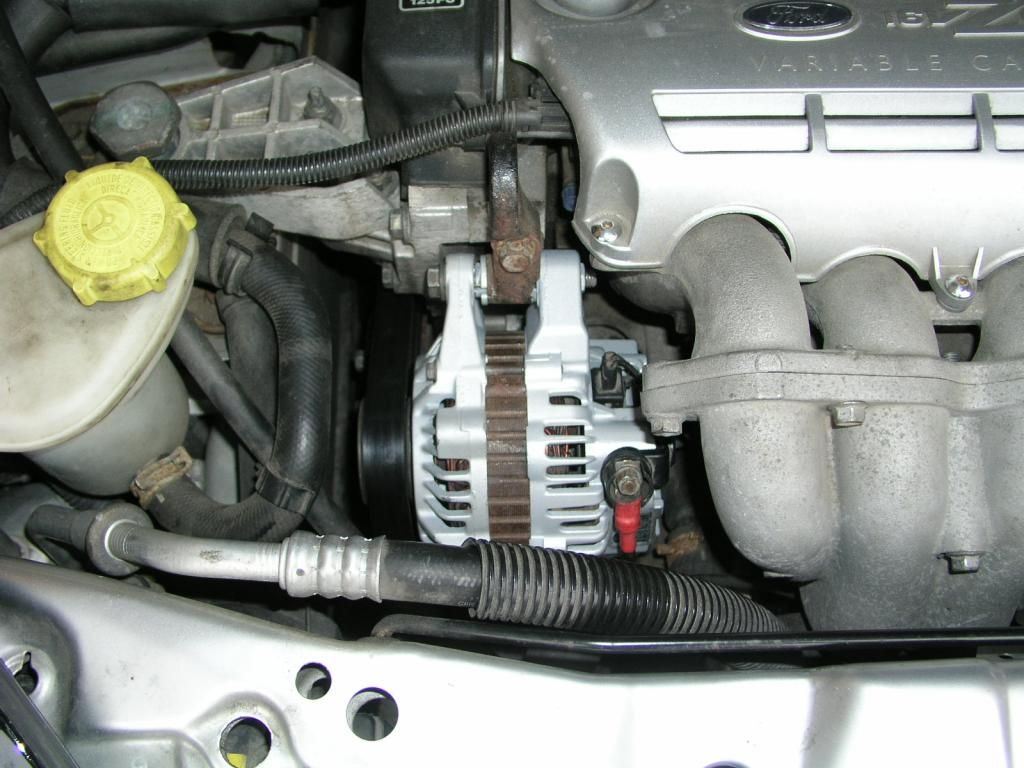
Putting it back together is piece of cake. And here it is in all its glory bolted to the engine
After starting the engine the red light signalling low voltage was sporadically going on but, that is normal! It is just in first phase of the new brushes bedding in. Just to make sure went for the voltmeter and by the time I took it, set up and brought from the house, the light stopped appearing and the voltage was stable 14,47 -14,48 V. It never came back, the pitch is gone and one more thing learned!
Also, couldn't resist the temptation so cleaned IAV and resprayed it as well
Looking smart under the hood now