The Almost Free Rover 218vvc Tomcat..

ProjectPuma

Help Support ProjectPuma:

This site may earn a commission from merchant affiliate links, including eBay, Amazon, and others.
Well, the day came to turn the key, what would happen?!!!

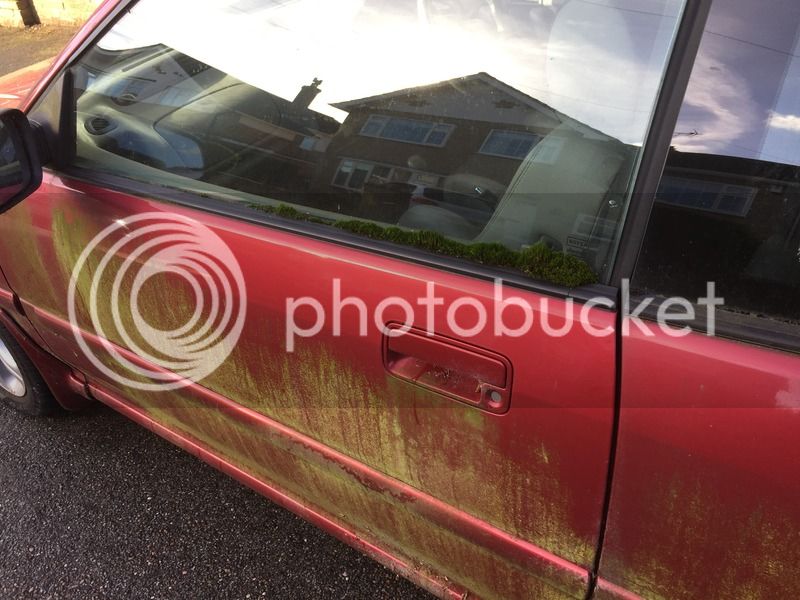
Arrived with a boot full of tool, everything I thought I could need, obviously apart from the things I needed it turned out. More on that in a bit. So first of all, let's relive its mossy wonder....


David Bellamy would love this!!


Started by draining the old oil, was a good sign the oil filter was an MG Rover one, backed up the wedge of paperwork I was given for it. 19 years old and full Rover history - well, until it was laid up. Even has the original bill of sale, looks like it was a showroom car for the first part of its life...


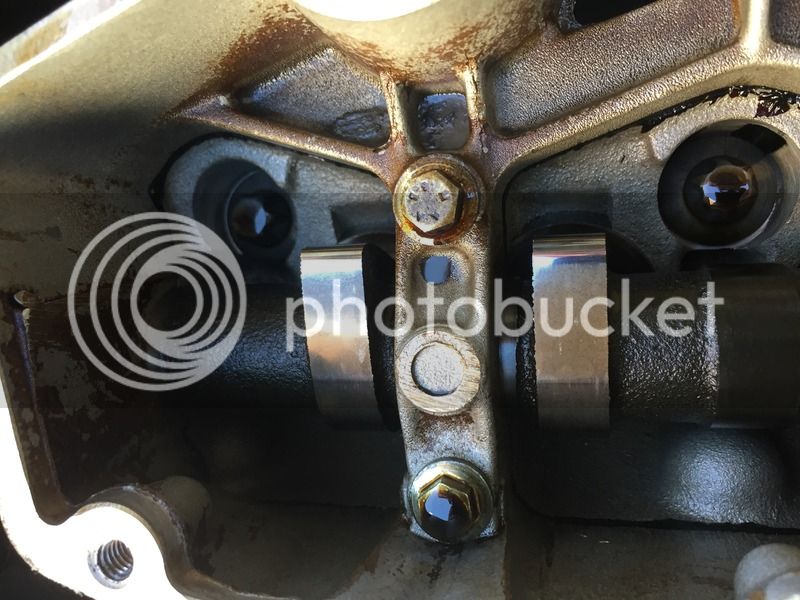
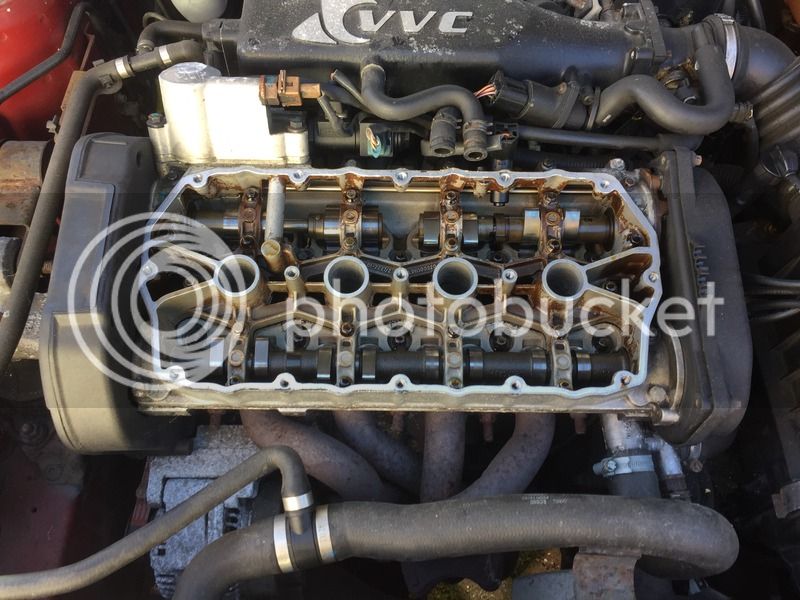
Whipped off the cam cover and inspected the lobes, looking good so far!


Fairly clean in there, but very dry so poured fresh oil all over the cams to lube them up and flush through a little as I still had the sump plug out..


So, first problem. No oil filter tool with me. Bugger. Positioning meant I couldn't stick a screwdriver through it either so rather than risk failing for the sake of a filter, I left it be. I'm gonna change the oil again anyway after a couple of hundred miles.

Oil down the bores and left it whilst I had a cuppa. Went to turn it over by hand and it was stuck. Really stuck. Tried a longer bar, the lever rule never fails!! Except it did, still wouldn't move. And then I noticed the small amount of movement was being limited by the alternator. Turns out that was totally seized, wouldn't turn and didn't have my mole grips with me. Fail 2!

So after cutting the belt off, the engine span free, really free. Very happy indeed! So put it all back together, filled with Halfords finest and turned the key.... click on the pic for the video..


She's alive!!!! So happy, no lights on the dash other than the battery light and sounds sweet. Will it move? Sure did, brakes freed straight up and clutch works. This is looking promising!

So, packed up and gingerly drove down the road to my parents, feels pretty good. Even the brakes aren't binding, so took it for a longer loop around the block at it seems really solid and no nasty noises.

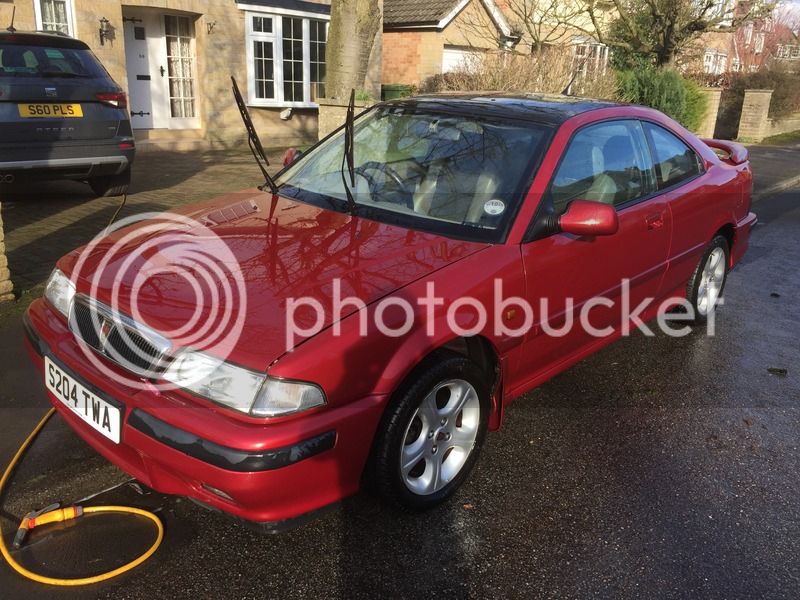
Couldn't resist giving it a bit of a clean....


Looks really good:


And remarkably straight...


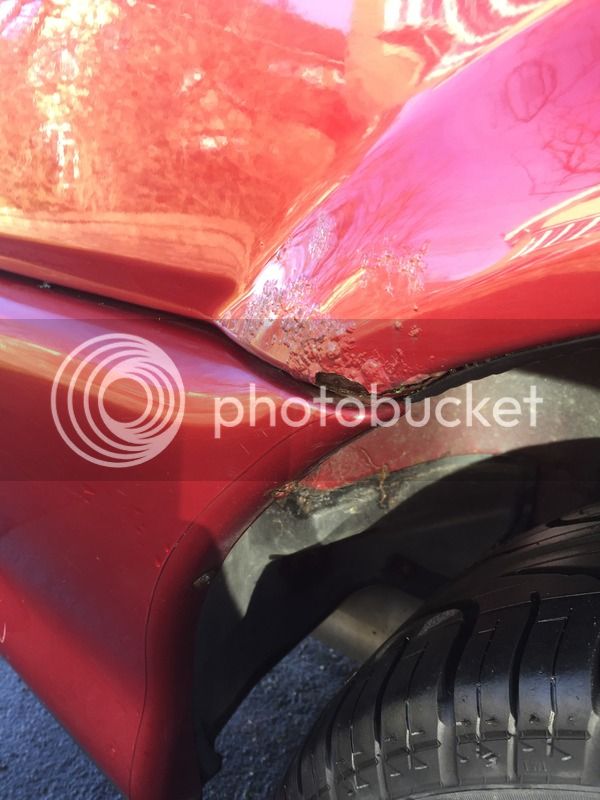
Apart from this little bit of grot:


So, it now stands me at a whopping £147, all in. Bargain!
Discs and pads next and fix the bonnet latch and it's MoT time!

Still to fix is the drivers window that the motor works on, but it doesn't move. That could be fun, and the clock is buggered too. Oh, and the alternator of course!

If anyone knows where I can get a good condition drivers door card from too, let me know!!!
 
Hi James
Looks ok that but unless my eyes are deceiving me isn't there a bit of the inlet camshaft missing???? How does that work :)
Barry
 
tuonokid said:
[post]360167[/post] Hi James
Looks ok that but unless my eyes are deceiving me isn't there a bit of the inlet camshaft missing???? How does that work :)
Barry

Ha, ha, that's exactly what I said when I took the cover off! The inlet side is made of two small cams, how the hell do you time that up?!!!
 
The Arch Bishop said:
[post]360168[/post] There's a second little cambelt on the other side to drive the second little inlet shaft. Cool eh? :)

Cool? Maybe but does that double the pain of a cambelt change?
 
XAF said:
[post]359545[/post] The old guy who owns it used to polish it within an inch of its life each weekend back in the day,
When you've done the alternator, you could take it round to the nursing home and take the original owner for a round trip in it. Reckon he'd like that, be a bit like that Car SOS stuff that Barry watches.

Probably be best not to mention to him how much you paid for it though.
 
Car SOS(sge) is one of the best shows on TV! Don't listen to them Barry...

I'm not sure how difficult it is to time it up, but the guy that refitted the head on the MGF made it look easy. Having said that, he found that little cambelt was mistimed from the last time it'd been done, so clearly not everyone can do it!
 
Hi James, looks good mate, I had a 216gsi back in the day, and loved it, it was two tone, white and grey, always looked up to the two door version, saying to myself one day, had min for a few years before trading it in for a Toyota celica, now that was a car. Anyway hope your well.
 
It does look like a missing bit but was it not something to do with the way the pulleys were fitted on to the shafts, think they did it that way to allow the shafts to be pulled out from both ends rather than removing the pulleys, I should add I have absolutely no idea why I should know that :grin:
Of course it could simply be that there is a piece missing :?
 
zinc2000 said:
[post]360183[/post] It does look like a missing bit but was it not something to do with the way the pulleys were fitted on to the shafts, think they did it that way to allow the shafts to be pulled out from both ends rather than removing the pulleys, I should add I have absolutely no idea why I should know that :grin:
Of course it could simply be that there is a piece missing :?

It's all there, just a strange design!
 
So... update time!

Having the car over in York 40 miles away has proved to be a bit of a pain so I've not got as much done as I would have liked to, but with an MoT booked in for next Saturday, it was time to put some effort in.

First job was to fix the bonnet latch. For some reason it just wouldn't click closed, and everything seemed ok so time to take it off and see what's what. Turns out it was just gummed up with 20 years of grease and dirt. Cleaned it up with brake cleaner and then freed it whilst working in some new grease. Good as new!!!

Next onto the alternator. No amount of WD40 and brute force was going to free it up so no option but to get a new one. For £9 more than I paid for the car one was duly dispatched from Germany. I soon realised that I'd have to take the power steering belt off I order to get the new alternator belt on, and a bit of googling showed a deceptively easy tensioner. Just put a 13mm spanner on it, rotate and lock with a drill bit. Absolute genius. And I thought Rover had no common sense. Alternator on, belts on, and the new genuine oil filter I didn't do last time. Problem fixed. Lovely jubbly!


Now onto the leaking targa tops. Turns out the rubber seals had long since perished to dust and water was getting in through the latch on the glass. Yet another part you can buy new but this is a budget fix not the FRP so two new gaskets made out of a bike inner tube and we're water tight again.

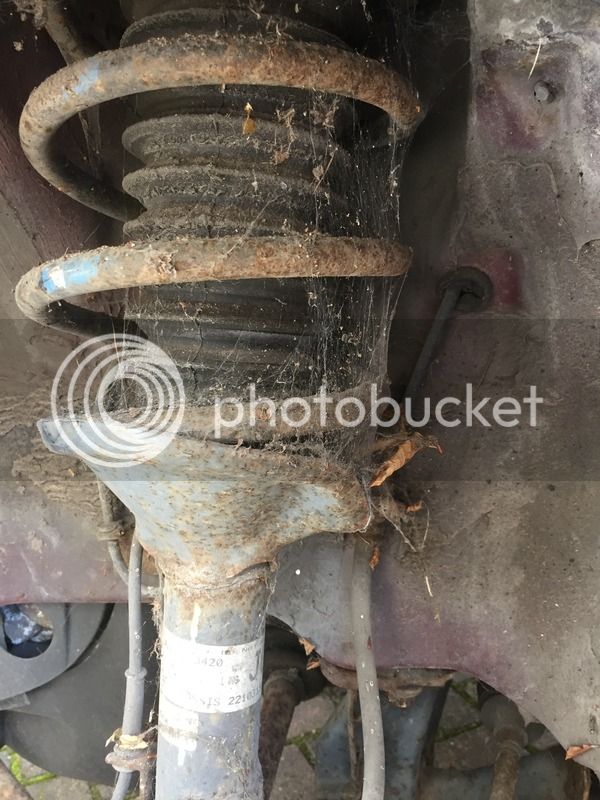
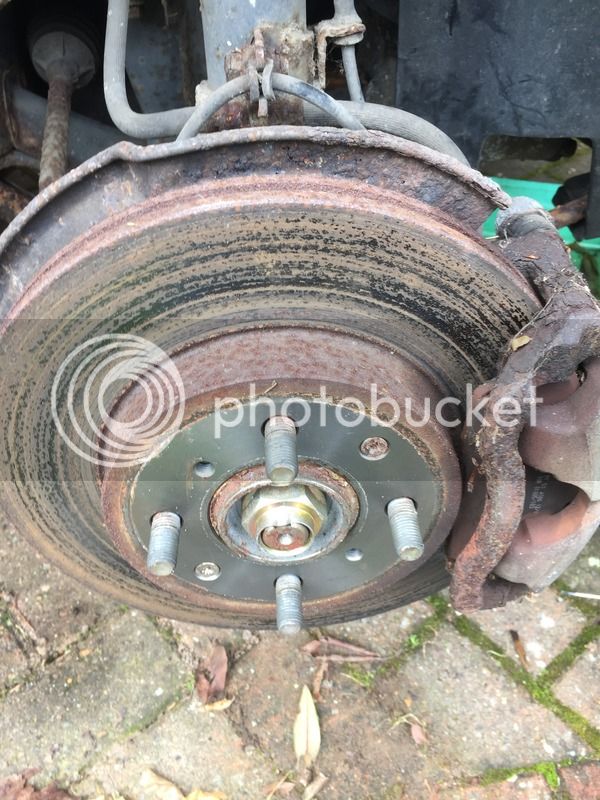
Then it was the brakes. The fronts came apart really easily and the calipers appeared in rude health. The sliders in the caliper calipers were all a bit seized, one needed so persuasion but it eventually came out. All cleaned up and greased and good to go. The huge service history seems to be backed up by the brake discs, I'd hazard a guess they were virtually new before it was laid up. They had no lip, the centre section was shiny and the pads were brand new. Shame it just sat there and rotted.


Looks like I've made several spiders homeless today too....


The rear brakes weren't so much fun. Every bolt was rusty and seized. Some were hard to get to and I couldn't get the handbrake cable out of the guide for love, money or big hammer. That said, they all succumbed in the end. Another sign of its previously cherished life was all the disc retaining screws coming straight out with evidence of copper slip on the threads. Even the slightly crusty looking calipers weren't seized and wound back in without a fight. A quick blast down the road shows that braking service is resumed, no wheel wobble and it seems quite a nippy thing!

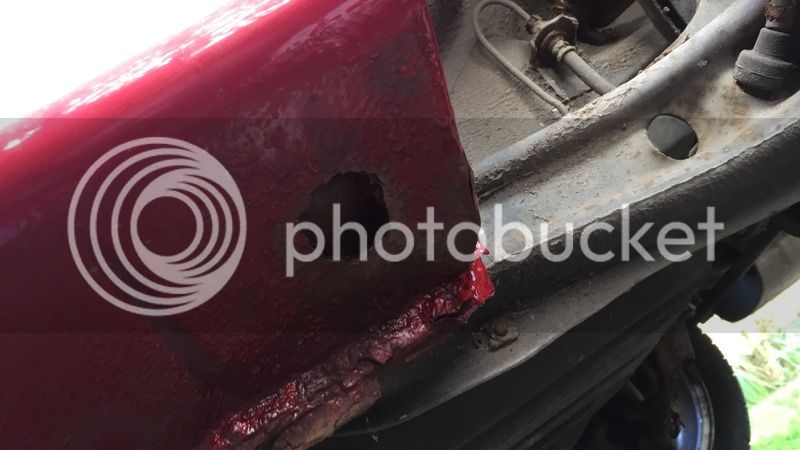
Sounds good so far yes? Well, as I was putting the wheel back on and wire brushing some surface rust on the sill to give it a quick blast of top coat for protection. This happened. That feeling that you know you're finger is going to go through, but you have to see how big the hole is....


It's not the end of the world but annoying as other than that, I recon it's good to go for the MoT. Will defo need a plate but don't want a patch just lashing on but feel I'll need to do that for its ticket, then cut away properly and weld something nice and flush so it's invisible in the future.

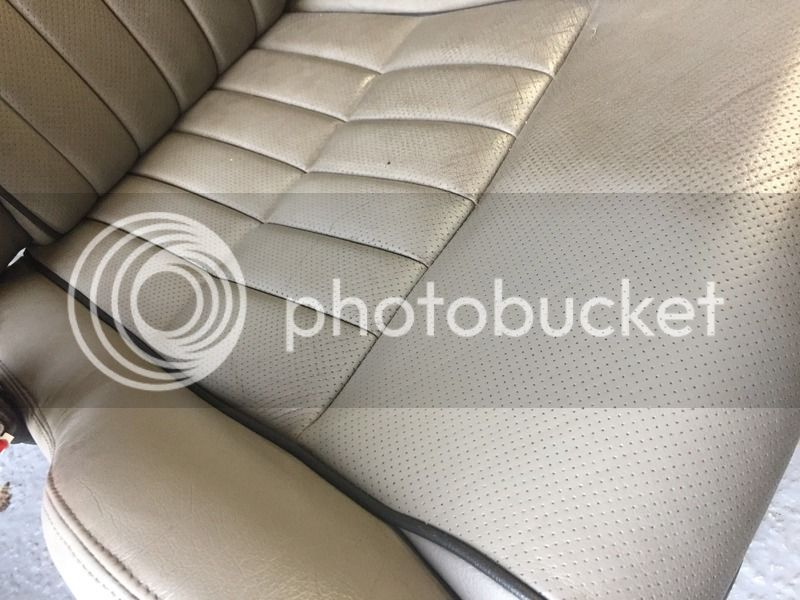
And lastly, what do you do when you are or a budget and just tinkering for fun? Of course, you buy a full leather interior rather than the part leather that's in it. For £100, it's a bargain, and will replace my broken one that's on it now. There's my justification!!


It's a bit grubby, and the bolster needs a repair, but think it will be quite plush when it's in. You can see how much cleaning I've got to do though!!


So that's it for now. Need to see what I can do about the patch or just leave it to the MoT place to sort. What will next Saturday bring?!! All in all, it's owes me £350 so far (including a load of brand new bits I've not mentioned yet!) so if it passes that's a bargain!
 
What are you using to clean the seats up? Thats the reason I don't like that colour seat is because they sheen over in a much darker dirtier looking colour. (I don't have any now but did in my old Megane)
 
red said:
[post]361093[/post] What are you using to clean the seats up? Thats the reason I don't like that colour seat is because they sheen over in a much darker dirtier looking colour. (I don't have any now but did in my old Megane)

Elbow grease, a nail brush and Glyptone leather cleaner. Then following up with Auto Glym leather care cream. It's amazing how dirty they are!
 

Latest posts

Back
Top