Black puma project - e3silversurfer

ProjectPuma

Help Support ProjectPuma:

This site may earn a commission from merchant affiliate links, including eBay, Amazon, and others.
I must say that is one very shiny knob you have there Elvin.
 
Blob (Blingin' Knob lol)

Are you going to infill the markings with black paint? Or UV paint (and shine a UV LED on the knob at night :cool: )
 
used wet and sand 600 first. and then switch down to 2500 or the finest you an get

rub like crazy at first... takes the entire day to complete. no dremel. it is too destructive for elegant work :p

ford had a layer of silver paint on top of the aluminium. you will have to rub down quite hard (due to it being very smooth) to "eat" into the paint and carry on attacking it from there.
 
finally got round to fitting in the window which has been smashed a couple of weeks ago


pushing the shattered glass out from the inside prove challenging as it still fell into the car althought I tried to push everything out.
3132501425_3804962472.jpg

used brute force and ripped off the rubber frame of the side window and proceeded to cut the silicone which is still stuck on the car rear window frame
3132501597_79b24762c0.jpg


Spent another hour or 2 getting a cutter to cut off the silicone seal which held the glass in place.
3132501793_490a47627b.jpg


new window fitted and held in place using silicone. spent about 30mins blasting it with hair dryer before scotch taping the gaps to prevent water ingress. will be removing the tape after the silicone has harden (hopefully tomorrow )

3133325002_d11366c953.jpg

3133324790_248c0047ca.jpg

3132501219_2ddef46a10.jpg


quite proud of my handy work

all together, spent £51 on a new rear window panel, £15 for the front. £3 for the tube of silicone. i think autoglass's quote of £300~ is bull crap. Well thats one episode over. wonder whats next
 
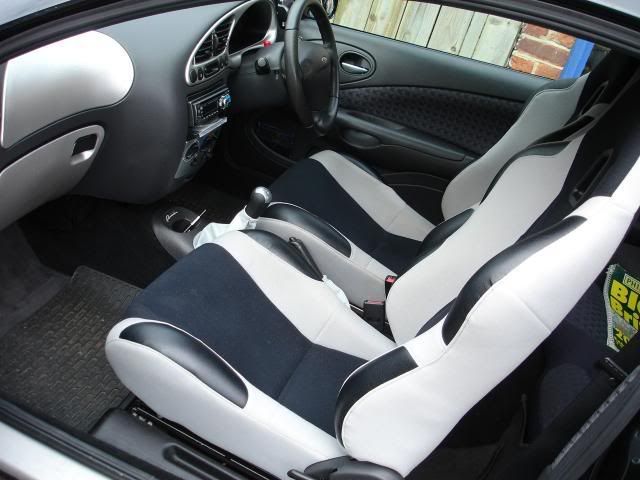
Decided to do a update/catchup on my mods.

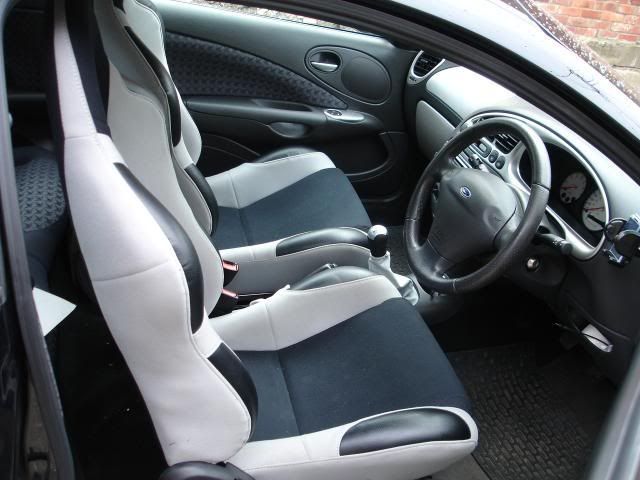
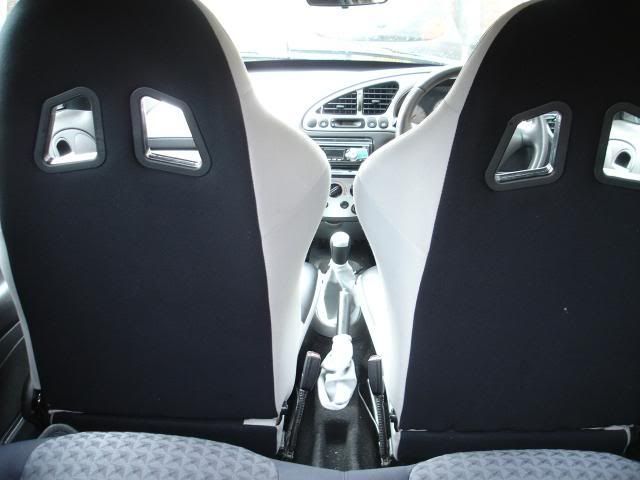
most of you know about my interior :) heres a little graphic thread and description of what i did.

basically I removed all door cards. and got a 10m x 2m roll of grey suede off ebay (i think grey sude is a very difficult colour to come by)

To glue the suede onto the door cards, I used the dremel to rub down the plastic "rivets" which hold the door card's cloth portion onto the door card itself. after popping them off i then used PVC glue to glue them onto the standard door card's cloth.

The reason for doing this is so that I do not have to worry about the "feeling" of the cloth part being too hard as the original cloth has got a layer of sponge under it.

Doing the same for the rear I fitted the clothed trim back onto the door cards


FRONT DOOR TRIMS

[albumimg]1307[/albumimg]

REAR DOOR TRIMS

[albumimg]1305[/albumimg]


After thinking for a long time I decided to use screws and washers to fasten the clothed trim to the door trims. This was decided as I have removed the original melted plastic rivets which is part of the trim and there is no other way except to use silicone (which I think is rather messy) or the screw washer method which I think is better.

So after a trip to B&Q I came up with this

[albumimg]1306[/albumimg]

[albumimg]1308[/albumimg]

found that it is actually very firm and not loose. happy with the result I then proceeded to install them

[albumimg]1309[/albumimg]


Completed door card mod ;) will be proceeding onto the roof liner and A/B pillar mod nest ;)
 
HEADLINER AND A/B PILLAR MOD

having bought additonal suede from the ebay seller, black this time. I decided to continue with covering the ugly plastic trims with suede.

For this purpose, i discovered that normal pvc glue is not able to glue the suede onto the plastic trim with enough strength. So I went with using contact adhesive (boy it stinks <_<)

anyway the pillars are not too bad as they are small and easy to handle. with loads of paper clips and pegs, I managed to hold the suede till it dries.

Next up is the headliner. now this is an extremely tedious job I used 3 cans of the largest can of contact adhesive from Wickes to complete the job.

After leaving everything to dry for about 2 days, I got round to fitting it and here are the results:

A PILLAR TRIM

[albumimg]1311[/albumimg]

B PILLAR TRIM

[albumimg]1310[/albumimg]

HEADLINER

[albumimg]1314[/albumimg]

[albumimg]1313[/albumimg]

[albumimg]1312[/albumimg]

Thanks to Dan as he was the originator of this Mod ;)
 
Wow Elvin, that looks absolutely fantastic!!

Keep up the good work, there'll never be another Puma as original as yours :eek:k:
 
Decided to go skint and refurb a set of alloys in white.

got these off ebay for £60 (they were in a very crap condition)

[albumimg]1681[/albumimg]

[albumimg]1682[/albumimg]

got a couple of 150 grit sandpaper and rubbed them all down to their basecoat/primer level.

[albumimg]1683[/albumimg]

Hopefully I can get the masked and ready to be painted for after work today, seeing that the weather is looking nice. Am thinking of doing them in white and black :p will do a photoshop of how i think they will look like.
 

Latest posts

Back
Top