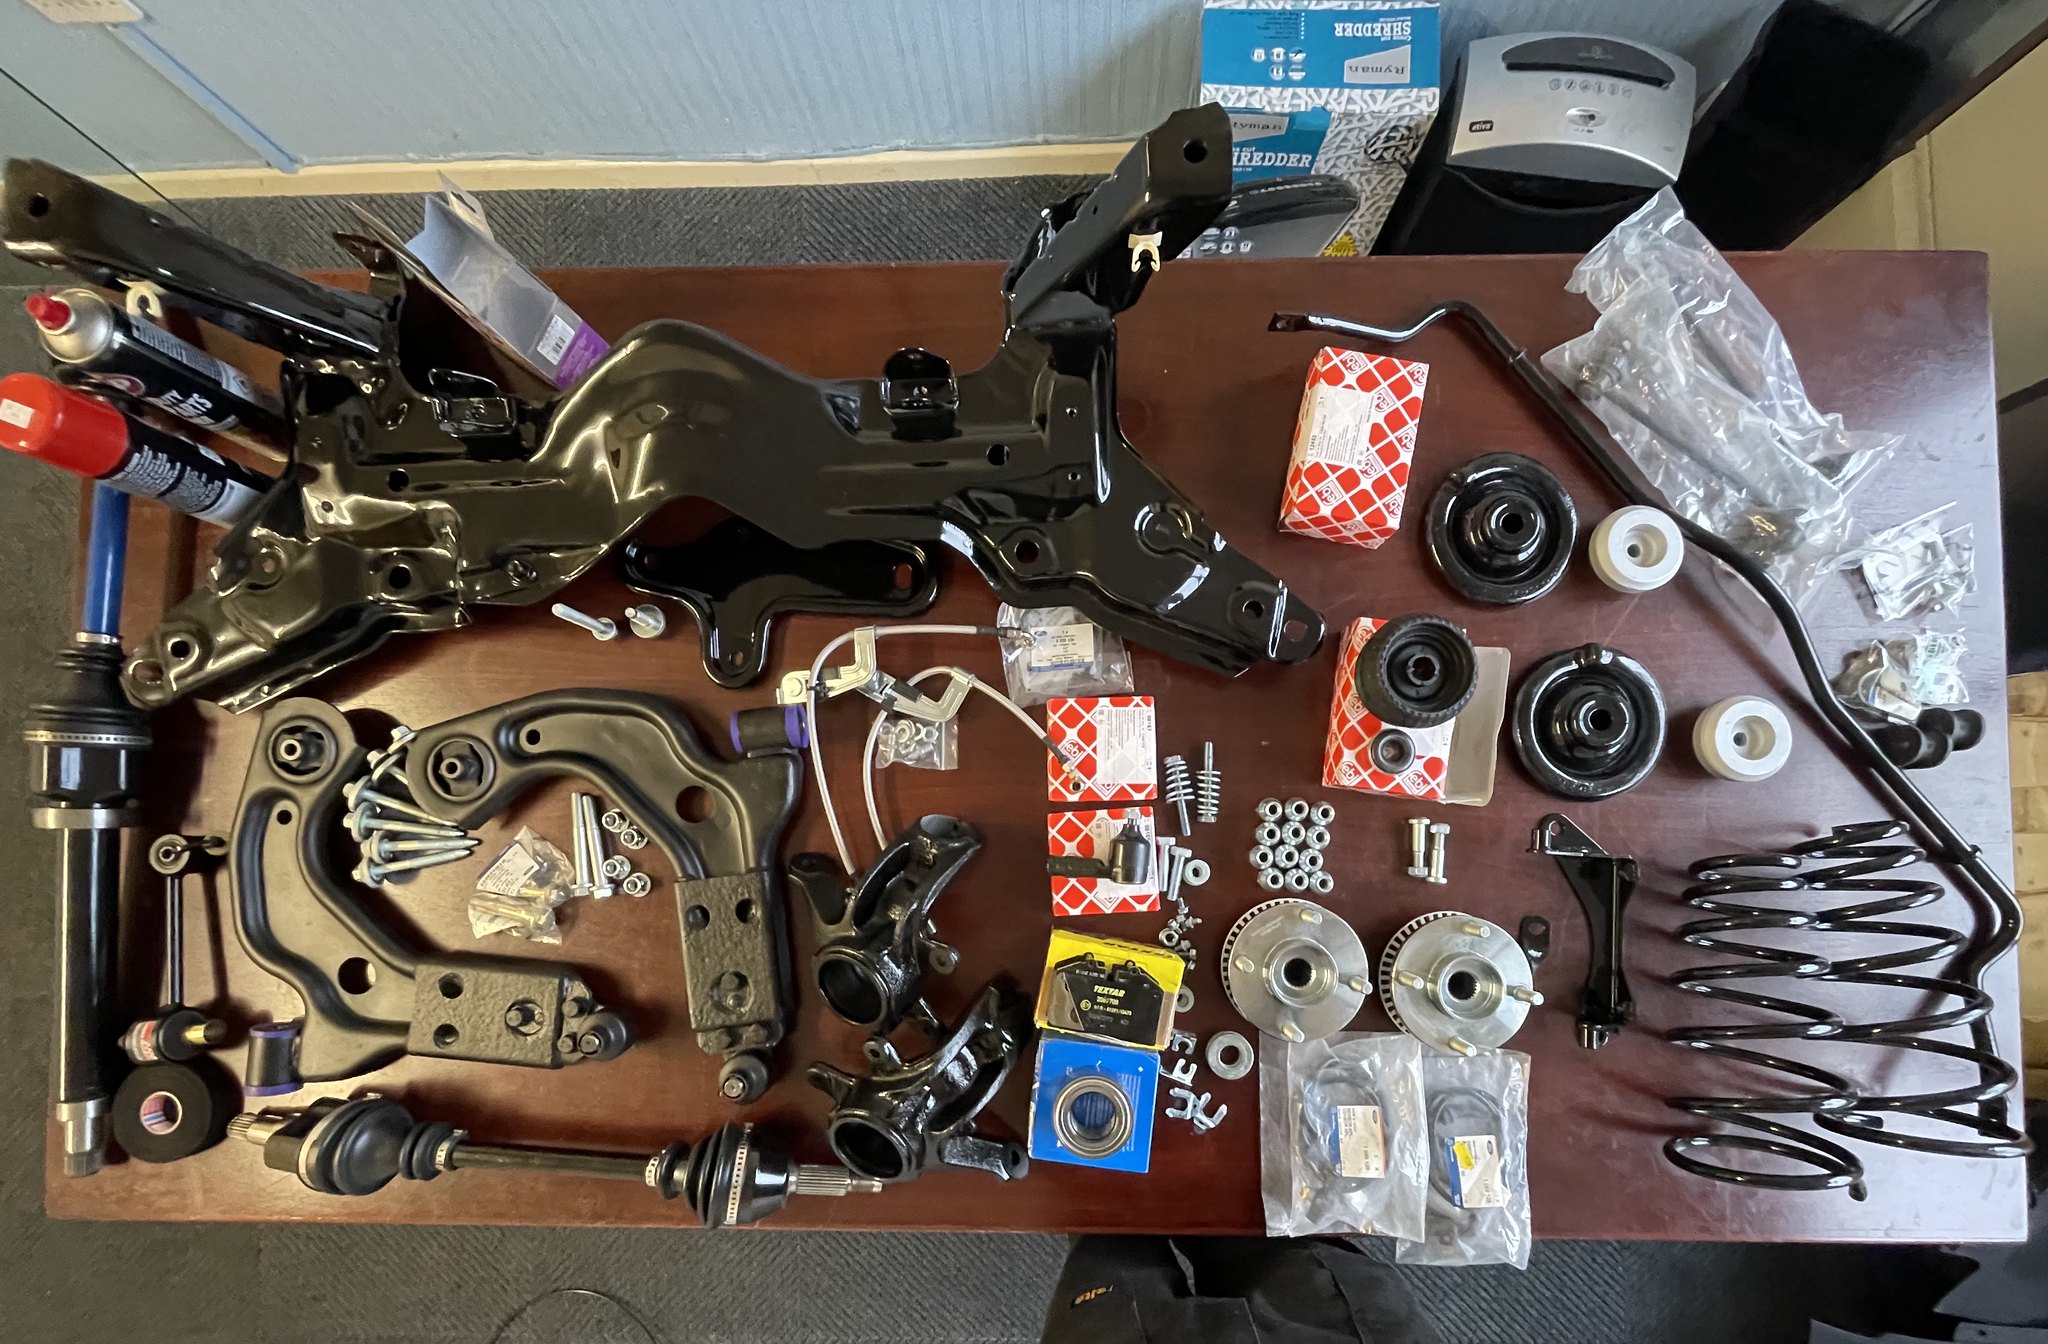
The rebuild of no 219

ProjectPuma

Help Support ProjectPuma:

This site may earn a commission from merchant affiliate links, including eBay, Amazon, and others.
Wild E. Coyote said:
[post]367891[/post] Would you make a bespoke set with a bit more camber dialled in? What is it made of, aluminum?

I was discussing that with a colleage when I made them, I'm going to make another set with 1.5 degrees negative camber I think.
And yes they were made from a super high grade of ally, better than 7075 :)
 
Yup, what would be the price for a set of two made to my spec after I measure the suspension and give you the exact dimensions to bring the rear wheels to desired camber settings?
 
Wild E. Coyote said:
[post]368184[/post] Yup, what would be the price for a set of two made to my spec after I measure the suspension and give you the exact dimensions to bring the rear wheels to desired camber settings?
I'll work out a price for you
 
Just a thought, wouldn't it need a washer plate making for the rear of the axle bracket to ensure that the bolts tighten up with even pressure on their shanks? I know the angle/dimension is tiny but the bolts are under a lot of shear.
Barry
 
tuonokid said:
[post]368217[/post] Just a thought, wouldn't it need a washer plate making for the rear of the axle bracket to ensure that the bolts tighten up with even pressure on their shanks? I know the angle/dimension is tiny but the bolts are under a lot of shear.
Barry

It's definitely a point to think about/debate. It's not so much the extra shear force I'd be concerned about but rather the tension going through the bolt. The head on an M10 hex head is 18mm so 1 degree over that is 0.31mm, is this enough to worry about? Obviously the amout would get bigger depending on the desired camber. My main concern with tapered washers is getting them into the correct orientation, they should self centralise in therory but when you're trying to fit them to old parts that are rusty/dirsty it could prove tricky. And if you don't get the washer in the perfect place it will throw the torque settings out, or worse still you could tighten it up in the wrong position and then the washer will work loose and the bolt will slacken off.

But if you don't use a tapered washer there is the chance of point loading on the head of the bolt. Maybe you could switch to a higher tensile strength bolt, say 12.9 grade, and look at a socket head cap? And get zinc plated ones to prevent them rusting
 
Hi Richard
I wasn't thinking of individual washers but as I said a washer plate so a 1 piece plate covering all the bolt holes just machined to match the spacer. I think if you tried to match the cambers with individual spacers you'd be on a hiding to nothing.
 
richard_rip said:
Wild E. Coyote said:
[post]360565[/post]
richard_rip said:
[post]360556[/post] I've just had a look through all the bits I've bought, the rings I use are indeed NPR :?
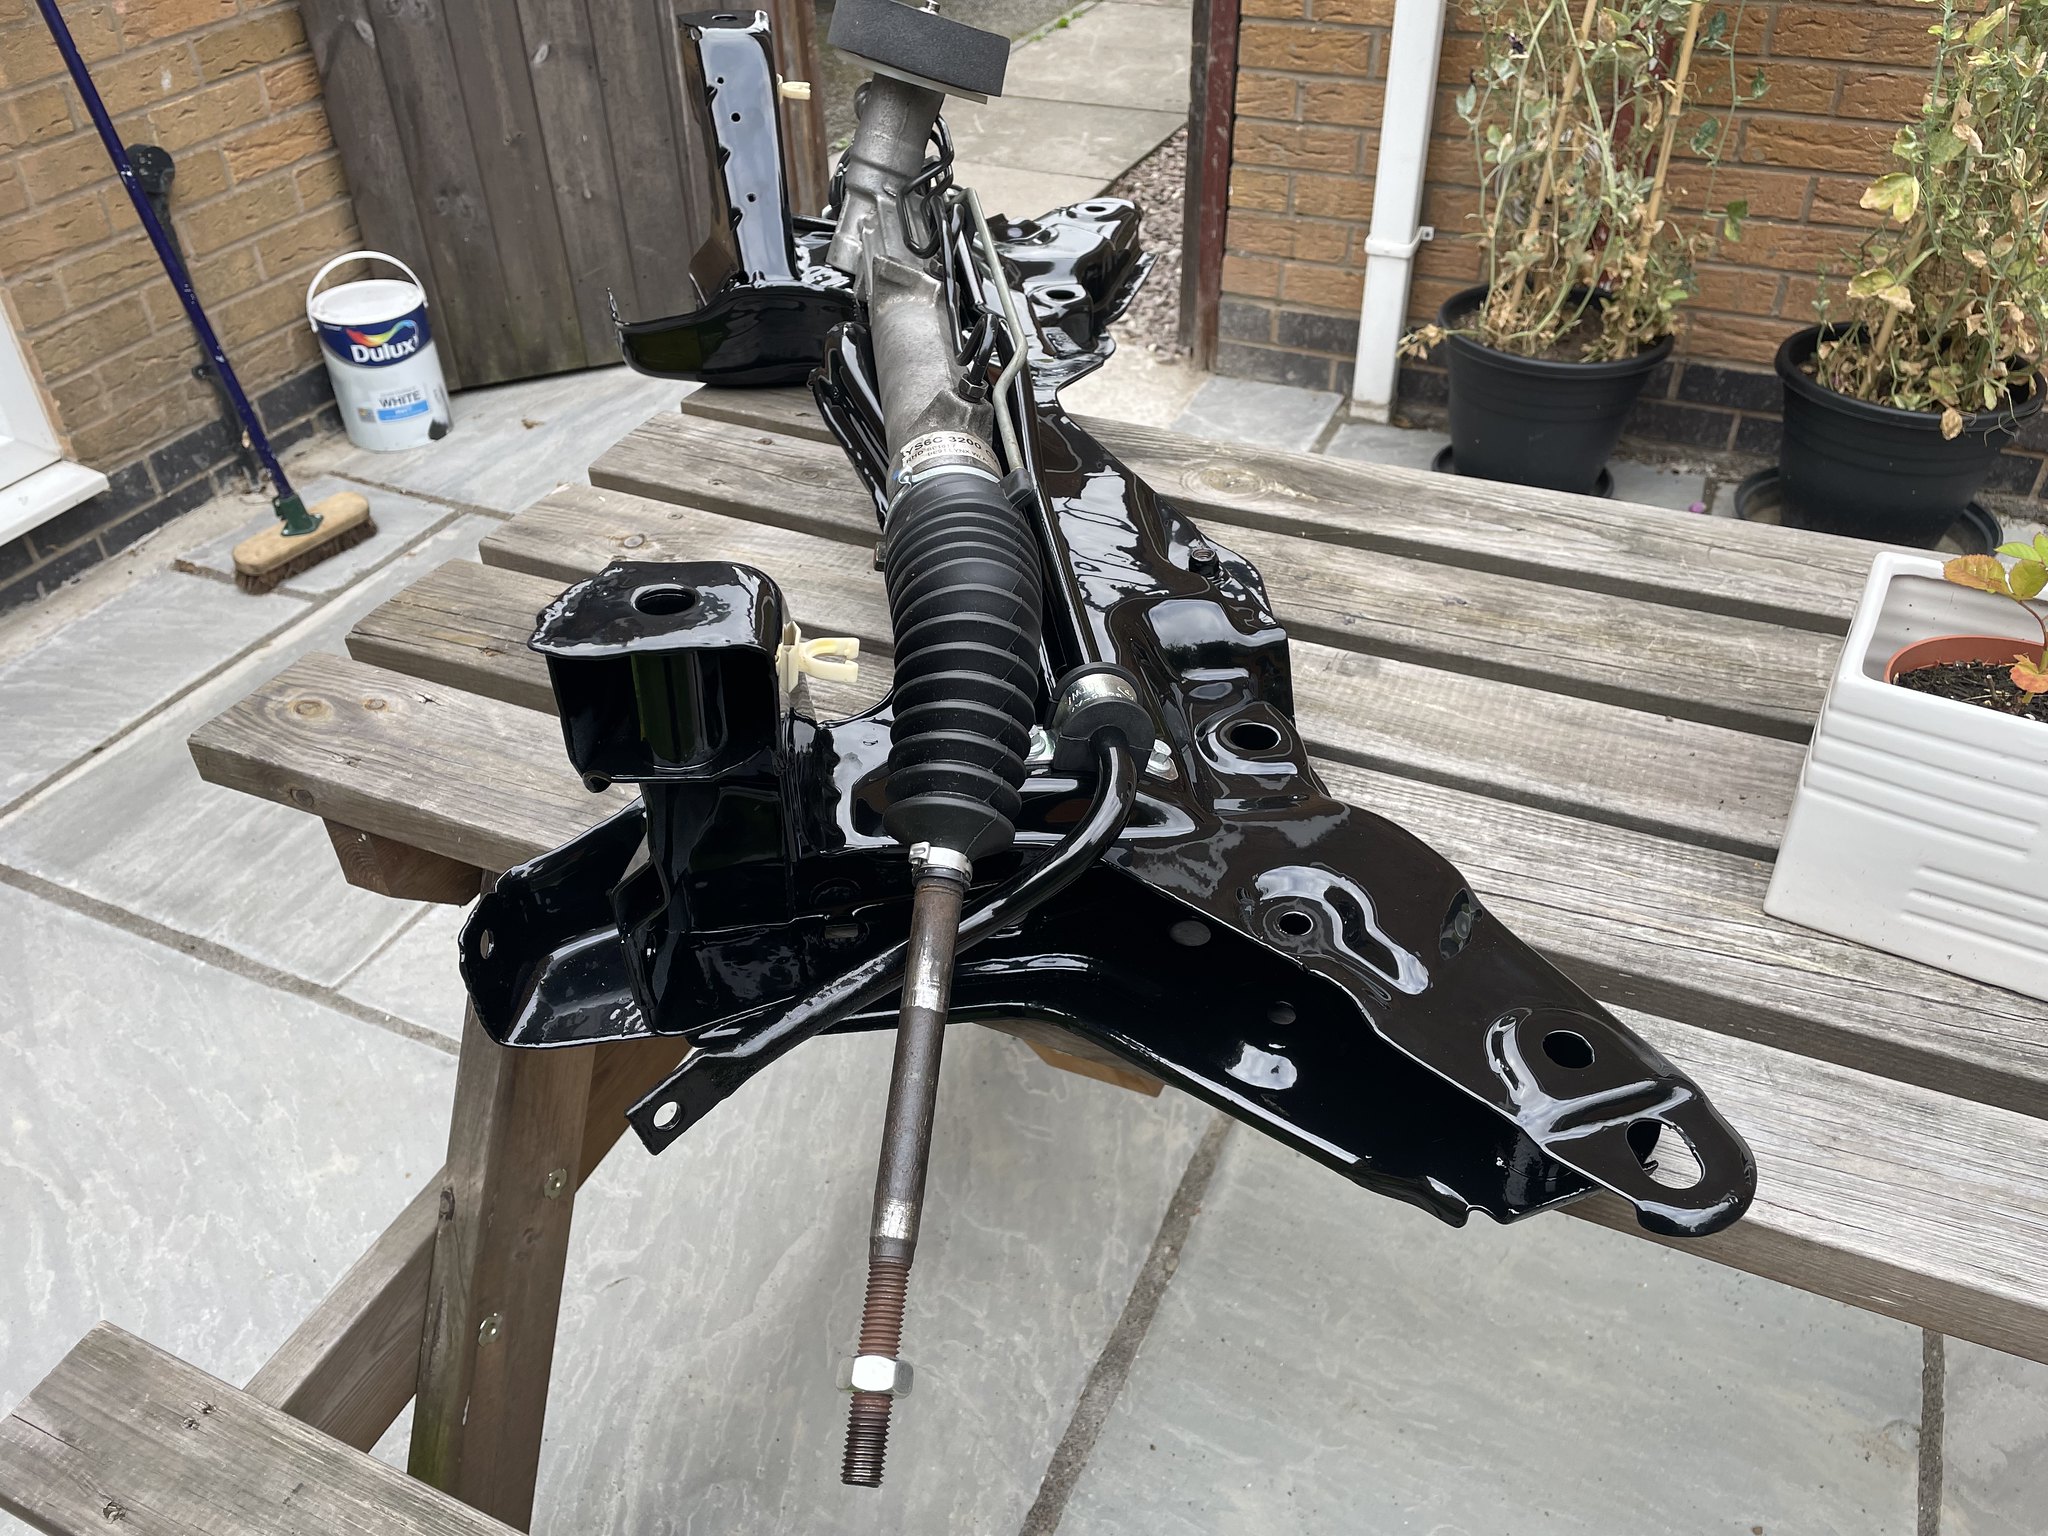
I'll see how they go with this engine given it's not the original engine. I get a lot of nitriding done through work, I wonder if I could get the chrome removed and then nitrided. Or I could look at getting the cylinders relined in steel?

The thing with material pairing is that you by design want to make one material softer and one harder to be able to predict the behaviour in advance. Chrome is very hard and so is nikasil so you don't know which one will let go and obviously you don't want the nikasil to let go.
Here you can download the NPR catalogue: http://www.npr-europe.com/index.php?article_id=3&clang=1 and then browse through it. There you will find the finish of the rings and some explanations about them. Since there is no set meant for puma 1.7 engine (factory designation is MHA/MHB) I advise to go and have a look at sets for Porsche 911 from say 1987-2000. Those engines are nikasiled as well as puma engine and have a look at finish of those piston rings to see about the material pairing.

Regarding the sleeving: if you do that, you have removed one big hurdle out of equation: then you can use the honda set without problems as that set is designed for cast iron block and that is what you will efectively have if you resleeve the engine. However, you may have noticed that there is really no space between cylinders and I am affraid the sleeving might warp the engine block.

I would just like to stress one thing out: the rings being NPR means nothing bad, as NPR is very good company and their products are top class (on par with Goetze or Mahle): the problem is that particular set is not designed for puma engine.

Since you are thinking about removng chrome and nitriting of rings, I really do believe it is easier to order that other set for Nissan engine (I gave the cat. number in previous post) and use it's 1st compresion ring as it is already nitrited. The second being phospated in Honda engine is quite OK to be used.
Regarding the 3rd (oil scraper): In Nissan set it is nitrated but the stated height is 2.5 mm and I believe it is somehow to low. It is a 3 piece design so I guess you could use the rings form the Nissan set (again, they are nitrited) and the spring element either from existing puma or from Honda set to bring the rings to desired height.

IMHO that would be much easier and cheaper route than either sleeving or modifying the rings from Honda set (the chromed ones)
Really appreciate the info :grin:
Strength was definitely something that concerns me about sleeving the block, but it could solve other issues, like if the bores have worn a lot of the original engine. That said I have seen that theres a few companies that can re Nikasil the bores, but I'm not sure on the cost.

I'll have a look through that catalogue to see what I can find under the Porsche section. I might also speak to our heat treatment company and see if you can nitride onto of chrome. We get loads of stuff nitrided at work because it doesn't pick up like other heat treatment processes but I've never tried chrome, I've had high chrome tool steel nitrided as well.

As I say I'm not too concerned as that engine will be coming out, I might keep my eye on the compression though
Goetze rings for Nissan are the same material as NPR for Ford Puma 1.7

http://www.fmecat.eu/results/partdetails.asp?VI=11487&vPart=08-435800-00&Dlnr=385&vAppNo=004&TsVer=1543254504312&prdgrp=4&langID=1&theType=1&isCV=1
 
It's been a while since my last update. Since Feb 2018 I've got divorced, moved house and bought the company I've worked for since 2010, plus the whole pandemic stuff. Fortunately my company has been pretty busy over the various lockdowns. Anyway, back to the FRP.

Last November it went into the bodyshop as I wanted a few bits under the back end sorting. The rear end was stripped and various parts (like the trailing arm & fuel tank) where sent off for powder coating. A little bit of welding was needed around the rear crash panel and bumper mounts, but apart from that it was good. All of the old paint and gunk was stripped off and cleaned, rust inhibitor was applied, then it was painted to protect it from the British roads and weather
The rear calipers were left in a pickling bath to clean them up then zinc plated.

51399487177_dd3ea2fdfd_k.jpg


51399487182_76c6f8a0e1_k.jpg
 
The work above ended just behind the sub frame mounts, the plan was to do the front end and mid section at a later date. This summer I had the bright idea of refurbing the wishbones, thinking it would be an easy job. I suppose that job in itself would have been an easy job, but one thing lead to another. As I started to strip the front end I could see lots of bits that needed attention, and with me being a bit of a perfectionist I couldn't leave it. Plus I want the car to be around for a few more years to come.

So I removed the subframe and steering rack so I could get the ARB poly coated and powder coat the sub frame. New track rod ends, ARB bushes, clamps and bolts were order from Chris Allison. I also ordered some steering rack boots.
Then I removed the front brakes so I could fit bells and rotors and replace the front brake lines, again all from Mr Allison.
Then the hubs came off for a full refurb, leaving just the drive shaft and shocks hanging.
At that point it was a case of in for a penny...
The drive shafts came out for a refurb as did the shocks

This was a great opportunity the grind the rust off, spray with inhibitor and paint the arches.

51400495988_3cf1078b90_k.jpg

51401216635_043da04757_k.jpg
 
After much money parted with, and lots of scraping, cleaning and rebuilding. This is what my office at work looked like :grin:

New drop links were added to the list of new parts as well as ABS sensors, and top mounts

51404695864_204fbea313_k.jpg


Chris Allison Sorted the wishbones for me, I got on with the hubs and driveshafts. Everything was either blasted and spray, or pickled and plated to keep the rust away
51400495513_909dd5c04f_k.jpg
 
Looking good!! If you get stuck on any parts give me a shout and I’ll see what we can find for you
 
I ran into a problem when the front shocks were stripped for painting, as you can see the thread had rusted away quite badly. In fact it had gone from 12mm in diameter down to just below 11mm at its worst. I was really unsure what to do here, I couldn't get hold of new original shocks and I wanted to keep the cars handling the same as standard so I was resisting new coil overs. Going forward, the tricky thing with FRP's is keeping them standard, it's getting to a point where this just isn't possible and it becomes more important to keep the vehicle going that keeping it standard.

51404567644_745e5e888c_k.jpg


The only other options I could see was to get it spray welded, but that gave me big problems reforming the thread, or to insert the rod. After a lot of agonising I took the hacksaw to the rods and clamped the shock to a milling machine. I centralised the rod with 0.01mm and got to work.
51404567079_74f3e069c8_k.jpg


I'm not sure what steel the rods were made from, but it was some of the softest steel I've ever drilled. The original thread was M12 fine, it had a pitch of 1.25mm (M12 course has a pitch of 1.75mm). Wanting to keep it standard I ordered some lengths of high tensile studding, zinc pated, as well as some nuts, again zinc plated. I also had to order taps and a die as I didn't have them in the factory.

Step 1 was to machine the end of the rod flat. Then centre dill and drill the rod 25mm deep with a 10.75mm drill. To achieve the safe loading rate of a bolt you need to have 1.5D of thread engagement, so in this case 18mm was needed. I decided to go 2x just to be extra safe. Once the thread was in I cut the studding to length, applied some stud lock, and wound them in as tight as I could. The only area I deviated from original was on the end of the new rods, I machined male hexes on rather than female. This was just because I've had several female ones break on me over the years in other vehicles.

51413285435_5ba6130e23_k.jpg


One thing to note was that when I clamp the rods into the Vee block I used a piece of brass and didn't go crazy tightening it up. I needed to clamp on the ground area so that I could keep it square and centralise it accurately. When I came to wind the new rods in I clamp the shocks using the unground area
 
yippeekiay said:
Never seen this thread before somehow.
Anyway, just read through it all.....nice job! :thumbs:
Thanks :grin:

XAF said:
Looking good!! If you get stuck on any parts give me a shout and I’ll see what we can find for you
Thanks, getting hold of parts is becoming more and more difficult.

Enxebre said:
Weren't the original FRP calipers made of aluminum?
The fronts? they are indeed. The rears are cast steel, they came from a 2.0 focus.
 
Driveshaft after powder coating and rebuild. New boots and intermediate bearing fitted. I even bought myself the special pliers so that I could use the proper clamps on the boots, any excuse to buy a new piece of kit haha.
51413285465_bc9c817be6_k.jpg


Knuckles were shot blasted and sprayed. I fitted new hubs as the old ones looked a bit rough, someone in the past removed the bearings and made a bit of a mess. New bearings were fitted along with the ABS sensors. The old brackets were sent off for pickling to remove the rust and then zinc plated along with the new hubs. I also picked up some stainless steel bolts for the ABS sensors.
51412304811_ff7a5f89ad_k.jpg
 
The cross member with steering rack and ARB back on, ready to be bolted back on the car.
I fitted new boots on the rack, ARB bushes and clamps, and a new seal for the steering column. Everything was given a flipping good clean before reassembly. The threads on the ends of the tie rods were a bit rusty which made it difficult to get the new track rod ends on, so I order a new M14 die to sort that along with new nuts.

51404567104_43da0c3193_k.jpg


51403064587_fc40bddfb6_k.jpg


The support plate was powder coated and all the bolts were pickled and plated. I decided to fit a new torque link as the old was buggered and I like the feel of these vibra tech ones. I fitted one to my RS Clio and love it

51403812211_e99fac8466_k.jpg
 
:cool: really nice updates, it's going to feel like a different car once it's back on the road!
 

Latest posts

Back
Top