My Puma 1.7, more than a year on (A works in progress)

ProjectPuma

Help Support ProjectPuma:

This site may earn a commission from merchant affiliate links, including eBay, Amazon, and others.
Hi Stu
Thanks mate, no the bearings are fine and I can watch the ABS ring turning as I made a porthole in the side of the splash shield to check the sensor gap. TBH it sounded more like electrical "noise" rather than a mechanical sound that's why I thought it might be ABS related.
Barry
 
Hi Stu
I don't know as I've never driven the car apart from up and down the drive. I got the previous owner to drive it over and then I took him home in the Fezzer. From what I've heard from other members the self test is a harsh grinding/rattling noise that happens at 12mph when the car first sets off. This happened in both directions and was very quiet, oh and I was doing a lot less than 12mph.
Barry
 
That is exactly what I was experiencing. That is the sound of ABS system kicking in at slow speeds as the car grinds to a halt. What happens is that the system is losing a signal from (at least) one of the sensors who can't pick up the tone ring. The system thaen thinks that the wheel in question has blocked and it releases the ABS to cure it (i.e. helps wheel start turning again).
You now really SHOULD do a rolling test of ABS. Any chinese OBD 2 reader can do it. You just plug it in, take with you a laptop (download Forscan at http://www.forscan.org" onclick="window.open(this.href);return false;, it is free!) and then drive slowly (less then 12 mph) and look at the wheel speeds as detected by the system. All should read the same. If not, it will be clearly visible on graphs and you will know where to look.
On my first attempt one of my ABS sensors was out of place by less than 1 mm. Enough for the system to pass self test, but at really slow speeds that signal would dissapear and the system would kick in thinking that wheel has blocked. At speeds of 7-9 km/h it was clearly visible like erratic BUT REPEATING speed signal in contrast with nice flat lines on the other three wheels.
That is why I did it for the second time with drum stub axles to get exact postioning of the sensors and grinding it slowly to get the exact gap. After it was done like this, bolted it to the car and it was perfect right away. It is not a rocket science, but you have to be precise
 
Hi Wild E
It might be simple to you but I'm a complete numpty with computers :grin: I thought it might be something to do with the ABS but there was no pedal pulsing as I can remember although I wouldn't have been pressing hard on the brakes. It also didn't sound like a mechanical noise.
This was experienced on the previous set up I had with only the aluminium brackets pushing the sensors in. Now I can (when I'm finished) bolt the sensors to the stub axles as long as I achieve the 0.6mm clearance I should be ok. If it doesn't then I'll seek help from one of my mates who's more computer savvy than me so thanks for the techy tip.
Barry
 
Hi Wild E
Thanks for your kind offer :grin: I'm looking at this positively though as I was careful to centralise the sensor holes over the rings and as long as I'm careful grinding the rears of the stubs to the right depth (60% of it done in last set up) I should be ok.
Barry
 
tuonokid said:
Hi Wild E
It might be simple to you but I'm a complete numpty with computers :grin:

Actually, all you need is one OBD2 scanner. Let's say like this: http://www.ebay.co.uk/itm/ELM327-OBDII-OBD2-CAN-BUS-USB-Auto-Diagnostic-Code-Scanner-Reader-Tool-V1-5-/390665722455?pt=LH_DefaultDomain_3&hash=item5af57dda57" onclick="window.open(this.href);return false;
It can be wifi or bluetooth as well. Then you need a laptop with windows XP (at least). Pretty sure you have one. Then you go to http://forscan.org/download.html" onclick="window.open(this.href);return false; and download the software for windows. Install it (nothing fancy there), hook up the OBD 2 scanner to your comp (if you are using USB version, you need a driver for it so comp can recognise it). After your computer sees the scanner, plug it in OBD port (to be found in left footwell; driver's side in my case, passenger's in yours). Start the Forscan and wait until it boots up. When it is ready it will let you know. Now start the engine and wait. The computer will scan your VIN number and other info about your car. Then you just pick up the ABS test. The first one is simple, it just tests the ABS modul like you are driving and speeding past 12 mph. The other is rolling test. You need to select the wheels (i.e. sensors) you are trying to monitor and then slowly take off in straight line. Do not go faster than 12 mph, if the system does self test the monitoring will be cancelled. But if you stay below it will continue to work. What I did was go to a nice, lonely strecth of local staright road going slightly downhill. Just would let the car roll and brake it to keep the speed below 12 mph. On your laptop screen you will have four graphs depicting the individual speeds of each wheel as the system sees them. You can save it for later reference. But when you see it, you will know right away which wheel is reading wrongly
If you want, can do the full how to with piccies?
 
Hi Wild E
That's really useful and interesting so it looks like I might be buying one of these scanners and borrowing a laptop if I can't get it to work with the new sensors. I'm impressed that you can access info to such a detail with a relatively cheap piece of equipment. The scanner you've shown the link for is it the one that you have?
Thanks again
Barry
 
Yep, I have WIFI version but it behaves erratically. Now would opt for USB cable version. But yes, you can do your diagnostics almost as well as any Ford dealership and that Forscan software is really impressive. Russians developed it and it is amazing considering the fact it is free. And you have very good forum support to guide you if you have any problem
 
Hi Wild E
Thanks for that I'll probably get one of those then. It's a shame I haven't got a laptop as I could probably experiment with the megasquirt ECU (M-TECH) on the Westy I'm building as well.
Barry
 
Hi Barry,

Just got little how-to together for you!

This is the setup I am using. A small hp laptop with atom procesor running windows XP. OBDII scanner ELM327, here in USB version. I have also WiFi version, but USB is much better. More stable, faster and easier to setup what is probably of more improtance to you (no offence!).


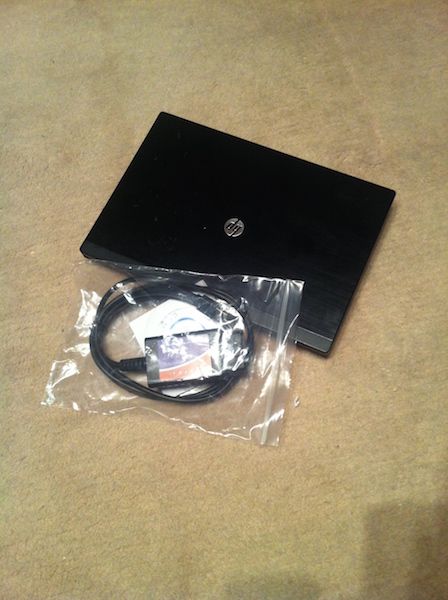
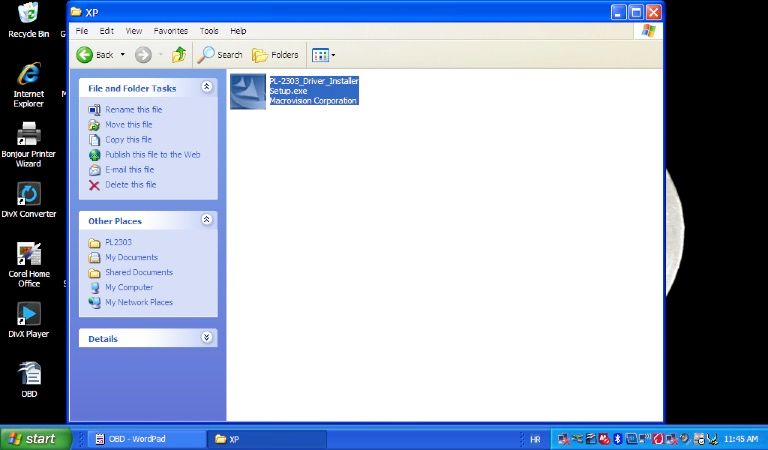
With scanner comes the small CD with the drivers needed for it to run on computer. Open the circled folder


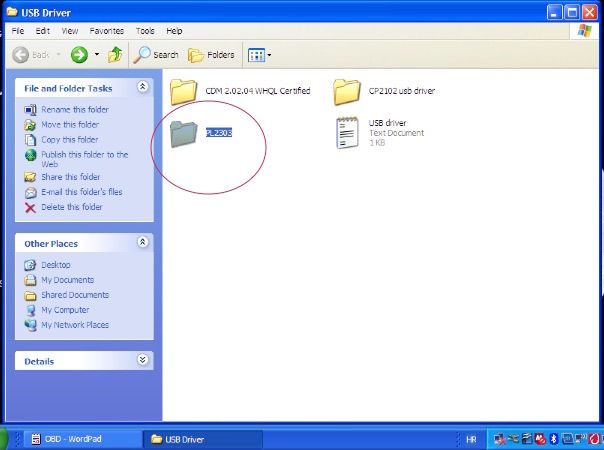
Click on the folder depicting your version of windows. I have XP so picked that one up


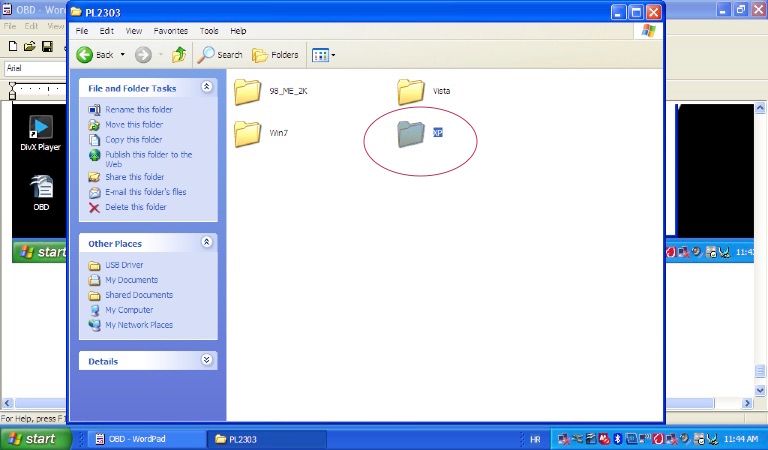
After that just click on the icon inside and let it do the work. When finished everything should be setup and working


Download the forscan here: http://www.forscan.org" onclick="window.open(this.href);return false;
It is free. Unbelieveable it is free, as it is incredible piece of kit!

Go inside to setup and set the connection to COM. The OBD scanner should be now connected to the computer


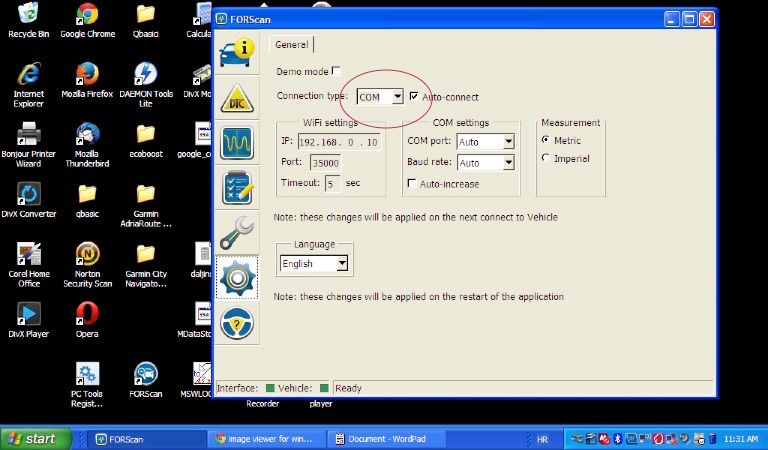
Program will find your scanner and after connection to the car and turning the key to either II position, or starting the engine the LED will turn to green. You just click to this simbol to connect it to the car and it will scan it and show you something like this


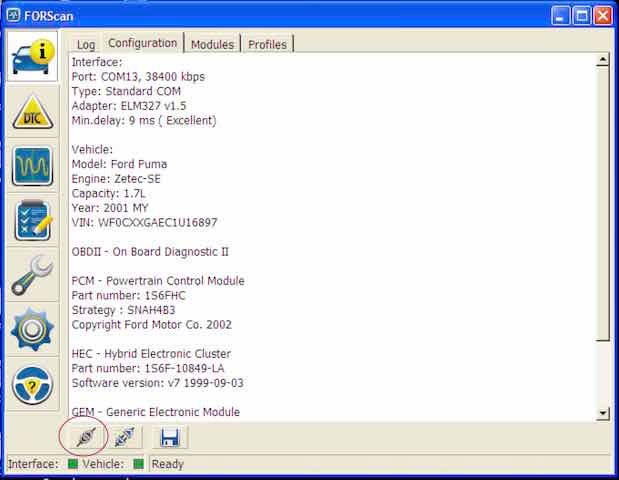
After that it is just a matter of trying different things and discovering what you wanted to know with the software….


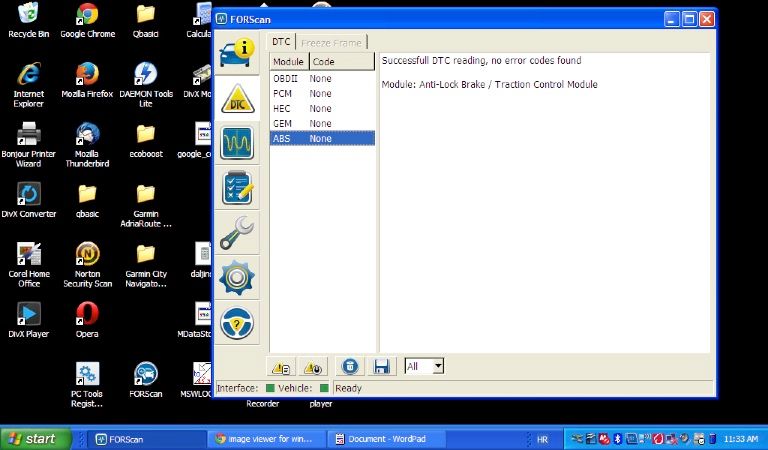
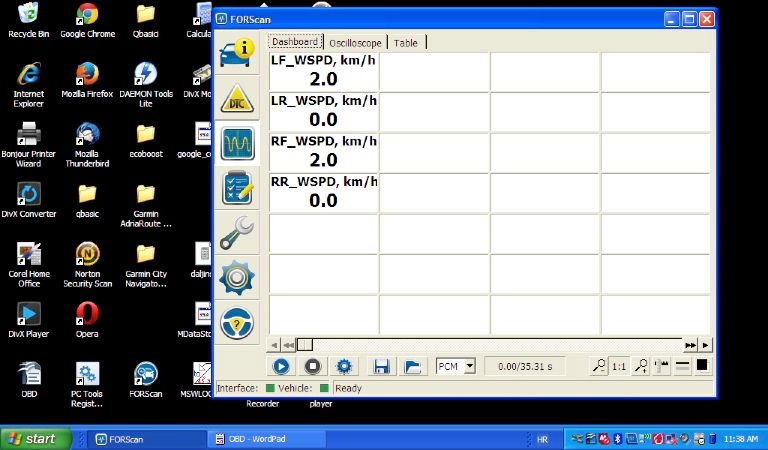
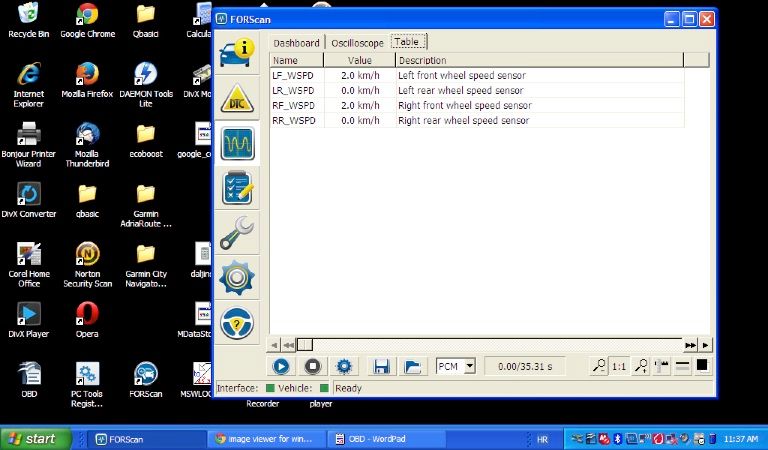
The ABS that is your focal point and live scanning of speed of each wheel that will tell you where is your problem


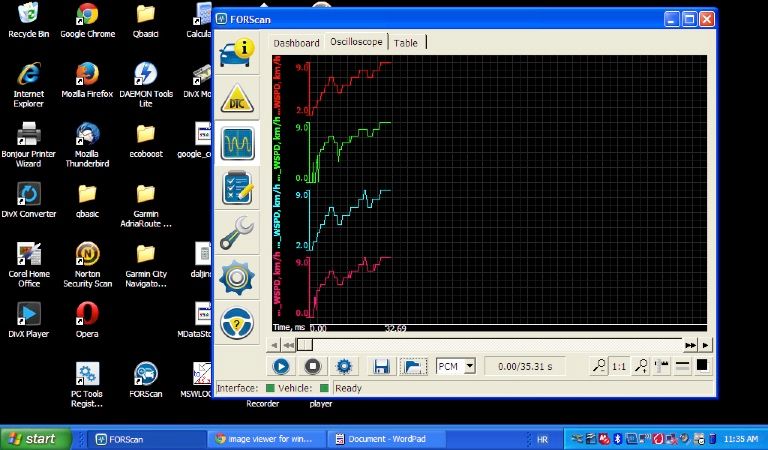
Or you can look at each moment


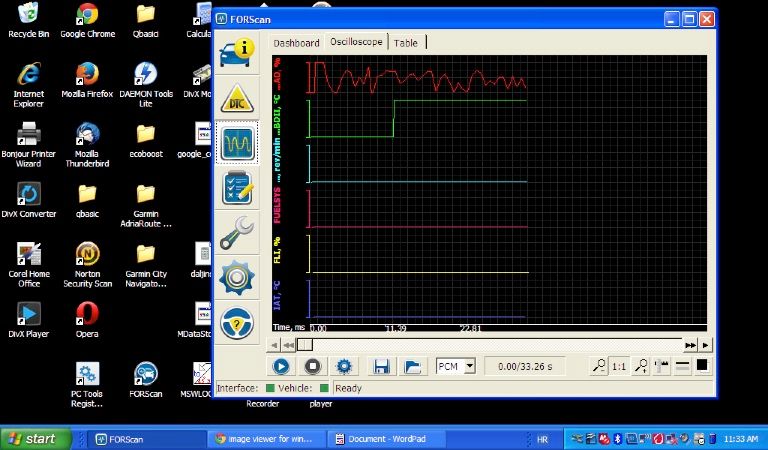
You can monitor other data as well and record it for later analysis or future reference…


Hope that helps! It is not black art, just another version of a spanner!
 
Hi Wild E
Thanks very much for that again. It does look an impressive set up for something so cheap and with your short guide even I should be able to do it, let's hope I don't have to do it :grin:
I've just about completed the drivers side now so here's a few photos;


The sensor rings were re-used ones off the drums and I had my mate machine down the hubs to fit. When I put the rings on the machined hubs it was obvious that the rings would be too far away from the sensors (the Focus ones are much longer} so I had to araldite the rings in place. To ensure that the rings ran true on the hubs I inserted the same thickness washers between the hub and the underneath of the rings and then put weight on the rings until the araldite had hardened.


I'd decided I didn't want to use a bolt or screw to hold the sensors in so after I'd drilled and tapped a new hole (M5 for me) . I screwed and araldited a M5 bolt into the hole with 2 M5 nuts threaded on (These were to clean the threads after I'd sawn the bolt head off)


Bolt head sawn off and (old) sensor fixed on with S/S washer and S/S nyloc nut. It should be easier to take out the sensor from the side of the car rather than underneath it using this stud and nut system.


View of sensor and hub. I checked the gap with feeler gauges and a 0.6mm might have gone in with a little force but a 0.5 mm could be wiggled in the gap.
 
Looking forward to that Wild E :grin:

Anyway back in the garage today to make progress on the rear ABS


This shows the window through the back of the disc splash shield which roughly equates to the window through the back axle which the ABS sensor has to go through. There's not much room for movement in siting the ABS sensor.


This is how I can check the ABS sensor gap without having to dismantle the brakes. I have rubber bungs which slot in to keep water out.


This is how I've fixed and protected the new ABS sensor lead. On the standard lead there is a plastic channel enclosing the lead right to the edges of the axle. On this Intermoter 60020 Escort lead the channel finishes a good few inches before the end of the axle and is replaced by hard plastic reinforcing so it's hard to get the lead to go where you want. Ideally I would have gone around the back of the shock but it made the hard plastic reinforcing twist and not line up with the beam. I used one of the old beam fasteners to hold down the lead at the end of the beam and then used some plastic binding to cover the unprotected parts of the lead.


All nicely back together again.


This shows why it's impossible to use standard abs sensors in the standard holes in the Focus stub axles. This is the only position on the stub axle where the stub axle is flat under where the ABS sensor sits (suitable for drilling and tapping) but this brings the angled lead out of the sensor into conflict with the beam bracket. This is made worse if axle spacers are used.


Started the pass side today, this shows how much more of the back of the stub axle I have to grind off to suit this new set up.


Stub axle drilled, tapped and with 8mm M5 bolt fixed in place, just waiting for the Araldite to go off now.


View of the rear of the stub axle and the positioning of the sensor through the hole in the beam bracket.


Same view with the sensor in place, obviously no issues with the cable with these sensors.
 
tuonokid said:
Cheers CherryVimto that's very helpful of you and much appreciated :grin:
Barry
looking good it will be a beauty when finished. i also am having problems with the photos i have photobuket but cant find how to put photos on the project puma website :roll:
 

Latest posts

Back
Top