FRP Duratec Turbo Project!

ProjectPuma

Help Support ProjectPuma:

This site may earn a commission from merchant affiliate links, including eBay, Amazon, and others.
Got my car back with arches looking good, it looks how its supposed to look now!!

PICT0368.jpg


PICT0367.jpg


PICT0366.jpg


PICT0365.jpg


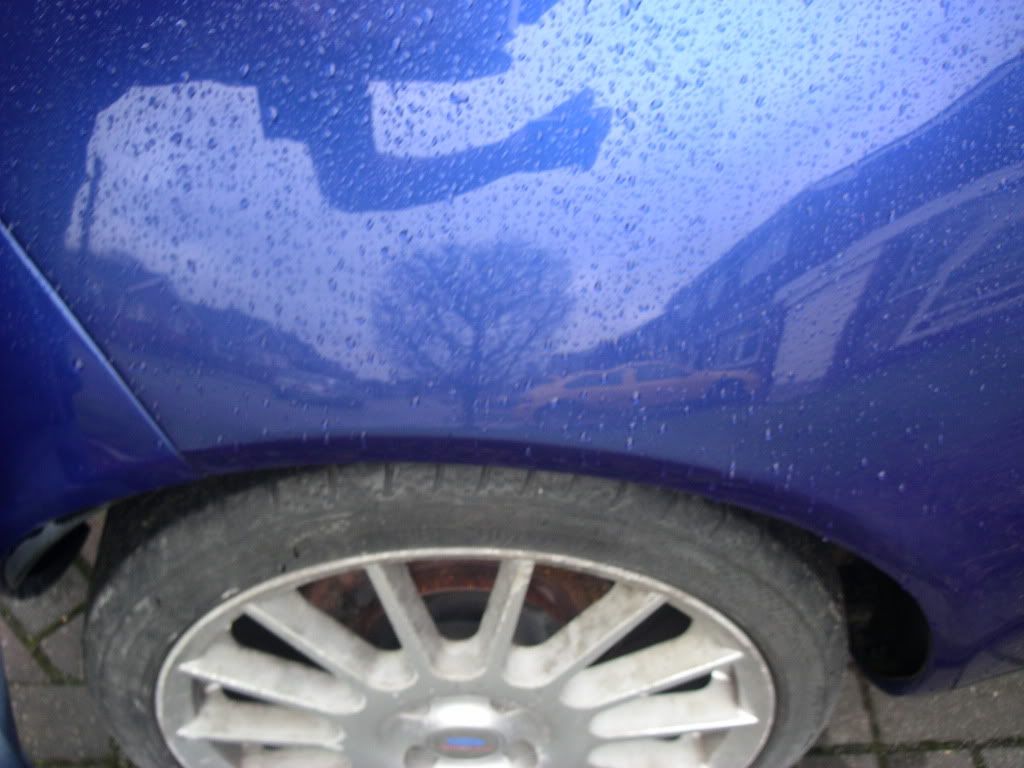
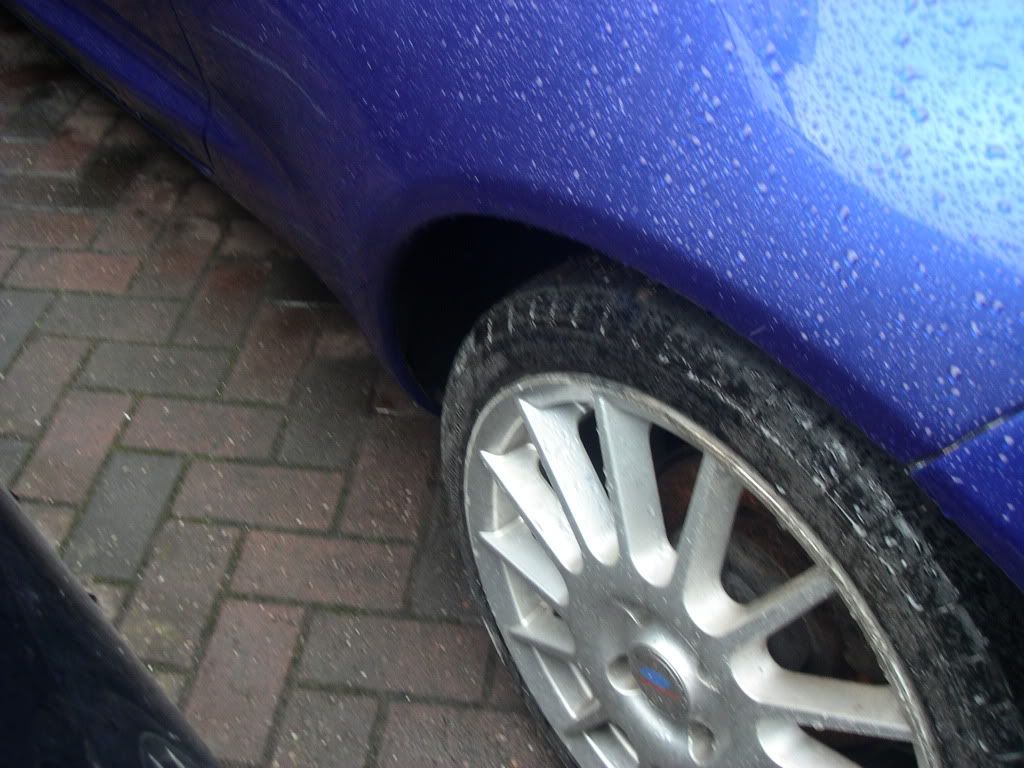
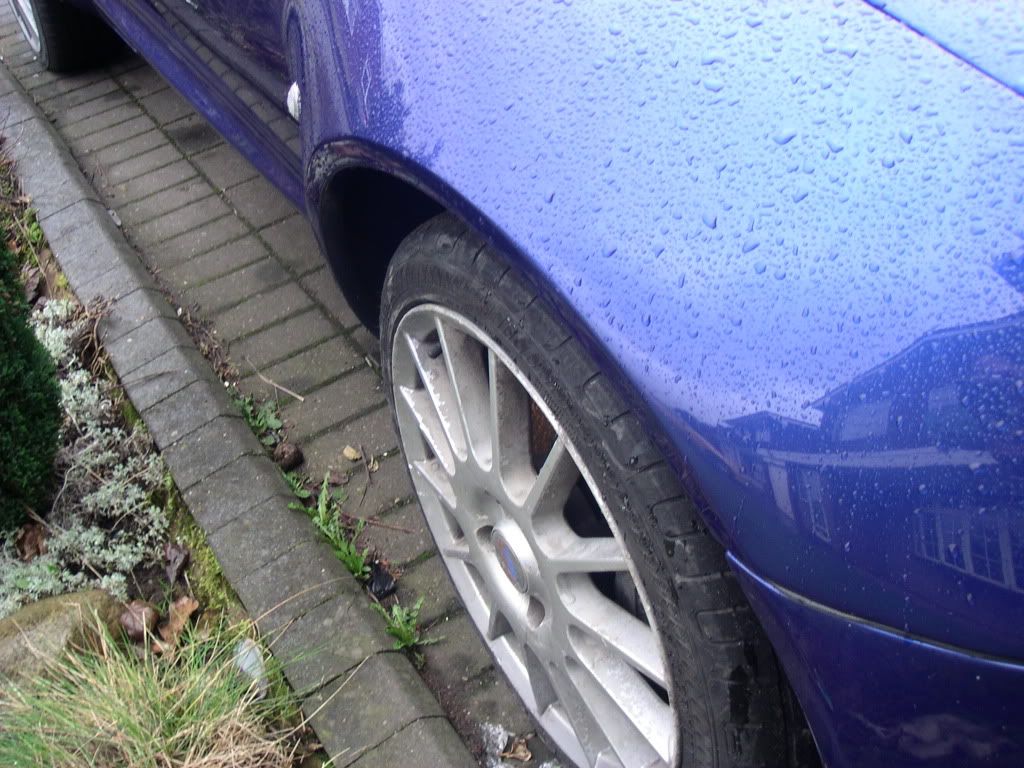
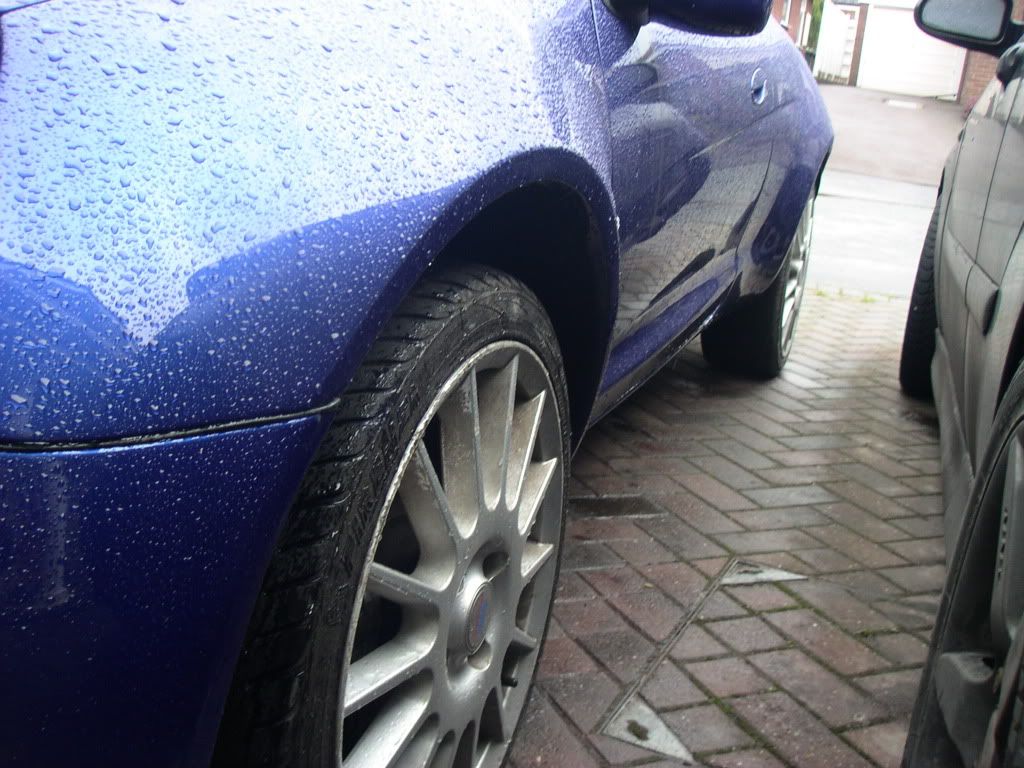
Im pleased with the job theyve done!!


On another note, did anybody know that the brake pads from the Audi RS2 2.2 Turbo 20v rear brakes are the same as the FRP front pads??? This opens up a whole range of different brake pads available. Maybe you FRP owners already knew this, but just thought it was interesting, also the same as the rears on the holden maloo & probarbly some others!!
 
ST170 clocks are niether back lit or front lit! The whole clocks face is an electrolumiescent sheet and glows.
focusdashlights010.jpg


Just remember on focus rs clocks you dont get engine temp just a "engine overheated and dead" light as a inaccurate boost gauge is in its place.

The good thing about the ST170 dials is there is a separate oil temp and pressure gauge for them that uses a combined sensor that replaces the standard oil pressure warn switch.

I wonder if the wiring would be neater with the chips all put on a bit of copper bread board??
 
Oh, ok, ive seen a picture of the ST170 clocks before, but assumed that was just a brighter pucture of a front lit speedo, i didnt know they were actually like that!! Ive heard a few people have struggled wiring the seperate gauges, and unless you got rid of vents or something, there isnt much space to put them. That clock in the pic goes to 160.

It might be neater to put on a seperate board, as mine is a right mess behind, its got its own loom now, but i just though as the clocks have already got their own board, why not utilise it? Youd only have a seperate board, and loads of wires going to the relevant bulb or motor. You still couldnt wire them all to the plug, because there would be far too many wires.I think the neatest way would be to wire all the bulbs and motors up and label the wires. Then wrap them and have all the wires comming out the back neatly like a standard clocks. Then make your copper board and encase it in its own little box, with the loom plug female side on it, and your loom plug plugs straight into it. Mine at the minute is a standard clock with about 50 wires going from 1 point to another, and loads of what look like scratches on the board to where ive had to isolate certain parts!
 
Another productive day!! Got the diff machined and went to collect Monday, but then got back to fina there was more work to be done!!!

The bolts are too big for the new diff, so had to machine them down to 8.5mm

PICT0375.jpg


PICT0371.jpg


PICT0370.jpg


And finally they all fit!!

PICT0380.jpg


Then realised id fitted the wrong diff bearing D'oh!!! :oops:

There are 2 different size bearings, i fitted 2 the same size, the smaller ones, then had to cut it off, and ordered the larger 71mm bearing.

PICT0383.jpg


PICT0384.jpg


Finally got it off

PICT0386.jpg


This is the difference between the 2 diff bearing sizes!

PICT0385.jpg


There always seems to be something else to do, its never straight forward!!
 
In my job, the motto is check twice, cut once!! I did check twice, but only checked the wrong end twice!! The annoying thing was having to cut through a brand new bearing, I'd rather have put it to good use then waste it, but I tried my bearing puller on it & it just wouldn't come off!

Thanks for the positive comments on the clocks, still a few issues to sort out, was hoping someone could tell me a bit about the wiring what pins on the fiesta clock does the sensor connect to?
 
Cheers bud, I had seen that thread before, but just scanned for pics of the circuitry on the back of the clock. Sounds pretty straight forward, just need to find out if polarity of sensor wires is an issue, will only take 5 mins to find out. I've already got a sensor, just need to get a clock, and hopefully I can get something rigged up. The Mondeo clocks have MPG and all sorts of functions in that left display, i'd love to have gotten that working, but I don't have know how for that.
 
warrenpenalver said:
just swap them over. it either shows temp or "--". you can remove pins from the plug easy enough.

Sounds like a plan!!

Had a crappy day today, got blue dials, fitted them, calibrated all the dials, temp, speedo, revs and fuel gauge, used my scangauge to get the mileage and revs right, run the engine up to temperature and put it in the middle of thegauge where it always is once engine is up to temperature. I know i had exactly 3/4 tank of fuel, so the needle was pushed on in the right place.

Fitted back in the dash, and it looked abserlutely mint!! But there was something bothering me!! Even though i dont use it, i wanted the built in dash diagnostics to work, and it never, so i started messing with different things, and it was all downhill from there! Plugged it back in and the light behind the odometer wasnt working, so i bypassed some circuitry and wired it with 2 resistors direct to the switched live. Tried it again, and it workid fine. Then tried to turn the lights on, and guess what, they didnt work.! Bypassed some more circuitry and wired directly to the stalk switch. It worked, but when i switched it on, the display turned to all 8's!!! Then the display went off completely, which is where im at now!

I switch the ignition on, and all the dials are dead, and the odometer is dead! Everything else works fine, the airbag light, oil light, indicators, full beam, door open, altenator, and handbrake lights all work as they should.

Back to square one! :-(

I found the earth from the illumination had come off, and probarbly shorted out a whoule bunch of stuff, so i need to try and go through each chip and connection and see if i can find where the problem is! :cry:
 
Yeah, i know :roll: , but im un deterred, ill be straight back on it tommorow, ive got a feeling its a faulty earth somewhere, because the whole thing is inactive, if it was a live, or a microchip, 1 thing or another would be more likely to go, not all the gauges together with the odometer. The clocks suit the FRP so well, they look to me like stock!!
 
What happened to this project, just seemed to fade away :?:
I want them clocks,i have to agree the puma clocks are a let down,do you have any wiring diagrams on how to fit the mondy speedo?

Would you consider making another one to sell?

Hopefully this project isnt one of those that dosent materialise!
 
SpeedFreak said:
What happened to this project, just seemed to fade away :?:
I want them clocks,i have to agree the puma clocks are a let down,do you have any wiring diagrams on how to fit the mondy speedo?

Would you consider making another one to sell?

Hopefully this project isnt one of those that dosent materialise!


i dont think there is any worry of that happening :D
 
no fear of that with errol lol he is working away for a few months so this is on hold for the time being.. just letting you know on his behalf as i spoke to him a few days ago....
 
Lol, cheers guys! Yeah, as Clarkie said, ive had to go away for a while to work so its on hold for a bit, but ill try and get straight back on it when i get some time, i REALLY want it sorted for summer!!
 
looking good make if this anythink like ur green one it will be a monster and be done very soon :)
 
Just looking at that mondeo clock video, not to cause a stir, but how do we know its actually in a puma?
You cant make out the steering wheel, or anything distinguishable about a puma!! It could still be in the Mondeo! :lol:
Did yo manage to get it fixed in the end? :?:
 
Ha ha! I was wondering when that might come up, I thought the same thing myself!!! Well firstly, on the top of the cowling, you see the puma hazard switch, on the mondeo its on the dash above the radio! But other then that, your right, it could be any car! I'm finishing work for a few weeks tonight, so hopefully ill be able to get on with the build, ill try and get a video of the 2nd attempt speedo at some point tomorrow, I think I'm pretty much done on it! I'm just refurbing my some Alcons at the moment, so pics will follow shortly!

I can assure you the clocks are in my puma though, why lie, ill only get found out at a later date!!
 
Ok fair play, i bet it will look mint with those clocks, looking forward to some more progress! :cool:
 

Latest posts

Back
Top